Stickles Glitter Gels add the perfect touch of twinkle and sparkle! Follow along as Lauren Bergold creates a greeting card to demonstrate how smoothly they apply with stencils, complement Archival Inks, and enhance projects with their dazzling variety of glitter sizes and shapes.
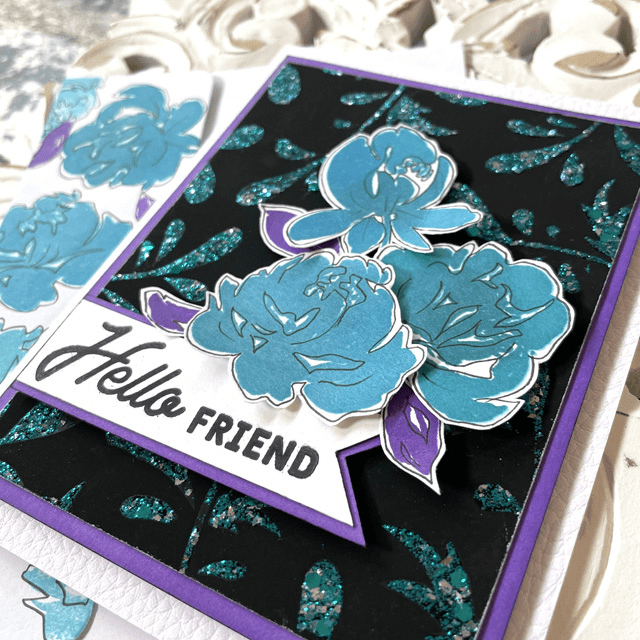
Stickles Glitter Gels Greeting Card by Lauren Bergold
- Materials
- Instructions
Archival Ink™ Pads: Paradise Teal, Majestic Violet, Jet Black
Ranger Pigment Ink Pad Glacier White
Simon Hurley create. Stencil 6x6 Grand Greenery
Simon Hurley create. Photopolymer Stamp Watercolor Flowers
Simon Hurley create. Paste Tool Set
Wendy Vecchi MAKE ART Stay-tion
Wendy Vecchi MAKE ART Stay-tion Craft Sheet 9x9"
Wendy Vecchi MAKE ART Perfect Stamp Positioner Set
Wendy Vecchi MAKE ART Perfect Card Adhesive
Letter It™ White Foam Roll Tape
Letter It™ Fineliner Black Pens
Letter It™ White Cardstock
Tim Holtz Distress® Cracked Leather Paper Cardstock
Tim Holtz Distress® Black Heavystock
Ranger Mini Ink Blending Tool
Ranger Mini Ink Domed Replacement Foams
Instructions
Here's a shocking true confession: Until recently, I had somehow never used Stickles Glitter Gels; but I'm making up for lost time, because now I'm OBSESSED with their glorious glittery goodness!
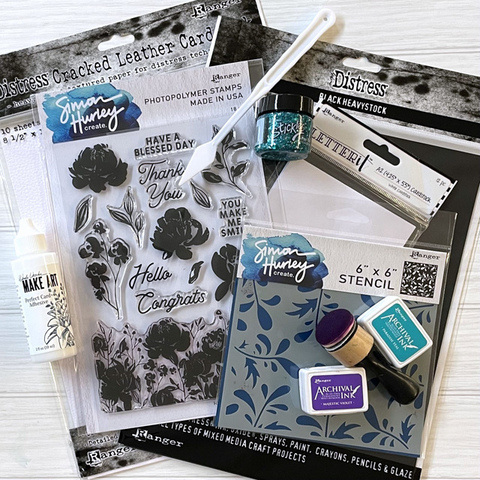
Step 1: Materials: Stickles Glitter Gel in Galaxy; Simon Hurley create Grand Greenery Stencil; Simon Hurley create Watercolor Flowers Stamp Set; Ranger Archival Inks in Paradise Teal, Majestic Violet and Jet Black.

Step 2: Use the magnets from Wendy Vecchi‘s STAY-tion to secure the Grand Greenery Stencil firmly on a 4.25 x 5.5" panel of Black Heavystock. Use the small palette knife from Simon Hurley's Paste Tools Set to apply a generous layer of Galaxy Glitter Gel. When finished, carefully remove the magnets (wiping them if necessary) and lift the stencil straight up. Set panel aside on a flat surface to dry completely, ideally overnight. To clean up, rinse your stencil with warm water; if the gel has dried, use a little dishwashing liquid to remove traces of glitter; dry on paper towels or an art rag. When your Glitter Gel panel has dried completely, trim it down to 4 x 5.25”, ink the edges lightly with Ranger Glacier White Pigment Ink and set aside.
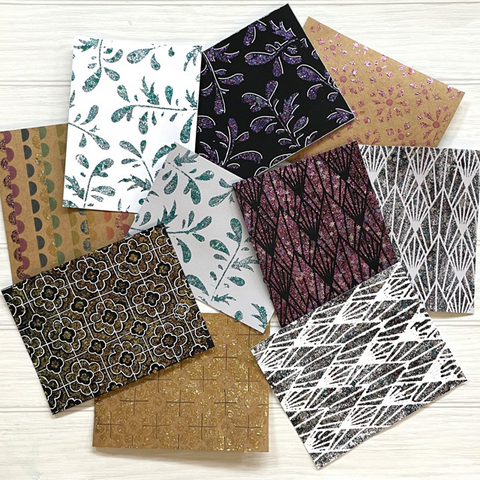
Step 3: OPTIONAL... but hard-to-resist: Experiment with other combinations of Stickles Glitter Gel and various substrates. Notice how the same shade of Glitter Gel looks completely different on black, white, gray and kraft cardstock. Try adding outlines, doodles or inking. Swap ink for Glitter Gel as the final application when using Layered Stencil Sets. The possibilities are mind boggling!
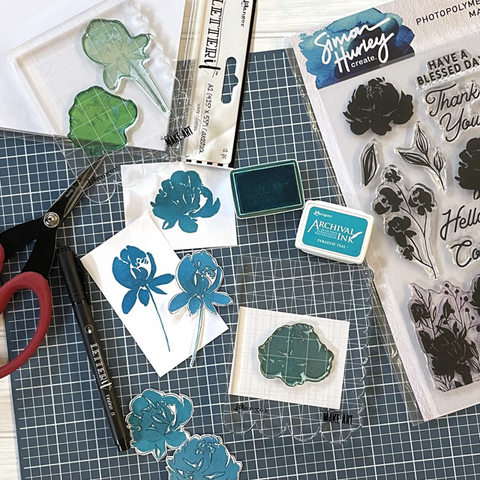
Step 4: Stamp the three largest blooms from Simon Hurley create Watercolor Flowers Photopolymer Stamp Set on Letter It White Cardstock with Paradise Teal Archival Ink. If desired, used a Ranger Letter It Black Fineliner to outline the flowers. Use the coordinating die set or cut the flowers out with scissors.
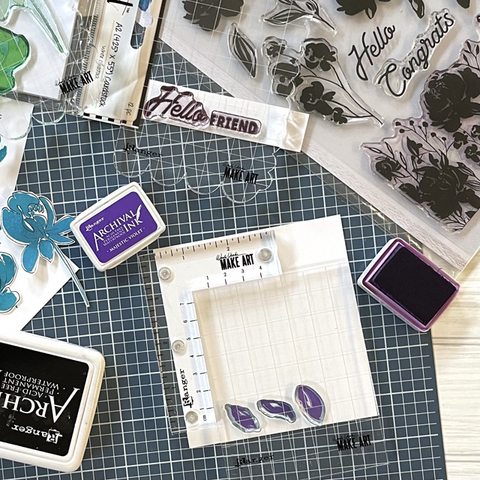
Step 5: Stamp the three solid leaves from the Simon Hurley Watercolor Flowers Set in Majestic Violet Archivalon a scrap of white cardstock. Outline the leaves if desired and cut out. Stamp, "Hello Friend" in Jet Black Archival on white card stock and trim into a neat flag.
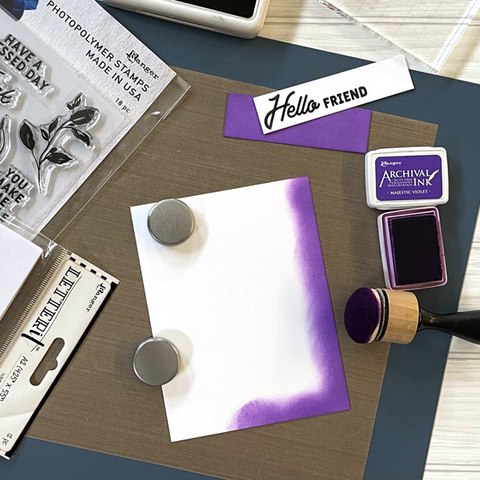
Step 6: Use a Ranger Mini Ink Blending Tool and Domed Foam to apply Majestic Violet Archival around all of the edges of a 4.25 x 5.5" panel of Letter It White Card Stock; and also to a .75 x 3" scrap of white cardstock.
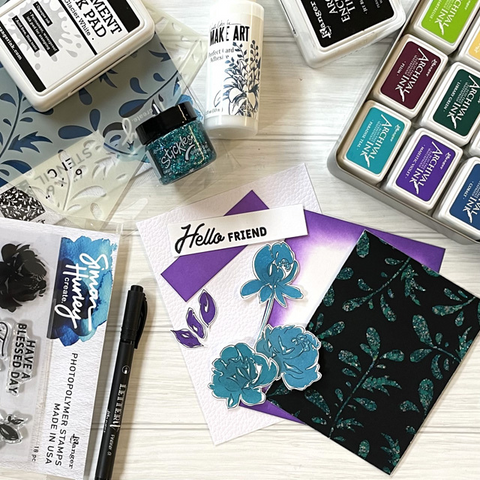
Step 7: Assembly: Create an A6 card (4.5x 6.25") from Tim Holtz White Cracked Leather Cardstock. Adhere the Glitter Gel panel to the Majestic Violet panel using Wendy Vecchi's Perfect Card Adhesive. Trim the sentiment into a neat flag and mat on the small piece of Majestic Violet cardstock, and adhere near the lower left edge of the design panel. Arrange the flowers around the sentiment strip and affix with small pieces of Letter It White Foam Roll Tape. Add the design panel to the card with foam tape.
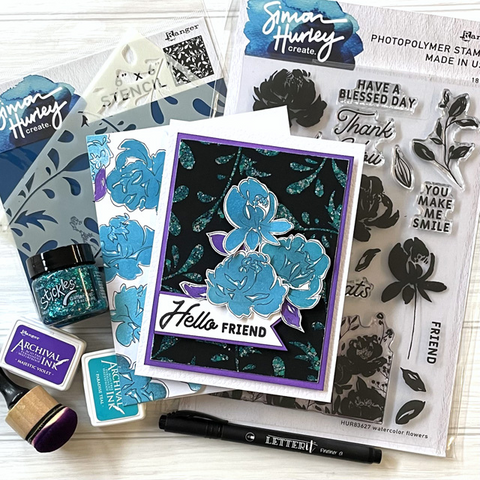
Step 8: If desired, stamp some coordinating Watercolor Flowers and leaves onto the flap of an A6 envelope; outlining them, if desired. Write a little message inside the card, address the envelope, and mail to the friend of your choice.


 My name is Lauren Bergold, and I live in central New Jersey with my husband of 30+ years and A LOT of art supplies! My favorite medium is paper, and I especially love making cards. I teach papercrafting classes, as well as collecting and compiling vintage and found papers. You can find me on my blog,