


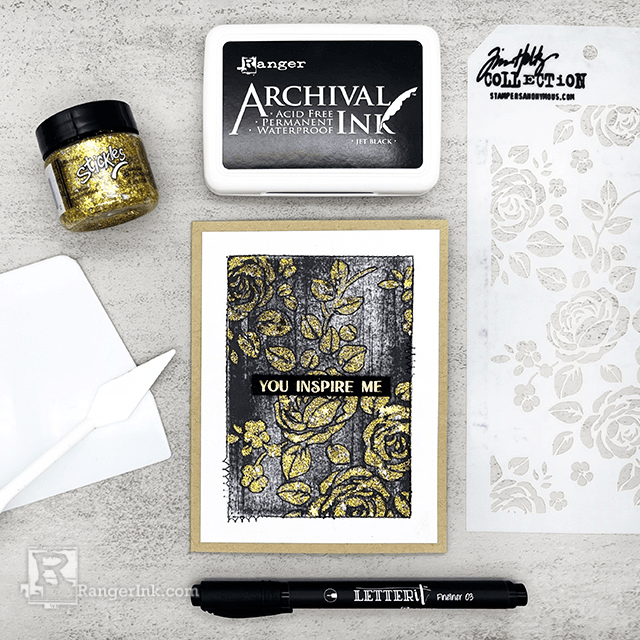
Add eye-catching texture and shimmer to your cards like Miriam Prantner did with this stunning floral design! In this tutorial, she used Archival Ink, Stickles Glitter Gels, and Letter It Fineliners to create a bold, dimensional background that really makes the card pop.
Product Play: Archival Inks, Stickles, and Doodling with Miriam Prantner
- Materials
- Instructions
Other:
Masking Tape
Sewing Machine
Foam Adhesive
Instructions
For today’s project, I mixed and matched products to achieve an elegant, but distressed look with lots of texture.

Step 1: Place a Wendy Vecchi Perfect Cardstock White Panel on your craft sheet and mask off the edges.

Step 2: Swipe your Archival Ink pad vertically over the exposed area, both top to bottom and bottom to top. Vary the coverage swiping both with the ink pad flat to the panel as well as on an edge to create additional interest and texture.


Step 3: Place stencil over panel, and spread Glitter Gel through stencil. Remove stencil and masking tape, and let dry.

Step 4: Using Letter It Fineliner, trace around stenciled areas. You do not need to be precise, this is just to add a bit of definition to the stenciled design.

Step 5: Assemble card. Trim panel to desired size and adhere to Kraft card base and using a sewing machine, stitch around inked/stenciled area. Add sentiment, from Simon Hurley Inspired Photopolymer Stamp Set, embossed with gold on Tim Holtz Black Heavystock, with foam adhesive.
 My name is Miriam Prantner, and I live in Arlington, Virginia with my husband, two daughters, and lemon beagle. I am a lifelong crafter of all genres, although these days I focus mostly on crochet and paper crafting. In addition to making pretty things, I design products (stamps/stencils/dies) for Simon Says Stamp, and also taught a class for Craftsy, Fresh Eyes on your Cardmaking Supplies. To see more of my work, check out my blog: mprantner.blogspot.com, and follow me on instagram @mprantner.
Related Posts
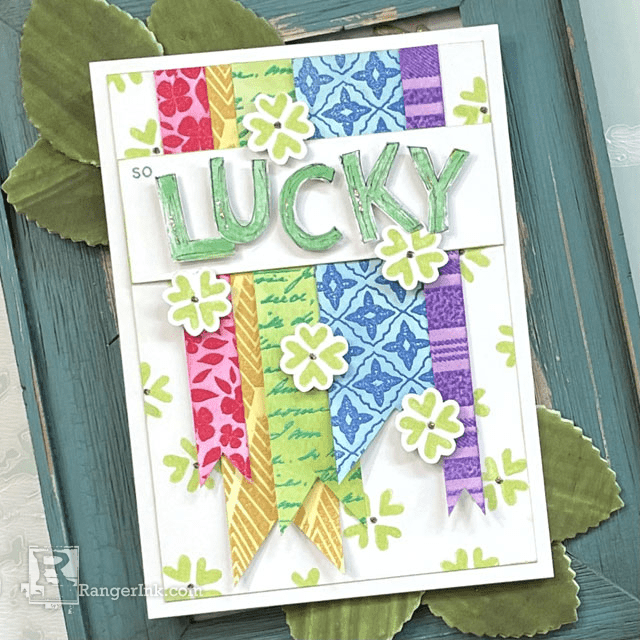
Ranger Embossing Powder Lucky Card by Lauren Bergold
A rainbow of Ranger Embossing Powders, coordinating Archival Ink, and a sprinkle of golden Stickles come together in this festive...
Read More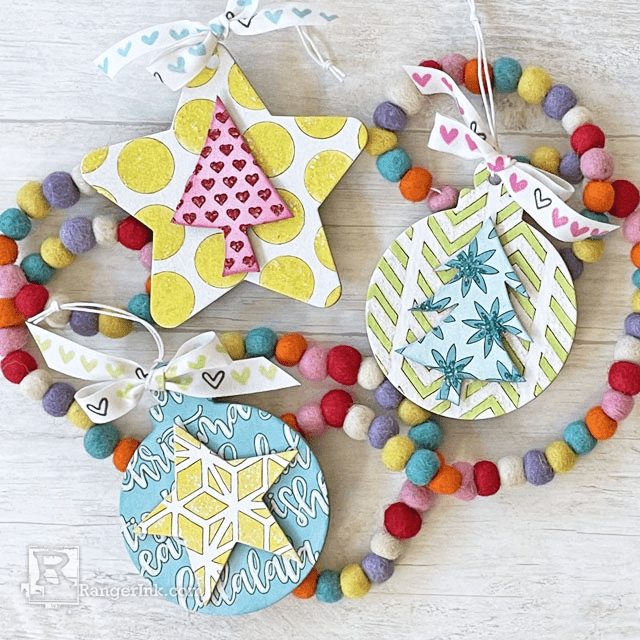
Archival Ink & Stickles Ornaments by Lauren Bergold
Get ready to shine this holiday season! Follow along as Lauren Bergold transforms festive Dyamond boards like trees, stars, and...
Read More