The latest Archival Inks and coordinating Stickles are bound to inspire lots of beautiful new combinations! Follow along as Lauren Bergold uses Beach Cruiser, Aubergine and Graphite to create a lovely all-occasion card.
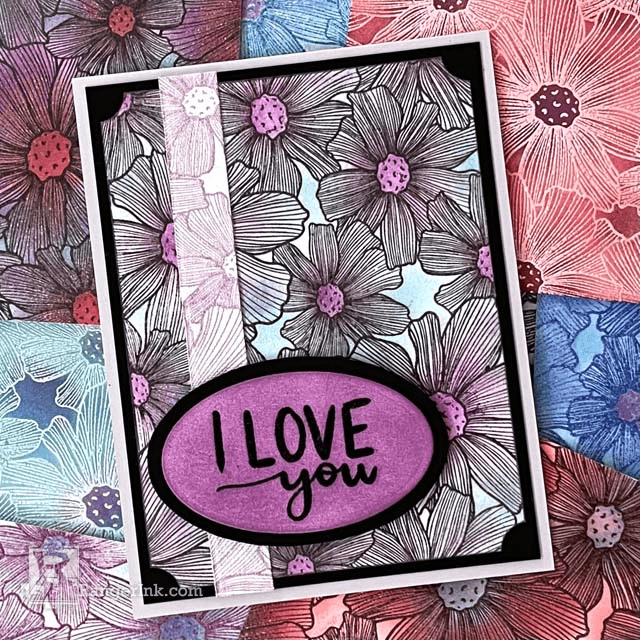
Archival Ink and Stickles All Occasion Card by Lauren Bergold
- Materials
- Instructions
Stickles™ Glitter Glue: Aubergine
Ranger Angled Brushes
Simon Hurley create. Background Stamp Sketched Bouquet
Simon Hurley create. Photopolymer Stamp Sentimental Flowers
Tim Holtz Distress® Tiny Blending Tool
Tim Holtz Distress® Tiny Blending Foams
Letter It™ Thank You Clear Stamp Set
Emboss It™ Clear Ink Pad
Embossing Powder Clear
Embossing Powder Black
Ranger Heat It™ Craft Tool
Wendy Vecchi Perfect Cardstock Grey Cards
Wendy Vecchi MAKE ART Stay-tion
Wendy Vecchi MAKE ART Perfect Card Adhesive
Tim Holtz® Alcohol Ink Cardstock Black Matte
Letter It™ White Cardstock
Letter It™ Double Sided Tape
Letter It™ White Foam Roll Tape
Ranger Mini Ink Blending Tool
Ranger Mini Ink Domed Replacement Foams
Other:
White Cotton Ribbon
Instructions
Did you know that Ranger Archival Inks emboss beautifully? Not that there aren't enough gorgeous Ranger Embossing Powder shades for nearly every project, but sometimes I want to use a specific Archival color (like my current favorite, Graphite!) and being able to emboss with Clear Powder means having even more options.
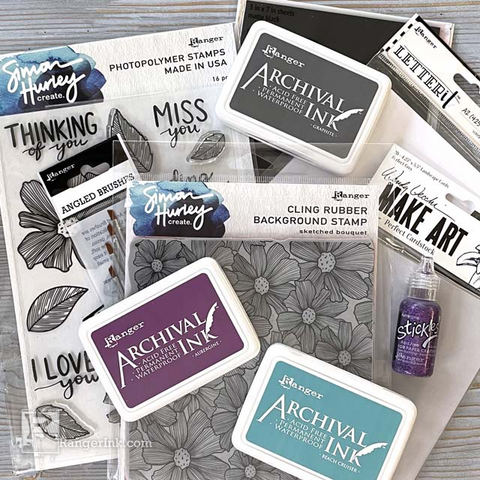
Step 1: Gather Materials: Ranger Archival Inks in Beach Cruiser, Aubergine and Graphite; Simon Hurley create. Sketched Bouquet Background Stamp and Sentimental Flowers Photopolymer Stamp Set; Ranger Clear Embossing Powder; Aubergine Stickles and an Angled Brush; white, grey and matte black cardstock.
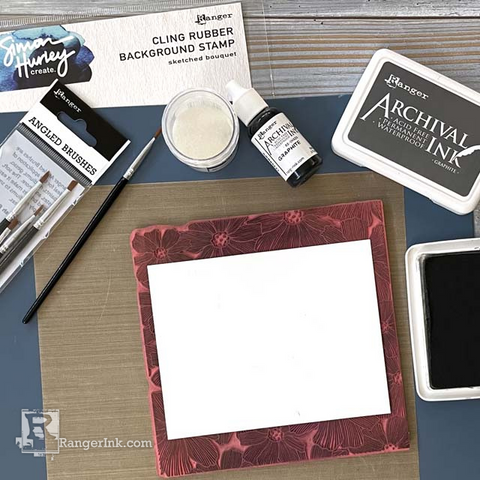
Step 2: Ink Simon Hurley‘s Sketched Bouquet background stamp well with Graphite Archival Ink and place a 4.25 x 5.5" panel of Letter It White Cardstock on top of the stamp, cover with a piece of scrap paper and press firmly over the entire image.

Step 3: Sprinkle with Ranger Clear Embossing Powder and melt with the Ranger Heat It Craft Tool. Set the panel aside and allow to cool completely.
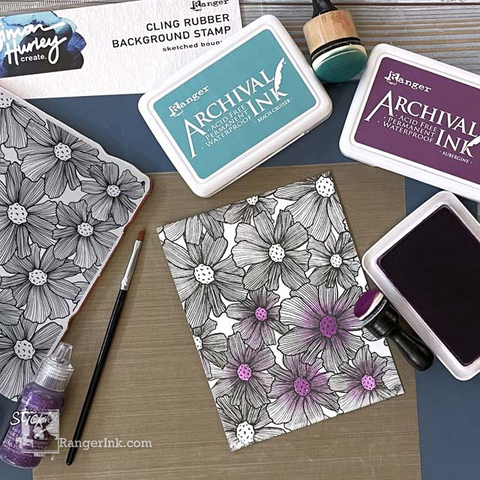
Step 4: Use a Tiny Ink Blending Tool to apply Aubergine Archival to the centers of the embossed flowers, pulling some of the color outwards into the flower petals.

Step 5: Using a Mini Ink Blending Tool and Domed Foam, apply Beach Cruiser Archival around the rest of the card, allowing the soft blue to gently blend in with the Aubergine, without covering it up. Trim the panel down to 3.75 x 5", ink the edges in Graphite Archival, if desired. Optional: Notch the corners using a circle punch or decorative corner punch.

Step 6: Use a Ranger Angled Brush to apply a small amount of Aubergine Stickles to the center of each flower; lightly brushing the Stickles out into the flower for a very soft shimmery effect. Set aside on a flat surface and allow to dry completely.
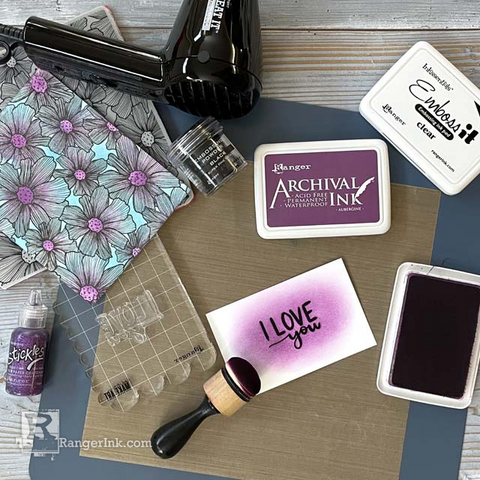
Step 7: On white cardstock, stamp "I Love You" from Simon Hurley‘s Sentimental Flowers in Emboss It Clear Embossing Ink and sprinkle with Ranger Black Embossing powder, brushing off any stray powder if necessary with a small Angled Brush. Melt powder with the Ranger Heat It Craft Tool and when it has cooled completely, use a Mini Ink Blending Tool and Domed Foam to apply a light coat of Aubergine Archival, extending the color approximately half an inch all the way around the sentiment. Use a die, punch or template to trim the sentiment into an oval. If desired, lightly ink the edges with Aubergine, Graphite, or both. Mat on a second (slightly larger) oval of matte black Alcohol Ink Cardstock and set aside.
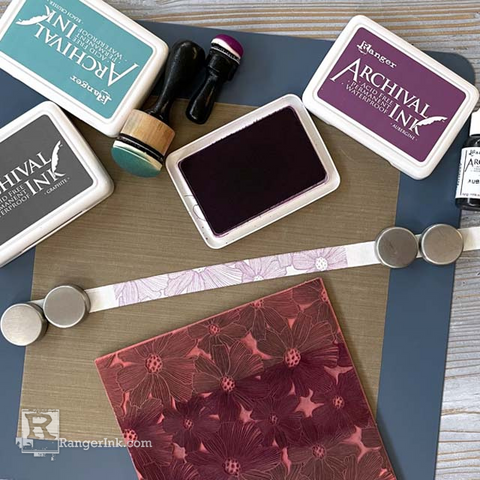
Step 8: Use the magnets on the Wendy Vecchi MAKE ART Stay-tion to securely hold a piece of white cotton ribbon in place; ink a strip in the center of the Sketched Bouquet stamp with Aubergine and firmly apply the stamp to the ribbon. Removing the stamp carefully, set the ribbon aside and allow to dry completely.
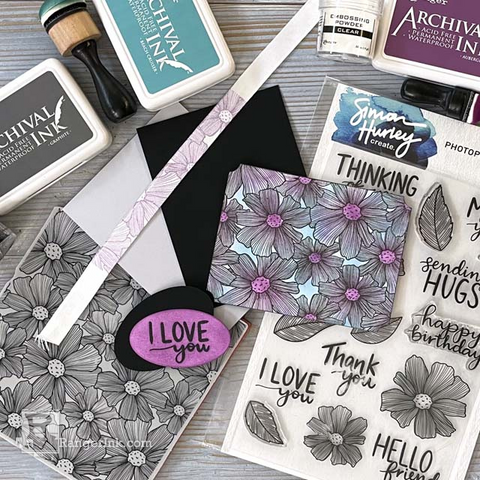
Step 9: Assembly: Trim a piece of Black Alcohol Ink Cardstock to 4.25 x 5" and attach the embossed flower panel to it using Perfect Card Adhesive. Wrap the stamped ribbon around the entire panel and anchor the ends securely at the back using Letter It Double-Sided Tape or your favorite strong adhesive. Affix the panel to a Wendy Vecchi Grey Perfect Cardstock A2 Card and add the matted oval sentiment using small pieces of Letter It White Foam Roll Tape.
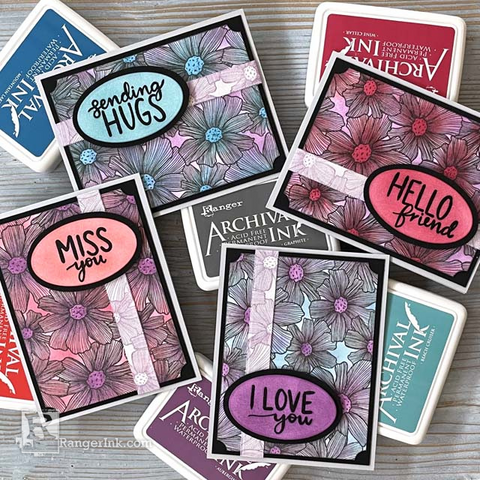
Step 10: Repeat Steps one through nine several more times, using Graphite Archival to emboss the Sketched Bouquet stamp, but varying the shades used to color the flower centers and the backgrounds. Send your completed greetings to four different friends OR... make them into a set and gift them to a non-crafty loved one who'd like to send handmade cards to their friends!


 My name is Lauren Bergold, and I live in central New Jersey with my husband of 30+ years and A LOT of art supplies! My favorite medium is paper, and I especially love making cards. I teach papercrafting classes, as well as collecting and compiling vintage and found papers. You can find me on my blog,