Ranger Guest Designer Yvonne Blair shares a quick and easy mini journal project that is perfect as a stocking stuff, hostess or teacher gift this holiday season.
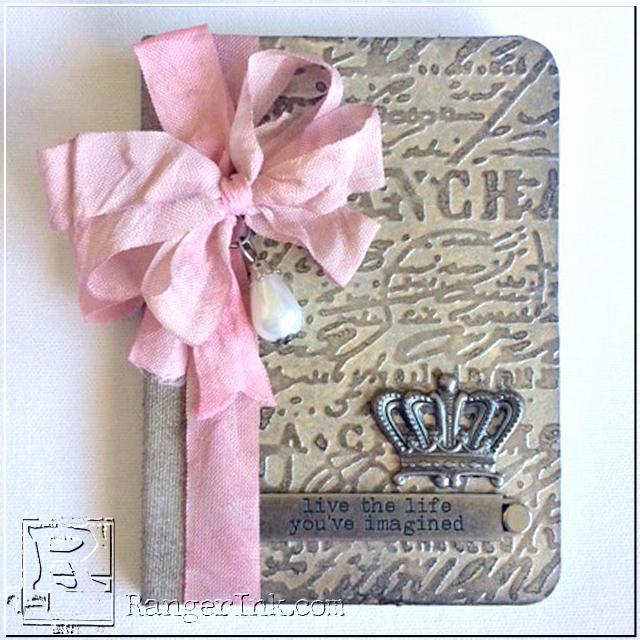
Mini Holiday Notebook by Yvonne Blair
- Materials
- Instructions
- Tim Holtz® Distress Spray Stains Brushed Pewter
- Tim Holtz® Distress Inks: Walnut Stain, Black Soot, Spun Sugar, Worn Lipstick, Picked Raspberry
- Ranger Sticky-Back Canvas
- Ranger Multi-Medium Matte
- Ranger Mister
- Ranger Adhesive Strips
- Ranger Heat it™ Craft Tool
- Ranger Ink Blending Tool & Foam
- Ranger Non-Stick Craft Sheet™
- Tim Holtz Sizzix Embossing Folders: Eiffel Tower, French Script Texture Fade
- Tim Holtz Idea-ology: Regal Adornments, Word Bands, Brads, Jump Rings, Gem Clips, Baubles and Crinkle Ribbon
Instructions

Cut your Manilla Craft Tag to 4 1/2 inches long. You will need two pieces, one for the front and one for the back. Run through the Vagabond using your French Script Texture Fade. Spritz your embossed tags with Brushed Pewter Distress Stain Spray. If you need to, use your finger to spread it so it is more evenly applied. Use your Heat-it tool to dry tag.
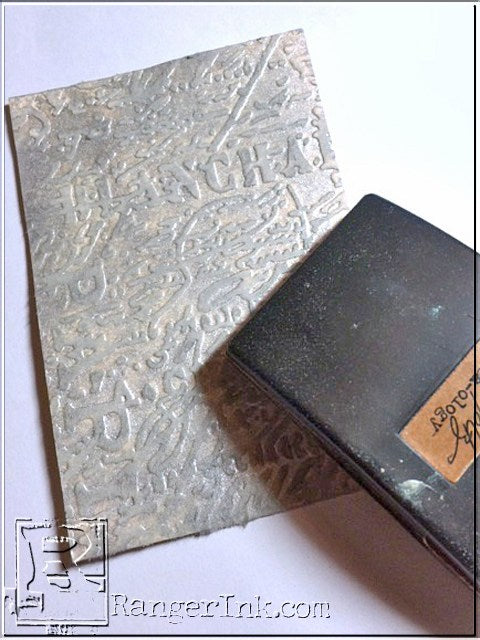
Sand the embossed and stained tags lightly with your Sanding Grip. You want to take away just a bit of the Distress Stain Spray.

Once you have your tags sanded you can now apply a touch of Walnut Distress Ink using a blending tool. At this point I used Black Soot and just blending on a very light amount to
the edges also with a blending tool.

I bought some of those cute little composition books from the office supply
store to alter. You could really use any little notebook. You will want to cover one side at time with Multi Medium and adhere the tag. Let that dry…you can use your Heat-it Tool to speed it along if you like.

Cut a piece of Sticky Back Canvas to 4 1/2 x 1 1/4. Peel the backing away and apply to your Non-Stick Craft Sheet (this makes it so much easier to work with and allows for no curling). Spray the Sticky Back Canvas with the Brushed Pewter Stain Spray. Again use your finger if you need to to smooth it out and apply evenly. Dry this with your Heat-it Tool. Once it is dried you can lightly apply a bit Walnut Stain Distress Ink with your blending tool. This will help tie it together with the cover and give it a bit of dimension.

Once your Sticky Back Canvas is completely dry adhere it to the spine of the
notebook. You will want to apply some Multi Medium to make sure it is a good and
strong bond. ( I know when I carry a little notebook in my purse it can be hard on it,
wink.) Let this dry.

Cut about a yard of Crinkle Ribbon. Swipe a bit of Spun Sugar, Worn Lipstick and Picked Raspberry Distress Ink onto your Non-Stick Craft sheet. Spritz water so you get “pools” of color. Swipe your Crinkle Ribbon through the puddles until you get the desired
color.

I like to roll it in my hand at this point to crinkle it up a bit. Use your Heat-it Tool to dry.

Once your ribbon is dried, tie it around the front cover of the notebook. Once you tie the first bow, adjust the loops as you like and make sure the knot is pulled tight. Using the tails tie another bow, adjust the loops and pull tight again. Repeat once more. This gives you a very full bow.
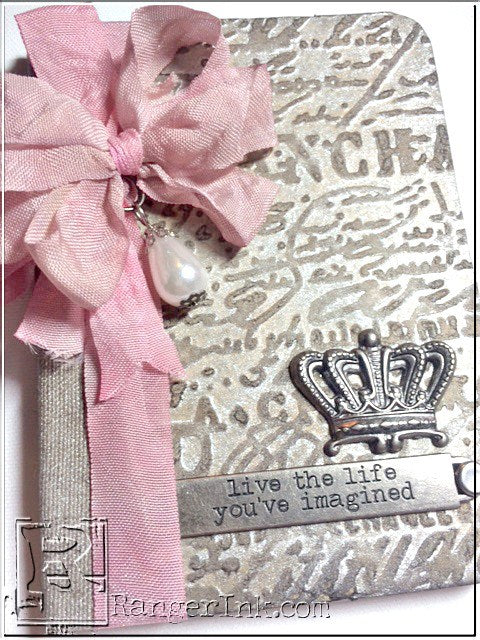
All that’s left is the embellishing. Using a Jump Ring attach the Bauble to the bow. For your Word Band use your Ranger Adhesive Strips. You will want to put your brad in before you adhere it. Trim off the ends of the brad back with your Tim Holtz Scissors.) Adhere the Crown with Glossy Accents.
I hope you enjoyed this fun little gift Idea. I am constantly in need of last minute gifts for the unexpected. I like to have about 12 of these made up so when in a pinch I just go to my gift drawer and pull it out. With a box of homemade cookies or dessert it is a fabulous little add on gift.


