by John Creighton Peterson

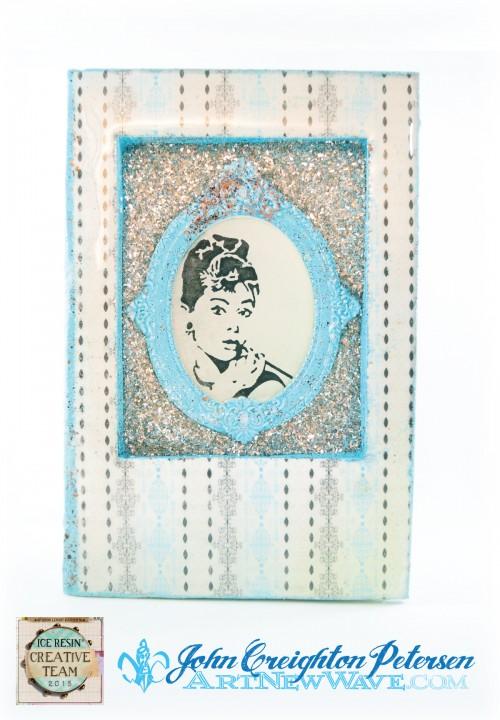
Audrey Hepburn Hollow Book Tribute by John Creighton Peterson
- Materials
- Instructions
- ICE Resin®
- ICE Resin® Paper Sealer
- ICE Resin® Iced Enamels Medium
- ICE Resin® Iced Enamels
- ICE Resin® German Glass Glitter
- ICE Resin® Brushes
- Ranger Heat it™ Craft Tool
- Old book
- Mini frame
- Clamps
- Audrey Hepburn image or your own image
Instructions
Step 1: With an old book, keep the book closed and apply glue to the outside of the pages on all three sides with Glue n’ Seal.
Step 2: Use heavy duty clamps (or rest something heavy on top of the book) to ensure that everything will set properly. Let dry.
Step 3: Once dry, cut out a large enough area for the frame. Use a ruler to cut nice edges through the book cover (remove when cut through) and continue cutting through the pages until the appropriate depth is reached.
Step 4: Glue the edges of the cut window as before with Glue n’ Seal. Let dry.
Step 5: Using a brush, coat the inside of the cut out window with ICED Enamels Medium. Add the ICED Enamels Relique powder inside the window and heat with a heat tool. Repeat this process for the spine of the book, along with the edges of the book cover and the frame.
 Step 6: Use the ICE Resin® Paper Sealer to seal the Audrey Hepburn image with at least two coats on both sides of the paper – and don’t forget the sides.
Once sealed, adhere to the back of the mini frame with Glue n’ Seal to add stability and ensure adhesion to the resin frame.
Step 7: Decorate the front of the book cover with printed paper, paint or anything you please!
Step 8: Apply a thin coat of resin into the cut out window in the book cover. Also add a thin layer to the back of the picture frame to avoid any bubbles from forming and to get achieve the best adhesion with the resin. Place the frame into the window and then generously sprinkle with Silver German Glass Glitter. Don’t worry about using too much of the German Glass on because once the resin has set the excess will be put back into the container.
 Step 9: Brush off any of the German Glass from the book cover and then apply a coat of resin over the entire surface of the book’s cover and allow the resin to set.
 Step 10: Once the resin has set, return the excess German Glass to it’s container. Clean any of the German Glass with a detail brush that may be sticking to the project with static electricity. Finish your project by filling the inside of the frame with resin and allowing to cure.


