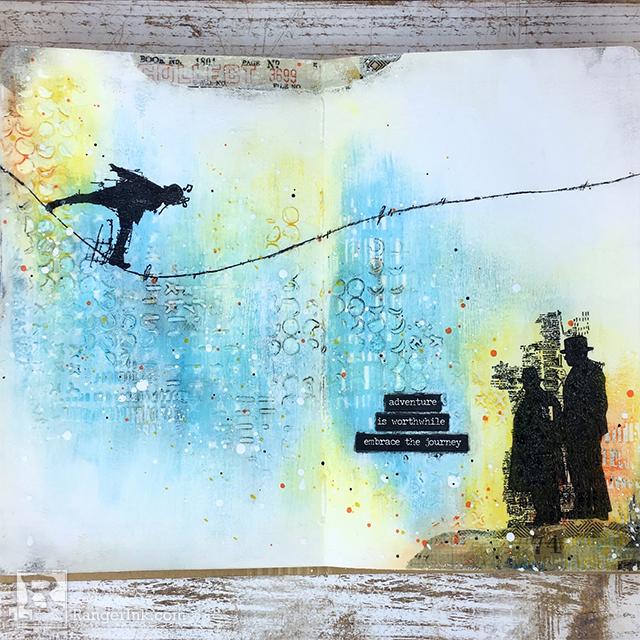
Hi everyone, Bobbi here. I’m so happy to be with you on the Ranger blog today! I’m sharing a really fun mixed media summer journal page for all those great adventures! Hope you’ll join me.

Adventure Art Journal Page by Bobbi Smith
- Materials
- Instructions
- Tim Holtz Distress® Paints: Carved Pumpkin, Broken China, Mustard Seed, Black Soot
- Tim Holtz Distress® Crayons: Carved Pumpkin, Broken China, Mustard Seed, Hickory Smoke, Picket Fence
- Tim Holtz Distress® Mixed Media Archival Ink Palette
- Tim Holtz Distress® Sprayer
- Tim Holtz® Waterbrush
- Tim Holtz Distress® Splatter Brush
- Ranger Palette Knife Set
- Tim Holtz Distress® Collage Mediums: Matte
- Ranger Texture Paste: Transparent Gloss
- Fude Ball Pen: Black
- Dina Wakley Media Mediums and Gessoes: White Gesso
- Dina Wakley Media Brushes
- Ranger Non-Stick Craft Sheet™
- Ranger Heat it™ Craft Tool
- Tim Holtz by Tonic Studios: Kushgrip Snips, Stamp Platform
- Tim Holtz Idea-ology Plain Collage Paper TH93708; Design Tape, Collector TH93674; Small Talk Stickers
- Tim Holtz by Stampers Anonymous Mini Stencils 99,100,101 and 102; Theories CMS329 Stamp Set
- Baby Wipe
Instructions

Step 1: To start with, spread a thin coat of Dina Wakley Media Gesso on both pages of the small Dylusions Creative Journal and let air dry. You could speed the drying process with a Heat Tool.

Step 2: Apply a thin layer of Broken China Distress Paint using a paint brush to center area of journal spread. Working quickly while paint is still damp, lay one of the Tim Holtz Stampers Anonymous mini stencils over paint. You could use a damp paper towel or cloth, but I used a moist baby wipe. Swipe the wipe over stencil to lift paint and reveal pattern. I used several of the mini layering stencils from sets 33 & 34. Remove stencils and dry journal page with Ranger Heat it Tool.

Step 3: To do the stamping for the page, I used idea-ology plain collage paper. This little gem is like magic, it just melts into the background and you can’t even see the edges. Cut a piece of collage paper about 5 1/2 inches wide and it’s already about 6 inches long. Secure the collage paper in the Tonic stamping platform. Attach the tightrope stamp image from the Tim Holtz Stampers Anonymous Theories CMS329 Stamp Set, to the stamping platform. Ink up the stamp using Black Soot ink from the Tim Holtz Distress Permanent Mixed Media Ink Palette. The beauty of the stamping platform, is that you can restamp the same image multiple times without movement…and that just what I did. I really wanted to achieve a striking and crisp image. Repeat stamping with “friends” image from same stamp set on lower half of collage paper.

Step 4: Remove the collage paper from stamping platform and dry really well with Ranger Heat It Tool. You don’t want to skip this part, to insure the ink is set really well. Tear the collage paper by painting/drawing a line with water from waterbrush. The collage paper tears very easy with a nice organic look to edges.

Step 5: Adhere the stamped images to journal page with Distress Collage Medium Matte. Spread a thin layer of Collage Medium to journal page, then lay the image over top. Then spread another thin layer of Collage Medium over entire journal page, and dry with Heat It Tool. Cut off any excess collage paper that is hanging over page with scissors.

Step 6: Attach a little Idea-ology Design Tape from the Collector set. Then spread a very small amount of white gesso with a Ranger pallet knife. Then dry with heat it tool.

Step 7: I wanted to extend the tightrope, so I used the Fude Ball 1.5 black pen. It works great on painted surfaces! Then dried with the heat it tool.

Step 8: Next, I add a couple of phrases from the idea-ology small talk stickers. Even though they already have adhesive, attach with Distress Collage Medium Matte and seal the surface with a thin coat. Then dry with heat it tool.

Step 9: Add some texture to accent the page. Working with the same grouping of stencils. I lay the stencil flat on the journal page and holding in place, then swipe a small amount of Ranger Transparent Gloss Texture Paste across the stencil with palette knife. Carefully lift the stencil and repeat the process with different patterns of the various stencils across the middle section of the journal page. Immediately wash stencils and palette knife off, so the paste doesn’t dry on them. Allow the transparent paste to air dry, it’s very important to not add any heat.

Step 10: To bring in more color and highlight that fun texture, Distress Crayons were a perfect medium. Scribble various colors of Distress Crayons onto the raised surface of the dried texture paste. The colors I used were Broken China, Mustard Seed and Carved Pumpkin Distress Crayons. Then smudge the colors using your finger, to work into the nooks and crannies. Take a towel and wipe off excess color on raised portion. If you happen to wipe away too much, just reapply Distress Crayon.

Step 11: To add a hint of shading, scribble a bit of Hickory Smoke Distress Crayon onto journal page. Then smudge with finger and wipe away excess color with towel.

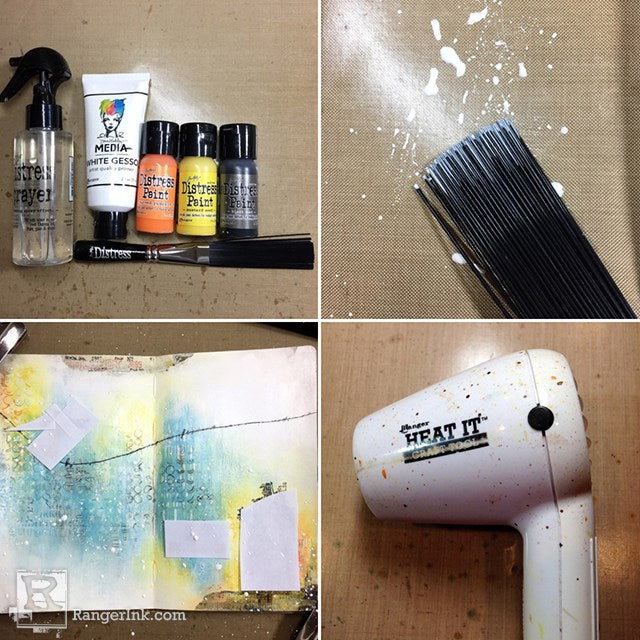
Step 12: To finish my art journal page, I wanted to add a hint of spatter. Cover any part of journal page that you don’t want to splatter with scrap paper. Add a small drop of Dina Wakley Media White Gesso to Non-Stick Craft Sheet. Then spray a little water onto Gesso to thin down. Pick up Gesso/color with Distress Splatter Brush and pull back bristle, then release for splatters. Dry with Heat it Tool. Repeat step with additional colors and dry with Heat it Tool. I used Carved Pumpkin, Mustard Seed and Black Soot Distress Paint for contrast. Remove the scrap paper, when finished splattering. There you have it, all done!

I hope you give this art journal page a try, it was really so much fun to create!


