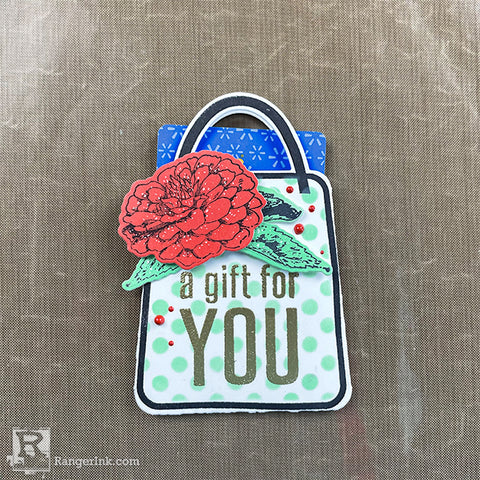
Joy Baldwin shows you how to make this adorable gift card holder using Wendy Vecchi's Stamp, Die and Stencil "Let's Shop" set in this quick and easy tutorial. This is the perfect solution when you need a gift in a pinch.

Wendy Vecchi Gift Card Holder by Joy Baldwin
- Materials
- Instructions
Gift cards seem to be a great gift for anyone these days, so I made a cute gift card holder using Wendy Vecchi’s, Let’s Shop Stamp, Die and Stencil combo. I hope you enjoy this project, let’s get started.

Step 1: Stamp the bag image from Let’s Shop with Jet Black Ink onto Perfect Cardstock. Use the stencil from Let’s Shop Set and stencil polka dots using Cracked Pistachio Ink. Then use the coordinating bag die and cut out both images (this will be the front and back of the bag).

Step 2: Ink up some Perfect Cardstock with Cracked Pistachio and Candied Apple Ink. Stamp the flowers and leaves from Flowers Say It All with Jet Black Ink and use the coordinating dies to cut out the images.

Step 3: Fold the flaps on the bag and glue them with Multi Medium Matte Glue. Stamp the image from Let’s Shop with Grey Tinted Embossing Ink and sprinkle that with Gold Embossing Powder. Heat that until the powder melts.

Step 4: Glue the front and back of the bag together with Multi Medium Matte Glue. Adhere the flower and leaves with Foam Adhesive and Multi Medium Matte Glue. Add dot details to the flower and leaves using a White Opaque Pen and finish with some Carnation Red Liquid Pearls.

Step 5: Slide a gift card into the bag and now it is ready to send off to your recipient.


 Hi! My name is Joy Baldwin, AKA, Create it with Joy. I am a wife and a mother to 3 kids and 3 crazy animals. I homeschool my 2 youngest kids (maybe I'm crazy) and am a part-time Nail Tech. I absolutely LOVE the creative process of making cards and the tutorials that go along with them. Also, the community of wonderful crafters and the friendships that follow. Find me at