by Richele Christensen

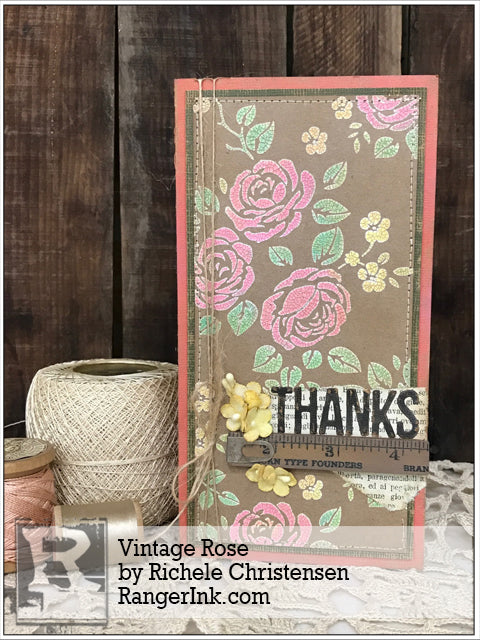
Vintage Rose by Richele Christensen
- Materials
- Instructions
- Tim Holtz Distress® Oxide Ink Pads : Abandoned Coral, Fossilized Amber, Lucky Clover, Peeled Paint, Ricked Raspberry, Vintage Photo
- Tim Holtz® Distress Sprayer
- Tim Holtz® Distress Collage Mediums : Matte
- Ranger Mini Blending Tool with Foam
- Ranger Collage Glue Stick
- Ranger Heat it™ Craft Tool
- Ranger Non-Stick Craft Sheet™
- Ranger Surfaces Kraft Cardstock
- Palette Knife Set
- Ranger Texture Paste : Opaque Crackle
- Black Cardstock
- Tim Holtz Idea-ology: Sanding Grip, Bouquet, Index Clips, Ruler Pieces, Paper Stash Classic Kraft Vintage book page
- Tim Holtz Alterations by Sizzix: Alpha Numeric 3/4” Tall Thinlits Die Set
- Tim Holtz by Stampers Anonymous: THS075 Roses Layering Stencil
- Twine
- Thread
- Sewing Needle
Instructions

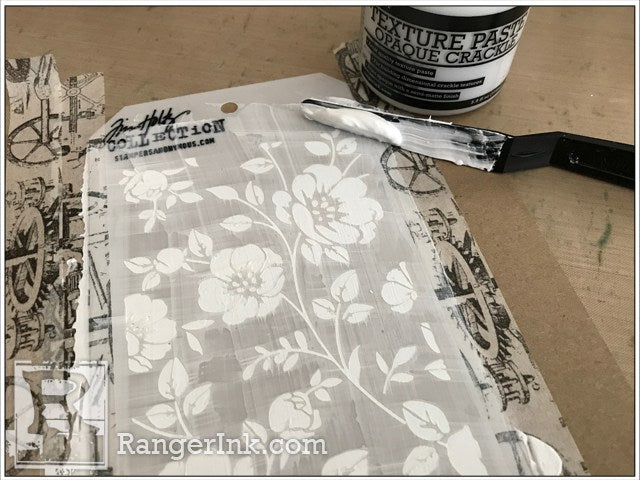
Step 1: Tape Rose Layering Stencil to Kraft cardstock with removable tape. Apply Texture Paste (Opaque Crackle) with Palette Knife. Pull off the excess paste using the palette knife. Carefully remove stencil and set aside to dry.

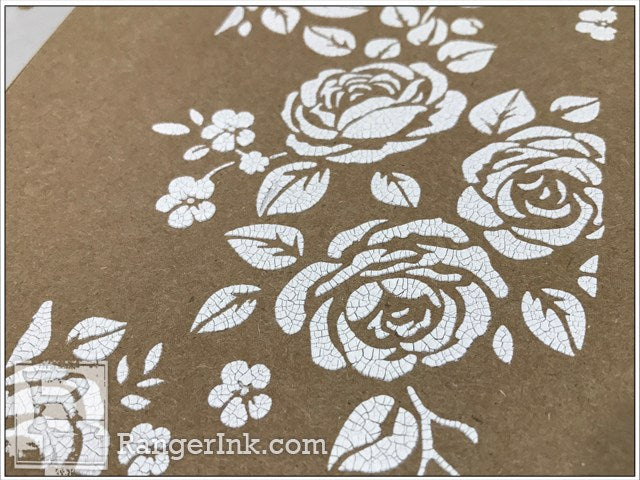
Step 2: When the paste is completely dry the Texture Paste will crack.

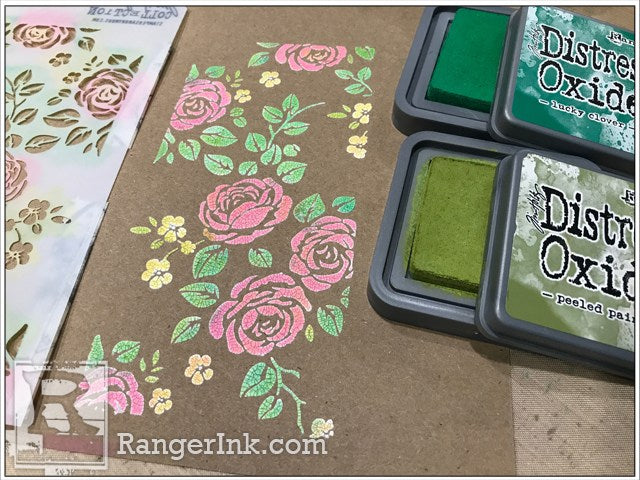
Step 3: Position Layering Stencil by lining it up over the Texture Paste areas and re-tape.Add color over the flower areas using Distress Oxide Inks (Picked Raspberry and Abandon Coral) on a Mini Ink Blending Tool. Continue adding color to the flowers with Distress Oxide Inks (Fossilized Amber) on a Mini Ink Blending Tool or a cotton swab for the small areas.

Step 4: Add Lucky Clover and Peeled Paint ink over the leaves and steams.

Step 5: Distress the edges of the base card and mat by sanding and inking with Distress Oxide Ink on a Mini Ink Blending Tool. Sew around the edge of the card as desired.

Step 6: Layer card together and add a piece of torn book page with Collage Glue Stick.

Step 7: Color Bouquet flowers by applying Distress Oxide Ink (Fossilized Amber) directly to Craft Sheet, spray with water using the Distress Sprayer, soak up the ink with the flowers and dry with a heat tool.

Step 8: Color the Ruler Piece with Distress Oxide Inks and a Mini Ink Blending Tool.

Step 9: Add Index Clip to the end of the ruler, cut ruler to fit and adhere with Collage Medium

Step 10: Die cut letters from black Cardstock using the Alpha Numeric 3/4” Tall Thinlits Die Set. Adhere letters, and flowers to card with Distress Collage Medium. Tie twine around card with a bow.


