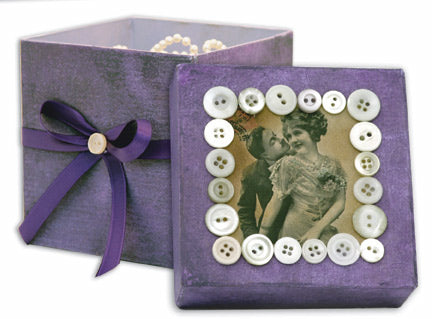
Create a vintage-style memory box using coordinating colors of Adirondack Acrylic Paint Dabbers. It’s a pretty box to keep trinkets in or to give as a heartfelt gift.

Vintage Memory Box By Michelle Harmazinski
- Materials
- Instructions
- Ranger Artist Brush Set
- Ranger Glossy Accents™
- Ranger Non-Stick Craft Sheet™
- Ranger Cut n’ Dry™ Foam and Felt Pads
- Tim Holtz Distress® Ink Pads
- Ranger Mini Misters
- Papier mache box
- Paper towels
- ¼” purple ribbon
- White or pearl buttons
- Clip art or use a favorite photo
Instructions
(1) Working over a Non-Stick Craft Sheet, dip your paintbrush (½” or smaller) into Acrylic Paint Dabber in Cool Peri and paint the entire inside of the box bottom and top.
(2) Dab Adirondack Acrylic Paint Dabber in Cool Peri over the entire outside of the box bottom and top, lightly “swirling” dabber tip to blend.
(3) Dab Acrylic Paint Dabber in Purple Twilight randomly on one panel of the box. Quickly spritz with water using the Mini Mister, then blend over existing paint color using a paper towel. Make sure you blend so that the first paint color shows through in spots. Repeat for all outside panels of box bottom and top.
(4) Dab Acrylic Paint Dabber in Eggplant randomly on one panel of the box. Quickly spritz with water using the Mini Mister, then blend over existing paint color using a paper towel. Make sure you blend so that the first paint color shows through in spots. Repeat for all outside panels of box bottom and top.
(5) Find a clip art image to decorate the top of your box. I printed one from a Design Originals book. Trim image to square to fit box top. With a 1” square piece of Cut-n-Dry Foam, tap into Distress ink and lightly rub around edges of image to age.
(6) Using Glossy Accents, glue image to center of box top and burnish well. Glue buttons around edge of image.
(7) Tie purple ribbon horizontally around the center of the box bottom and tie in a bow. Trim excess ribbon. Glue one button in the center of the bow.


