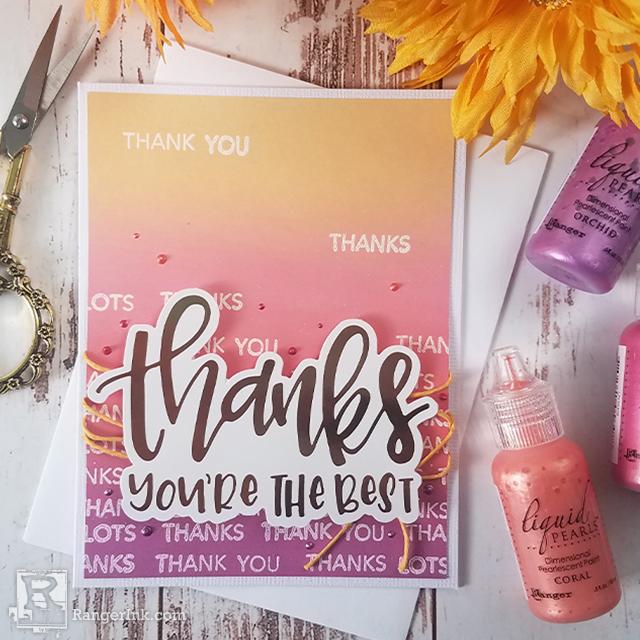
Follow along as guest artist, Joy Baldwin shares how she creates a simple Thank You card using the new Letter It™ Foil Die Cuts and It's the Little Things Clear Stamp Set.

Thanks, You're the Best Card by Joy Baldwin
- Materials
- Instructions
-
Letter It™ Foil Die Cuts: Set 1
Letter It™ Clear Stamp Set: It's The Little Things
Letter It™ A2 White Cardstock Panel
Letter It™ Acrylic Stamping Block
Ranger Adhesive Foam Tape: White
Ranger Liquid Pearls: Orchid, Coral, Raspberry
Ranger Mini Ink Blending Tool and Foam
Ranger Emboss It Embossing Ink: Grey Tinted
Ranger Multi Medium: Matte
Ranger Embossing Powder: Super Fine White
Tim Holtz Distress® Oxide® Ink Pad: Seedless Preserves, Worn Lipstick, Festive Berries, Dried Marigold
Wendy Vecchi Make Art STAY-tion™
Wendy Vecchi Make Art STAY-tion™ Non- Stick Craft Sheet
Twine
Instructions

Step 1: Using the Wendy Vecchi Stay-tion, hold down the Stark White Cardstock with the magnetic ruler. Stamp the “Thank You, Thanks and Thanks Lots” sentiments from It's the Little Things Stamp Set. Stamp them with Grey Tinted Embossing Ink, in rows working from the bottom up on the Cardstock.

Step 2: Finish stamping the Sentiments and fading off towards the top of the Cardstock. Then use White Embossing Powder and heat that until melted.

Step 3: Use the Non-Stick Craft Sheet on top of the Stay-tion for ink blending. Using non-traditional fall colors, start inking (with the Mini Ink Blending Tools) at the bottom of the stamped Cardstock with Seedless Preserves, then blend in Festive Berries.

Step 4: Next blend Worn Lipstick and Dried Marigold. Continue blending until there is a smooth transition between colors.

Step 5: Use a paper towel and gently wipe the ink from the embossed words. Then trim paper to slightly smaller than an A2 size card. Use twine and wrap around lower half of card panel a few times and glue in place with Multi Medium Matte Glue.

Step 6: Adhere Foil Die Cut with Foam Adhesive over the twine. Then adhere colored panel to an A2 size card base using Multi Medium Matte Glue.

Step 7: Add finishing touches with Liquid Pearls in: Orchid, Coral and Raspberry.


 Hi! my name is Joy Baldwin, AKA, Create it with Joy. I am a wife and a mother to 3 kids and 3 crazy animals. I run and cook for a small community kitchen in our city (it's a great feeling to serve), I homeschool my 2 youngest kids (maybe I'm crazy) and am a part-time Nail Tech. I absolutely LOVE the creative process of making cards and the tutorials that go along with them. Also, the community of wonderful crafters and the friendships that follow. Find me at
