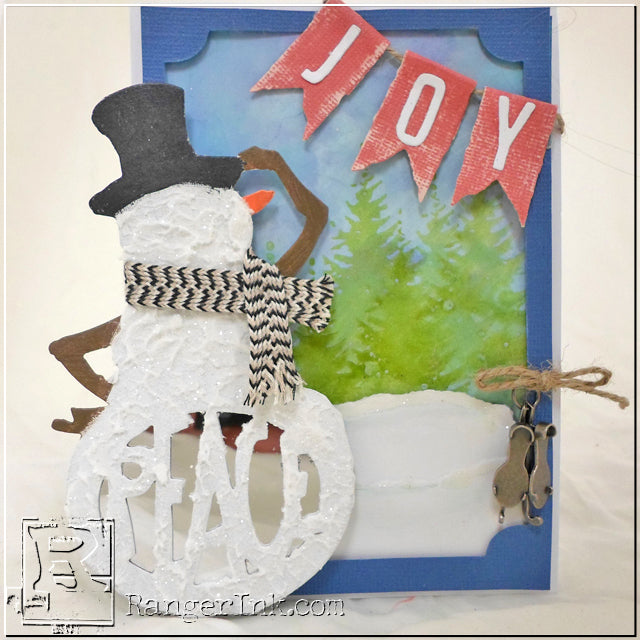
Guest blogger Michelle McCosh shares a quick and easy project that is great for last minute cards, tags, or ornaments!

Textured Snowman Card
- Materials
- Instructions
- Dina Wakley Media Palette Knife
- Tim Holtz® Alcohol Ink Applicator
- Ranger Adhesive Foam Rolls
- Ranger Non-Stick Craft Sheet™
- Ranger Glossy Accents™
- Ranger Texture Paste
- Tim Holtz Distress® Stickles™ Dry Glitter
- Archival Ink™ Fern Green
- Tim Holtz® Alcohol Blending Solution
- Tim Holtz® Adirondack® Alcohol Inks: Cloudy Blue, Stonewashed, Aqua
- Tim Holtz® Alcohol Ink Cardstock
- Tim Holtz Core
- Tim Holtz Idea-ology Mirrored
- Wendy Vecchi Holiday Art Stamp Set SCS127
- Tim Holtz Handwritten Holidays CMS208
- Tim Holtz Sizzix Alterations Dies: Winter Wonder, Peace, Ribbon Flags, Thinlets Alphanumeric
- Tim Holtz Idea-ology Embellishments: Jute String, Trimmings Naturals Black & Crea, Adornments Ice Skates
- Tim Holtz Idea-ology Grungepaper
Instructions
 1. Diecut the snowman from grungeboard and paint over the entire piece with Gesso.
 2. Add a little dab of each of the three distress paints to the craft mat and then use a small paintbrush, paint the snowman’s nose, then paint the arms and the hat, dry.
 3. Using the tip of the palette knife apply some of the texture paste to the snowman body and head.
 4. Use the knife to create texture as you go.
 5. Using the salt shaker sprinkle some distress glitter over the wet paste. Set the snowman aside to dry.
 6. Add alcohol inks to the alcohol ink applicator and pounce onto the glossy cardstock (4 by 5 3/4 inches). Then go over with some alcohol blending solution to blend and lighten the colors of alcohol ink.
 7. Use Fern Green Archival Ink to stamp the Christmas trees on the card. I only inked the stamp one time so that the trees could overlap and be different hues of the same color. Dry the ink using a heat tool.
8. Rip some white cardstock and use a little glossy accents on the edge, cover with the clear rock candy dry glitter to look like snow drifts. Attach the cardstock to the bottom of the card.
 9. Die cut a piece of coordinations that measures 4 by 5 3/4 inches with the ticket die and save the interior for another project. Using the frame that is leftover, add some adhesive foam to the back (leave a gap so that you can thread the jute through the back of the frame). Thread the jute through the frame and add a jump ring to two ice skates. Tie the jute through the jump ring.
10. Sand the ribbon pennants and then glue on the letters, fold the ends over and glue onto some jute. Attach to the frame.
11. Attach the frame to the card and then attach the whole piece to a card base. Cut some mirrored to fit behind the snowmans belly, remove the protective film on the top of the mirrored and use Glossy Accents to glue behind the “peace” cutout. Attach his scarf. Add more adhesive foam to the back of the snowman and place him on the card.
12. As a bonus, if you die cut an extra snowman out of white cardstock, you can attach to the back of the snowman for a more finished look.
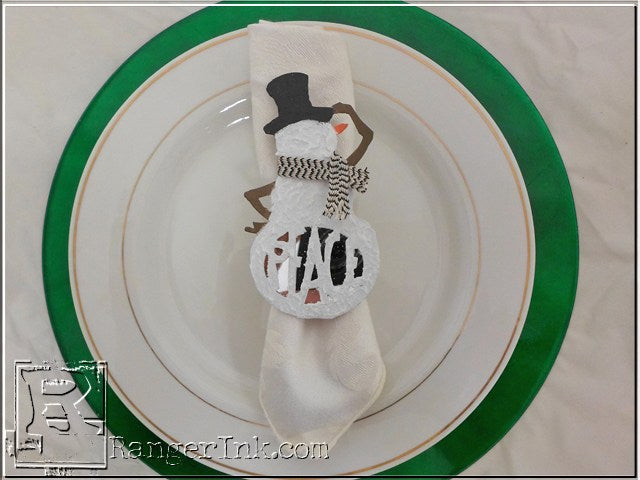
 Hot glue this to a napkin ring to dress up your table.
 Or attach some jute behind his hat and he becomes a tree ornament.

 Stamp a sentiment on the back and he becomes a gift tag for someone special.
Your Cart
- Choosing a selection results in a full page refresh.


