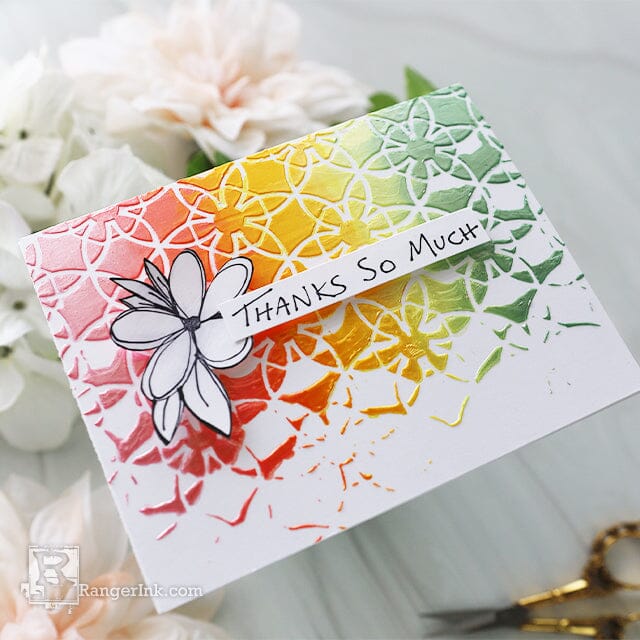
Stenciling With Liquid Pearls By Joy Baldwin
- Materials
- Instructions
Liquid Pearls™ Ballerina
Liquid Pearls™ Coral
Liquid Pearls™ Lemon Chiffon
Liquid Pearls™ Sage
Archival Ink™ Pads Jet Black
Wendy Vecchi Liquid Pearls Sunflower
Wendy Vecchi MAKE ART Photopolymer Stamp Set Floral Doodles
Wendy Vecchi MAKE ART Perfect Stamp Positioner Set
Simon Hurley create. Stencil 6x6 Backsplash
Simon Hurley create. Stark White Cardstock
Simon Hurley create. Paste Tool Set
Letter It™ White Foam Roll Tape
Instructions
Hi crafty friends, it’s Joy here and I have a fun and easy card for you today using Liquid Pearls. They are so great for adding detail but, today we will use them to make a background. I used it with a stencil to create a fun spring card.

Step 1: Lay the stencil on a piece of Stark White cardstock that is A2 size. Add the liquid pearls on one side in a line, overlapping the colors where they meet. This will give you a nice blend of colors. The colors are (from right to left) Ballerina, Coral, Sunflower, Lemon Chiffon, Sage.

Step 2: Using the Paste Tool, starting at the Liquid Pearl edge, gently glide and spread the Liquid Pearls across the stencil. If you need more Liquid Pearls, leave the stencil in place, add more then drag the tool across again. Do this until you get the desired look. Wash stencil and tool immediately.

Step 3: You can see what it looks like with the stencil removed.

Step 4: Stamp the flower and sentiment from the Floral Doodle stamp set with Jet Black Ink, fussy cut the flower and trim the sentiment.

Step 5: Add the 3D Foam Adhesive to the flower and sentiment and place it in the center of the panel and add the panel to a white A2 card base.
Your Cart
- Choosing a selection results in a full page refresh.


 Hi! My name is Joy Baldwin, AKA, Create it with Joy. I am a wife and a mother to 3 kids and 3 crazy animals. I homeschool my 2 youngest kids (maybe I'm crazy) and am a part-time Nail Tech. I absolutely LOVE the creative process of making cards and the tutorials that go along with them. Also, the community of wonderful crafters and the friendships that follow. Find me at
