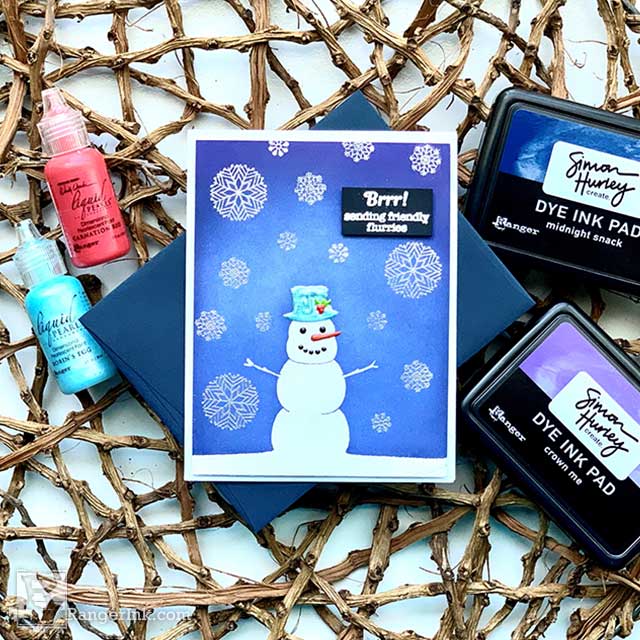
In this tutorial, Lieschen Harshbarger shows you how to make a wonderful winter background using Simon Hurley create Dye Ink & Stamps to make this darling card.

Simon Hurley Sending Flurries Card by Lieschen Harshbarger
- Materials
- Instructions
Simon Hurley create. Dye Ink Pad Crown Me, Midnight Snack
Simon Hurley create. Photopolymer Stamp: Christmas Silhouettes
Simon Hurley create. Background Stamp Stitched Snowflakes
Simon Hurley create. Stark White Cardstock
Tim Holtz Alcohol Ink Cardstock Black Matte
Simon Hurley create. Acrylic Stamping Block
Ranger Mini Ink Blending Tool
Ranger Mini Ink Blending Tool Domed Replacement Foams
Ranger Adhesive Foam Tape: White
Letter It™ Clear Foam Roll Tape
Letter It™ Double Stick Tape
Ranger Heat It™ Craft Tool
Emboss It™ Ink Pad Clear
Ranger Embossing Powder Super Fine White
Ranger Embossing Powder Silver
Ranger Liquid Pearls™ Onyx Pearl, Key Lime, Robin’s Egg
Wendy Vecchi Liquid Pearls™: Orange Blossom, Carnation Red
Other:
Envelope
Trimmer
Instructions
Hello crafty friends! I hope you had a wonderful Holiday Season. For me, these holidays were a blessing – not only to be able to spend time with family, but to enjoy more crafty time in my happy place.
Today, I’m delighted to share with you an easy card to make using Simon Hurley’s Christmas Silhouettes stamp set and Stitched Snowflakes background stamp. I also used two color combos from Simon Hurley’s ink collection. I hope you have fun learning from this tutorial!

Step 1: Create an A2 card base out of Stark White Cardstock. Cut the 8½” x 11” cardstock at 5½” and then score at 4¼”. Cut another piece measuring 4” x 5¼.”

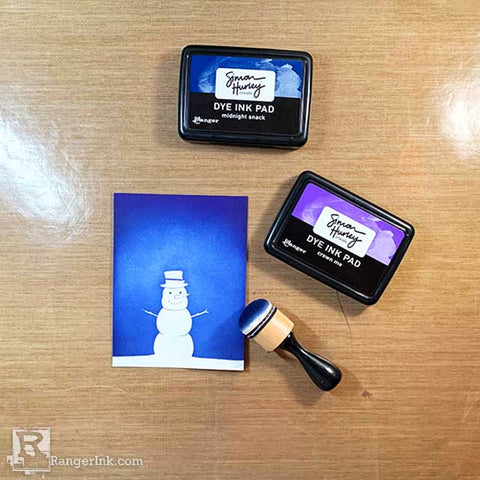
Step 2: On the 4” x 5” cardstock panel, color blend the background with Midnight Snack and Crown Me inks from Simon Hurley. Then heat emboss the snowman from the Christmas Silhouettes Stamp Set with Embossing Powder Super Fine White.

Step 3: Peel apart snowflakes from Simon Hurley create. Background Stamp Stitched Snowflakes and mount to Simon Hurley create. Acrylic Stamping Block. Stamp images with Emboss It Ink Pad Clear and heat emboss using Embossing Powder Silver.

Step 4: Use the Liquid Pearls – Onyx Pearl, Orange Blossom, Carnation Red, Key Lime, and Robin’s Egg – to add accents to the snowman from the Christmas Silhouettes stamp set.

Step 5: Tape the front panel using White Foam Tape and glue it to the card base.

Step 6: Heat emboss sentiment from the Christmas Silhouettes stamp set using Emboss It Ink Pad Clear, Embossing Powder Super Fine White, and the Ranger Heat It Craft Tool.

Step 7: Trim sentiment and place it with Letter It Clear Foam Roll Tape and secure it to the front panel.
Your Cart
- Choosing a selection results in a full page refresh.


 Hi! My name is Lieschen Harshbarger. I’m married to my best friend and even though we don’t have children yet, our dog Sophie fills our hearts with lots of love and joy. By day, I work for the State of Texas, but during my evenings and weekends you’ll find me in my craft room – making cards and trying out new techniques with my crafty supplies. I enjoy being creative, but mostly I have enjoyed getting to know others and learning fun new things in this wonderful crafty industry! You can see more of my crafty projects on my blog
