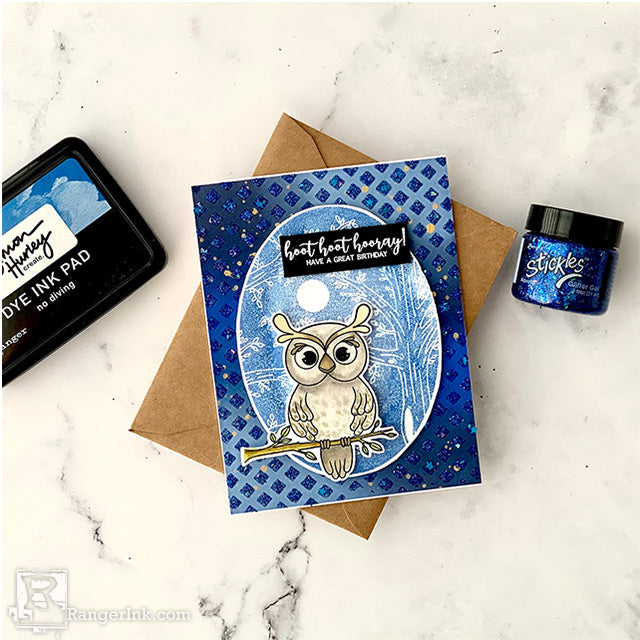
Discover how Lieschen Harshbarger creates this adorable birthday card using Simon Hurley create. and Stickles Glitter Gels to add some extra sparkle.

Simon Hurley Hoot Hoot Hooray Birthday Card by Lieschen Harshbarger
- Materials
- Instructions
Simon Hurley create. Stark White Cardstock
Simon Hurley create. Acrylic Stamping Block
Simon Hurley create. Photopolymer Stamp Owl Buddies
Simon Hurley create. Stencil 6x6 Tiny Diamonds
Simon Hurley create. Dye Ink Pad Midnight Snack, No Diving, Breakup Blue, Viper, Overzealous, Woof!, Grrr!
Ranger Archival Ink™ Pad Jet Black
Ranger Mini Ink Blending Tool
Ranger Mini Ink Blending Tool Domed Replacement Foams
Emboss It™ Ink Pad Clear
Ranger Embossing Powder Super Fine White
Ranger Glossy Accents™
Stickles™ Glitter Gels Aquarius
Ranger Silicone Mat
Ranger Artist Brushes
Tim Holtz® Alcohol Ink Cardstock Black Matte
Wendy Vecchi Make Art Stay-tion
Wendy Vecchi Perfect Card Adhesive
Ranger Heat It™ Craft Tool
Other:
Palette knife
Gold watercolor
Foam tape
Scissors
Paper Trimmer
Envelope
Scoring Board
Instructions
Welcome back crafty friends! I hope you have enjoyed seeing the new Simon Hurley release – I know I have! Today I’ll be using the new Owl Buddies stamp set and the Tiny Diamonds stencil to make a birthday card.

Step 1: Use Simon Hurley create. Stark White Cardstock to make a top folding A2 card base measuring 4¼ x 11, with scoring at 5½. Trim another piece to be used for the front panel of the card that is 4¼ x 5½.

Step 2: On the front panel of the card, blend the Simon Hurley create. colors Midnight Snack, No Diving, and Breakup Blue with the Blending Tool.

Step 3: Use Ranger Artist Brushes #6 to flicker some gold watercolor onto the already inked background.

Step 4: After watercolor has dried, use the Tiny Diamonds stencil with the Stickles Glitter Gels Aquarius to add more dimension to the background.

Step 5: On a separate piece of Stark White Cardstock, stamp the oval image from the Owl Buddies stamp set using an acrylic block. Ink your stamp with Breakup Blue first then color blend around the oval using the Blending Tool with the No Diving and Midnight Snack ink pads.

Step 6: On another piece of Stark White Cardstock, stamp one of the owl images from the Owl Buddies stamp set using an acrylic block and Jet Black Archival Ink. The use Emboss It clear pad and embossing clear powder to heat emboss the image.

Step 7: Fussy cut the images leaving a white border (if you like).

Step 8: To color the branch on the owl image, use Ranger Artist Brushes #2, Overzealous, and Viper ink pads.

Step 9: Color the body of the owl with the Grrr! and Woof! ink pads using Ranger Artist Brushes #4.

Step 10: Use the Grrr! ink pad and Ranger Artist Brushes #4 to color the beak and feet of the owl.

Step 11: Once the front panel is completely dried, glue it to the card base using Wendy Vecchi Perfect Card Adhesive.

Step 12: Use foam tape to glue the oval shape image and owl to the front panel of the card.

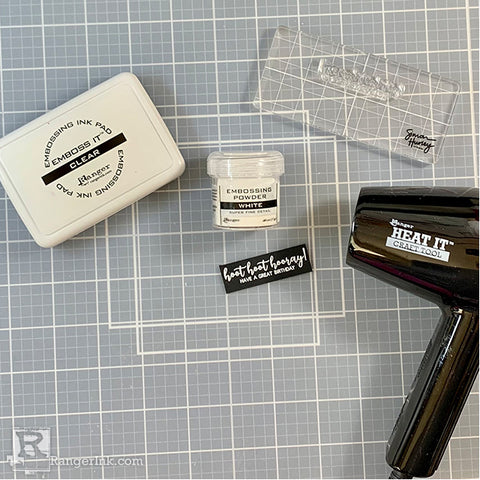
Step 13: Stamp one of the sentiments from the Owl Buddies stamp set on Tim Holtz® Alcohol Ink Cardstock Black Matte with Emboss It clear. Then heat emboss it with white embossing powder.

Step 14: Glue the sentiment onto the front panel of the card and add Glossy Accents to the owl’s eyes. Pair the card with an envelope and it’s ready to be sent to a loved one!
Your Cart
- Choosing a selection results in a full page refresh.


 Hi! My name is Lieschen Harshbarger. I’m married to my best friend and even though we don’t have children yet, our dog Sophie fills our hearts with lots of love and joy. By day, I work for the State of Texas, but during my evenings and weekends you’ll find me in my craft room – making cards and trying out new techniques with my crafty supplies. I enjoy being creative, but mostly I have enjoyed getting to know others and learning fun new things in this wonderful crafty industry! You can see more of my crafty projects on my blog
