by Taylor Huizenga

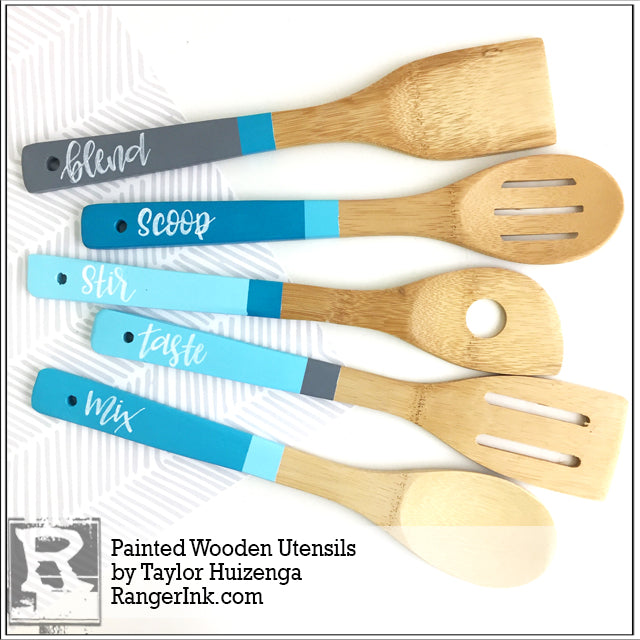
Painted Wooden Utensils by Taylor Huizenga
- Materials
- Instructions
Instructions

Step 1: Start with plain, wooden cooking utensils. Remove any packaging, stickers, etc.

Step 2: Using Dina Wakley Media Tape, tape off the bottom section of the utensils. Leave a decent amount of the wood, close to the top of the utensil, untouched. It’s best to leave space untouched so that it is not by the food.

Step 3: Coat the bottom of the utensils with a thin layer of Dina Media White Gesso.

Step 4: Next, coat the bottom of the utensils with Dylusions Paints. For these, I used Calypso Teal, White Linen, and Slate Grey. I created an ombred effect with the Calypso Teal by adding White Linen to lighten up the color and give me the various shades of blue. I gave each color two coats each.

Step 5: Gently remove the Media Tape to reveal a clean, crisp line.

Step 6: Once again, using the Media Tape, tape off the top section of color blocked painted section. I used the ¾” size tape and lined the top edge to where to color started. This ensured that all the utensils would have the same size piece of color as well as a straight line.

Step 7: Using the same selection of colors, paint the bottom of the utensils. I randomly chose how the shades were paired. Once the paint has dried, again, slowly remove the tape.

Step 8: Take your Dylusions White Linen Paint Pen and write out the kitchen phrases associated with the utensils. For these I used “Mix, Stir, Taste, Blend, and Scoop.”

Step 9: Once everything has completely dried, I would recommend sealing the final product with an acrylic sealer. Tape off the entire top half of the utensils, only leaving the painted section exposed. Do not spray the top which comes in contact with food with the sealer. Hand wash only once the project is completed.


