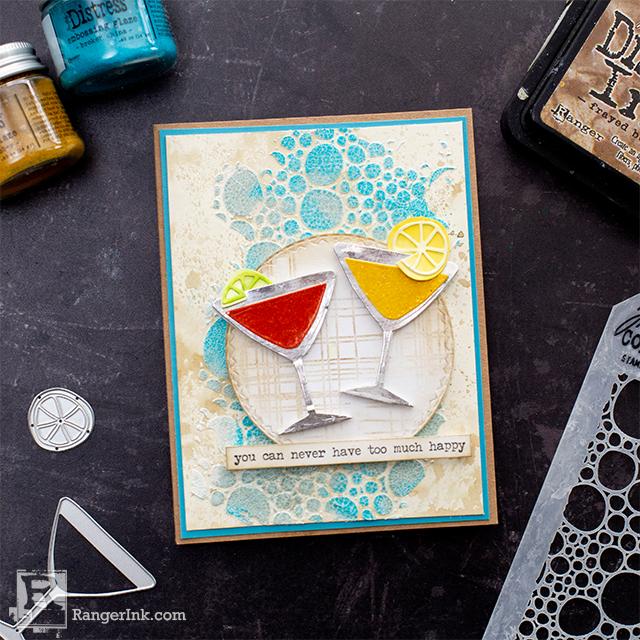
Follow this tutorial by Cheiron Brandon to craft your own cute, handmade card that is wonderful for all celebratory occasions. Create a delightful, bright cocktail front panel card using Tim Holtz Distress® Embossing Glazes that will make anyone want to raise a toast!

Never Too Much Happy Card by Cheiron Brandon
- Materials
- Instructions
Instructions

Hi there crafty friends, it’s Cheiron Brandon and today I have a fun card tutorial using Distress Embossing Glazes. If you haven’t tried the glazes out yet, they are a translucent embossing powder that you can use in many ways. On my card today, I will show you how I used them to create a fun background (with Distress Crackle Texture Paste) and direct to paper with an Embossing Dabber for a happy card.

Gather your supplies. You will need Distress Mixed Media Heavy Stock, Distress Crackle Texture Paste, a Distress Embossing Dabbler, Bubble Stencil, a palette knife and Sizzix Happy Hour dies.

Step 1: Create a background by adding Frayed Burlap ink to your Craft Sheet. Spray with water and swipe your paper through. Use a Heat Tool to dry, add a few more layers if desired by tapping your paper into the remaining ink. Let dry.

Step 2: Place the bubbles stencil on top of your panel and use a palette knife to apply Distress Crackle Texture Paste. Lift the stencil and wash immediately or place into water until you can wash.

Step 3: While the paste is still wet, use your fingers to pinch on the Distress Embossing Glaze in Weathered Wood and Broken China over the paste.

Step 4: Hold the panel and use your fingers underneath the panel to tap the embossing powder around until it covers all the paste area. Let dry completely.

Step 5: Once the paste is completely dry, use an Embossing Tool to heat the glaze. You will really be able to see the crackle now. Set aside.

Step 6: Now it’s time to make the drinks! Cut the glasses from silver metallic paper and cut all the rest of the drink pieces from Distress Mixed Media Heavy Stock.

Step 7: Color in the drink pieces by using an embossing dabber, then applying Distress Embossing Glaze in Fired Brick and Fossilized Amber, then embossing with an Heat Tool.

Step 8: Color in the garnish pieces using Distress Oxides in Twisted Citron, Mowed Lawn, Mustard Seed and Fossilized Amber by pressing the ink into your Craft Sheet, picking up with a Detailer Waterbrush and painting the pieces. Let dry. Assemble the drinks. You can cut a slit in the lemon and lime slices to make them fit over the glasses.

Step 9: Now you are ready to assemble. Gather your card background and drink pieces. Cut a circle to mount the drink pieces on and ink the edges of it with Frayed Burlap Ink using a Foam Blending Tool. Stamp the sentiment strip from the Tiny Text stamp and ink the edges with Frayed Burlap ink.

Step 10: Adhere the mat, the bubbles panel, the circle and the sentiment. Adhere the drinks using foam tape. Cheers!
Your Cart
- Choosing a selection results in a full page refresh.


