Create a stunning piece of mixed media home decor with this tutorial by guest artist Zoe Hillman.
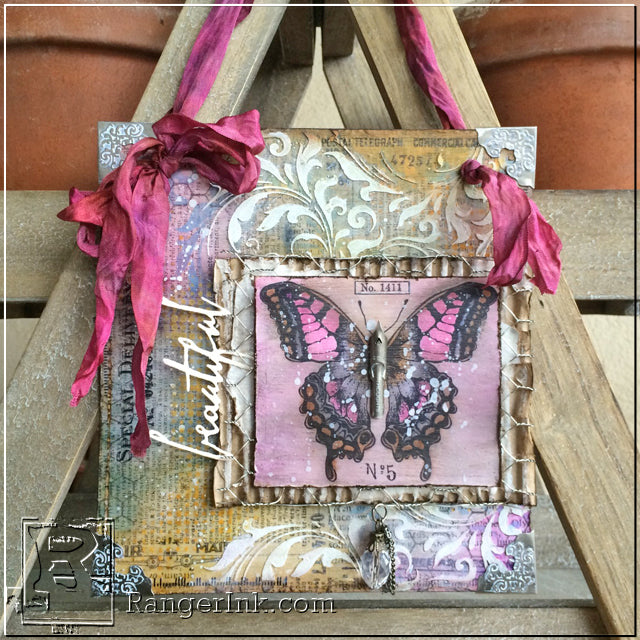
Mixed Media Butterfly Collage by Zoe Hillman
- Materials
- Instructions
- Ranger Watercolor Paper
- Walnut Stain
- Jet Black
- Watering Can
- Picked Raspberry, Weathered Wood, Walnut Stain
- Tea Dye, Black Soot, Pumice Stone, Picked Raspberry, Seedless Preserves, Salty Ocean, Stormy Sky, Spiced Marmalade
- Tim Holtz Distress® Marker Spritzer
- Tim Holtz Distress® Rock Candy Crackle Paint
- Tim Holtz Distress® Glitter
- Ranger Texture Paste
- Ranger Glossy Accents™
- Ranger Mini Blending Tool
- Ranger Ink Blending Tool & Foam
- Ranger Mister
- Ranger Brayers
- Ranger Artist Brush Set
- Ranger Non-Stick Craft Sheet™
- Dina Wakley Media Palette Knife
- Tim Holtz Idea-ology Grid Blocks, Design Ruler
- Tim Holtz Tonic Scissors, Craft Pick, Paper Distresser
- Recycled Cardboard, Corrugated Cardboard, Chicken Wire
- Tim Holtz Idea-ology Tissue Wrap, Pen Nib, Bauble, Chain Tassels, Jump Rings, Corners
- Tim Holtz Idea-ology Crinkle Ribbon
- Tim Holtz Stampers Anonymous Stamps: CMS125 Mixed Media, CMS213 Perspective, CMS225 Correspondence
- Tim Holtz Stampers Anonymous Layering Stencils: 006 Dot Fade, 032 Flourish
- Tim Holtz Sizzix Alterations: 660218 Handwritten Love
Instructions
 This butterfly wall hanging was inspired when I was clearing out my balcony garden ready for Spring. I wanted to recycle some boxes and chicken wire from my balcony and show that by adding glue n seal, you can make any surface ready for distress.
 Cut thick cardboard 7 x 7.5 inches, corrugated card 4 x 5 inches, chicken wire 4 x 5 inches and watercolour cardstock 3.25 x 4 inches.
 Cover the thick cardboard with a generous layer of Glue n Seal, (this seals the card and stops it from going soggy when adding media). Dry with heat tool. Once dry, cover with picket fence distress paint, (this is to give a white base under the tissue wrap, you can use any colour you wish). Once dry, cover with another layer of glue n seal and cover with tissue wrap, old dictionary pages or similar. Run a brayer over to smooth.
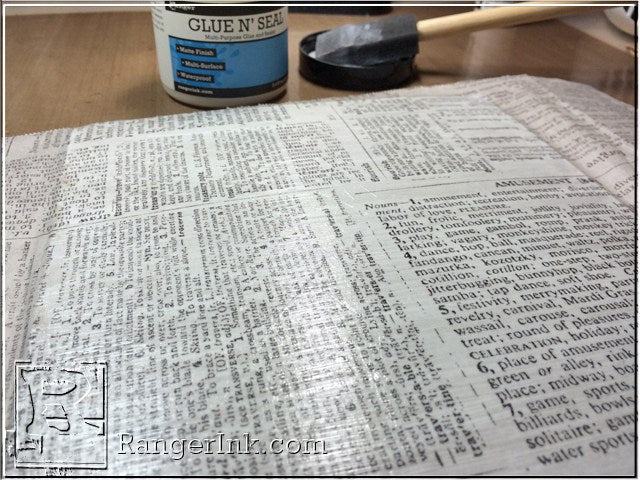 Cover with another generous layer of Glue n Seal, this will give you a slick surface to work with distress markers later). Run your fingers over the edges of the card while the glue n seal is wet, this will crease the tissue wrap to make it easier to trim when dry… once dry trim the edges.
 Pounce Distress Paint through a stencil. DO NOT SQUEEZE THE BOTTLE! If you need to get more paint flowing to the dabber sponge, gently press the dabber onto a craft mat until the paint flows. Use different colours and stencils, making sure you dry between each to stop colour bleed.
 Stamp background stamps using watering can archival ink.
 Use stamps to add more detail to the background using archival ink.
 Scribble Distress Markers over the tissue wrap and use your finger to smudge.
 Use a bright colour distress marker to highlight areas as desired. Cover in another layer of glue n seal. The inks will wick and change colour, (I love this bit). Once dry spread texture paste through a stencil with a palette knife.
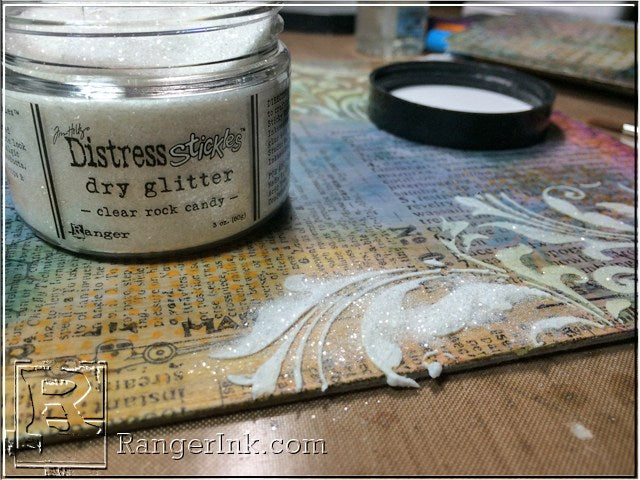 Immediately cover with Distress Glitter. Allow to air dry before shaking off the excess.
 Dab Picket Fence distress paint to your craft mat and generously spritz with your mister bottle. Load up a paintbrush with the paint and flick over your background.
 Stamp a butterfly onto watercolor cardstock with Jet Black Archival Ink. Scribble Distress Markers onto your craft sheet and spritz with a mister bottle. Watercolour the butterfly and then spritz again getting the cardstock really wet.
 Quickly, while the cardstock is still wet, use the distress marker spritzer tool, (without a marker), to push the colour over the image with puffs of air. Dry with a heat tool and then cover in Glue n Seal and dry again. Colour around the butterfly with distress markers and spread the marker colour with your finger, (same technique as earlier). Continue adding colour until you are happy with the background. Use black soot distress marker to around the edges of the butterfly and smudge to give definition. Scuff the edges and apply walnut stain distress ink with a blending tool.
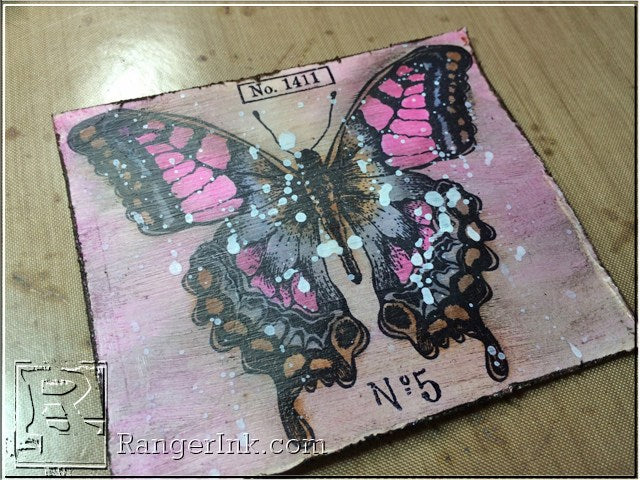 Using the same paint flick technique with picket fence distress paint, over the butterfly. Stamp some images using the correspondence stamps and allow to air dry.
 Measure the back of the base and mark 0.5 inches from the top and 1inch from each side and punch holes ready to thread ribbon through to hang later. Spritz crinkle ribbon with distress spray. I also used Weathered Wood (not pictured) later on to colour match the ribbon to the background.
 Gather some findings to decorate. I chose these various Tim Holtz Idea-ology pieces.
 Cover the metal findings with picket fence Distress Paint and allow air dry until tacky, then rub with a cloth to remove some of the paint.
 Pull the paper off the cardboard to expose the corrugated card. Swipe picket fence distress paint over the cardboard and allow to dry. Cover with a layer of distress crackle paint and allow to dry. Once completely dry, distress the edges using the Tim Holtz Paper Distresser. Apply Walnut Stain Distress Ink to the edges with an ink blending tool. Swipe a little ink over the crackle glaze to highlight the cracks.
 Assemble your wall hanging. Use a hot glue gun over the parts of the chicken wire that touch the corrugated card, (the glue will be hidden by the butterfly card).
 Attach the butterfly card, thread the ribbon through the holes, tie a knot at one end and secure over a double bow at the other. Add the altered metal findings. Hang and enjoy!


