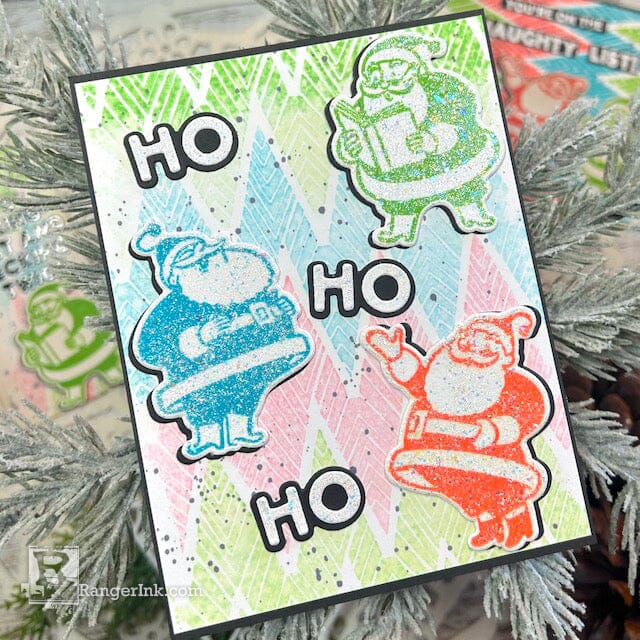
Upgrade your holiday cards with Stickles Glitter Gels! In this festive tutorial, Kimberly Boliver makes Santa sparkle with vibrant colors and dazzling cheer. Add a touch of magic to your Christmas greetings!

Make your Santas Sparkle with Stickles Glitter Gels by Kimberly Boliver
- Materials
- Instructions
Instructions
I love adding sparkle that doesn’t flake off when you touch it. Stickles Moon Dust Glitter Gel is perfect for adding that touch of glitter that will stay right where you put it! Follow along to see how I make these Santas sparkle!

Step 1: Using the Make Art Perfect Stamp Positioner, stamp three Santa images from the Simon Hurley create. Silly Santas Stamp Set on Wendy Vecchi Perfect Cardstock using Vivid Chartreuse, Coastal Coral, and Aquamarine Archival Inks.

Step 2: Spread an even and thin layer of Stickles Moon Dust Glitter Gel over all three Santas using a Tim Holtz Palette knife. Put this to the side to dry completely.

Step 3: Alternate Vivid Chartreuse, Aquamarine and Coastal Coral Archival inks on the Simon Hurley create. Funky Chevron Background. This is easy to do because the different layers peel apart to add the ink and then place it back on the acetate sheet. Once you have all the layers inked up, press a 5 1/4” x 4” Wendy Vecchi Perfect Cardstock over the top of the background stamp. This step is just to remove a layer of ink. Save that panel for another project.

Step 4: Next, gently spritz the chevron background stamp with 91% rubbing alcohol to get a second generation print by pressing a new 5 1/4” x 4” piece of Perfect Cardstock over the background stamp. Carefully lift it up so you do not smear the ink.

Step 5: Tap a small amount of Jet Black Archival Ink on the Perfect Stamp Positioner and lightly spritz with alcohol to make it fluid. Load a Ranger Artist Brush with the ink and tap it over the card panel to give it some splatter.

Step 6: Die cut the Santas using the coordinating Simon Hurley Create. Silly Santa dies. Using some of the white space between the Santas that has dried stickle gel, die cut three “ho’s” out also.

Step 7: Die cut the same three Santa images out of Tim Holtz Distress Black Heavystock as well as the shadow die for the Ho Ho Ho. When adhering the Santa to the black cardstock, adhere it off to the side slightly so you can see a small amount of the black showing on the side. It will give a slight shadow look to the Santas.

Step 8: The final step is to attach the pieces to the panel and card base. Stagger the Santas and the Ho Ho Ho on the stamped background panel. Then adhere the panel to a 5 ½” x 4 ¼” card base cut from Tim Holtz Distress Black Heavystock.


 My name is Kimberly Boliver. I am a south Jersey Girl now living in Delaware. I love the beach and paper crafting in my downtime when I am not working as a Security Officer. I have been hoarding, I mean crafting in my craft room for over 25 years and love sharing what I have created with others. I am most active on Instagram @KimmieB16, but you can find me on YouTube as well as my blog.
Your Cart
- Choosing a selection results in a full page refresh.


