by Aida Haron

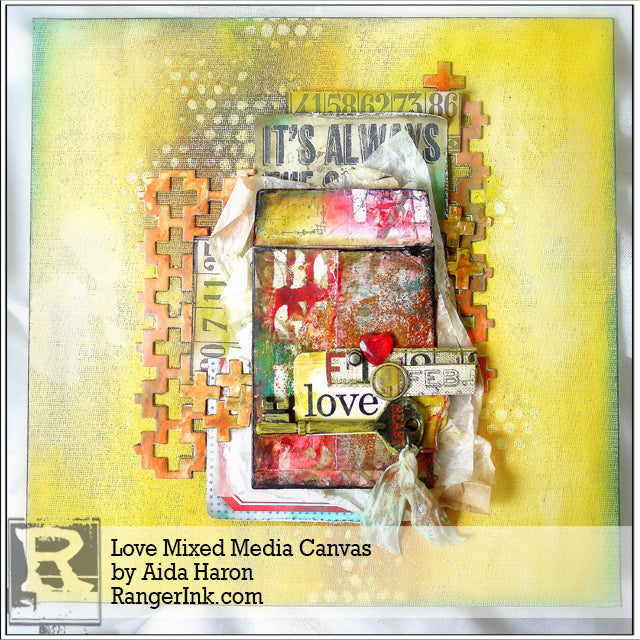
Love Mixed Media Canvas by Aida Haron
- Materials
- Instructions
- Tim Holtz® Distress Glitter: Rusty Hinge
- Tim Holtz Distress® Rock Candy Crackle Paint
- Tim Holtz® Distress Ink Pads: Gathered Twigs
- Tim Holtz® Distress Crayons: Vintage Photo, Walnut Stain, Rusty Hinge, Festive Berries, Peacock Feathers, Twisted Citron Picket Fence, Antique Linen
- Ranger Multi-Medium Matte
- Ranger Heat it™ Craft Tool
- Ranger Non-Stick Craft Sheet™
- Ranger Ink Blending Tool & Foam
- Dina Wakley Media Palette Knife
- Tim Holtz Distress® Sprayer
- Tim Holtz® by Stampers Anonymous Stencil : Cargo, Bubble
- Tim Holtz Alterations by Sizzix – Pocket Envelope, Frameworks Crosshatch dies
- Tim Holtz idea-ology – Wildflower and Dapper paper, Journal Card, Plain Tissue Wrap, Pocket Cards, Ruler Ribbon, Mirrored Heart, Brads, Screw Eyes, Heart Key, Tiny Attacher.
- Pre-Gessoed Canvas 10x10”
Instructions

Hi everyone, I am Aida and here today with a layered canvas using a mix of mediums including the newly released Distress Crayons. The Crayons are perfect for my style as I love blended backgrounds with colour gradients reminiscent of old, faded walls with years of paint layers.
Distress Crayons have a creamy texture much like lipstick, and are water reactive. Once dried, it is permanent to touch. You can use the Heat Tool to gently dry it, or leave it to dry on its own. In the creamy state on paper surfaces, you can use your finger to smudge it or move it around. You can wet the Crayons, then with a brush, pull at the colour to move it around and blend. Coated paper, or lightly coating your paper with Multi Medium helps in this process.
Tim Holtz has a very informative video from CHA2016 here:


To me, the most interesting characteristic of the Distress Crayon is its *smudge-abiity*! I like using my fingers to blend colors and previously with Distress Paints, the smudging has to be done quickly as the paints dry really fast. With Crayons, I have the luxury of time as they take a little longer to dry, the creamy texture means they are easy to apply and they react with water to make smudging easy. If I make a mistake, all I need to do is to take wipes and swipe it off, then start again.
For this project, I’ve used the Crayons on both paper and pre-gessoed canvas.
 Step 1: Assemble the Pocket Envelope and brush the surface lightly with Matte Multi Medium. This prepping of the paper surface is important as it will ensure it stays water resistant and help the Crayons to smudge and blend more easily.
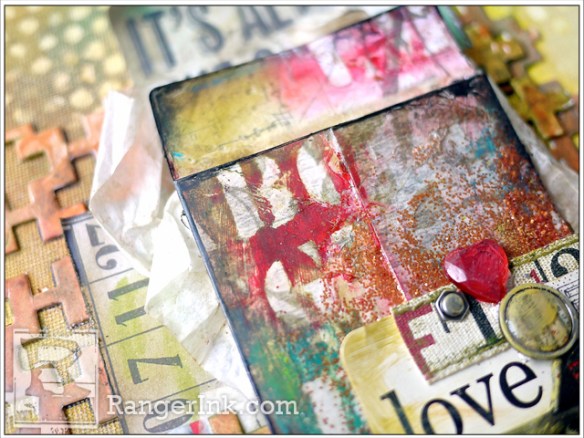
 Step 2: Next, I rubbed a combination of Rusty Hinge, Festive Berries and Peacock Feathers at random places on the Envelope. Smudge and blend the colours.
 Step 3: Lay the Cargo stencil on the Envelope.
 Step 4: Using a wet wipe, gently rub on the stencil and lift off the Crayon. This is a characteristic of the Crayon. It will react to anything wet like wipes or damp brush. The Matte Multi Medium acts as a protective layer to the paper surface.
 Step 5: This is how it will look.
 Step 6: To add more texture on parts of the surface, I lightly swiped Clear Rock Candy Crackle Paint to the right of the Envelope, then poured a small amount of Rusty Hinge Distress Glitter.
 Step 7: Dry completely and you have an Envelope with interesting colors and texture.
 Step 8: Scrunch up 2 small pieces of Tissue paper, add a light colouring of Walnut Stain Crayon, staple them together. Adhere to the back of the Envelope.
 Step 9: I painted the key with Crushed Olive Distress Paint and rubbed in Rusty Hinge Crayon into the word Heart.
 Step 10: Next, let’s work on the canvas background. I’ve used Distress Paint in Crushed Olive on the canvas and you will find this lightens to a deep yellow when mixed with water. This color will be the base seen when the Crayons (which will be layered on top) are lifted off.
Next, thickly rub on Crayons Vintage Photo and Rusty Hinge. Smudge with your fingers, and if it gets dry, use just a little water to wet it. Add more colors for subtle hints here and there. I’ve used light daubs of Mermaid Lagoon and Twisted Citron to stop the yellow from overwhelming the canvas.
 Step 11: I lifted off the Crayons in patches by laying the Bubbles stencil on the canvas and lightly swiping with wet wipes.
 Step 12: I cut 2 pieces of matt board with the Sizzix Frameworks (Crosshatch) and smudged them with Rusty Hinge.
 Step 13: Here you see how the Distress Crayon can be used to color a piece of Ribbon.
 Step 14: Add the details to the front of the Envelope and I’ve used Idea-ology Mirrored Heart, Brads, Screw Eyes, Heart Key and the Ruler fabric.
 Step 15: Adjust the colors on the canvas by rubbing in some Picket Fence. Darken the Crosshatch shape with a soft pencil to give it more definition and shadows. Ink the project with a little Distress Gathered Twigs ink to deepen the colors.

Check to see that there is sufficient light and shadow in the project, add more crayon smudges if you feel the color looks too flat.
This was a real art exploration for me as Distress Crayons are new and very different from paints or mists. I found them surprisingly easy to work with and the blending ability a huge plus for mixed media. It’s wonderful to see the colors staying vibrant even after the blending. Thank you for joining me today, have a great week creating!


