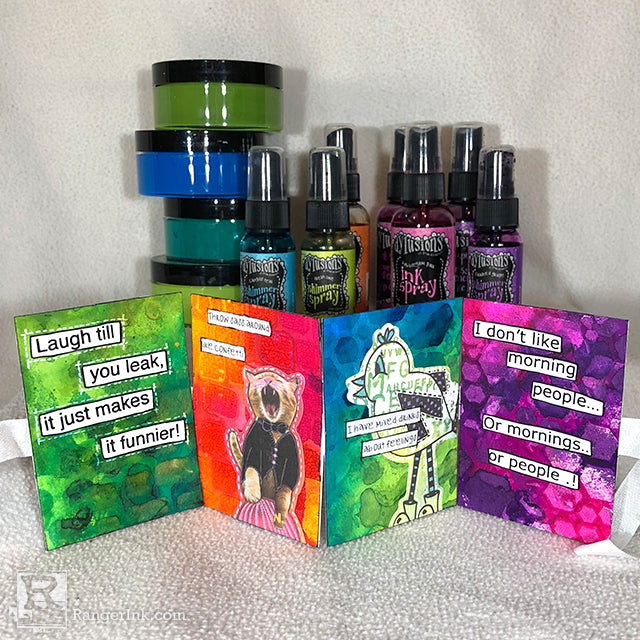
Hi and welcome to a new guest post from me, Josefine. I’m super excited to share something really fun with you – a little book of snark. I love snark, which is probably why I enjoy working with Dylusions products so much. I decided to create the book myself, using ATC cards and bind them.

Little Book of Snark by Josefine Fourage
- Materials
- Instructions
- Dylusions Paint: Polished Jade, London Blue, Fresh Lime, Vibrant Turquoise, Dirty Martini
- Dylusions Ink Sprays: Cut Grass, Vibrant Turquoise, Funky Fuchsia, Squeezed Orange, Lemon Zest, Crushed Grape, Bubblegum Pink
- Dylusions Shimmer Sprays: Fresh Lime, Calypso Teal, Bubblegum Pink, Crushed Grape
- Dylusions Paint Pens: Polished Jade, Black Marble, White Linen
- Dylusions Stencils: Small Sugar Lumps, Small Giraffe, Small Honeycomb
- Dylusions Washi Tape
- Dylusions Colouring Sheets: Borders and Quotes
- Dylusions Creative Dyary Back Chat Stickers
- Dylusions Creative Dyary Dy-Cuts
- Tim Holtz Distress® Rock Candy Crackle Paint
- Tim Holtz Distress® Grit-Paste
- Archival Ink™ #0 Pads: Jet Black
- Ranger Collage Glue Stick
Instructions


Step 2: I wanted one more textured background and I went with Grid Paste through the Honeycomb stencil. Then I put both cards aside to let them dry.

Step 3: For the third ATC I mixed Fresh Lime, Vibrant Turquoise and London Blue by simply brushing a little paint all over the card and then adding a little water and blending the colors together.

Step 4: I did the same for the last ATC, but used a lot more water to mix the colors together.

Step 5: Once the pastes were dry I colored those ATCs as well. For the one with the crackle paste, I used Bubblegum Pink, Squeezed Orange and Lemon Zest.

Step 6: And Grape Crush, Funky Fuchsia and Bubblegum Pink for the ATC with the grid paste. I liked this one as not all the parts of the grid paste took the color and kept their white.

Step 7: I also added a little texture to the two green ATCs by spraying some Cut Grass ink through the Giraffe stencil.

Step 8: There’s something that every project needs and that is a little shimmer. So I added one color of Shimmer Spray to every of the ATCs.

Step 9: Now on to creating the book. I turned all the ATCs around, lined them up and taped them down with Scotch tape. Then I adhered a piece of white ribbon onto the back and covered all of the ATCs with another, clean one.

Step 10: The backgrounds are done, the book is assembled now we are moving to the best part, adding the snark. I picked a few Dy Cuts and some snarky sentiments and started cutting and adhering them all. I also outlined a few of the sentiments, added dots and doodles around them and decorated the pages a little more.

Step 11: At the end, I added a little washi tape to the front, Wrote “Little Book of Snark” to the front and doodled a little more.

Here is the entire book in all its Snarky-ness. Perfect for a few giggles


Thanks so much for stopping by! I hope you enjoyed the little bit of fun and feel encouraged to create your own “giggle book”.


