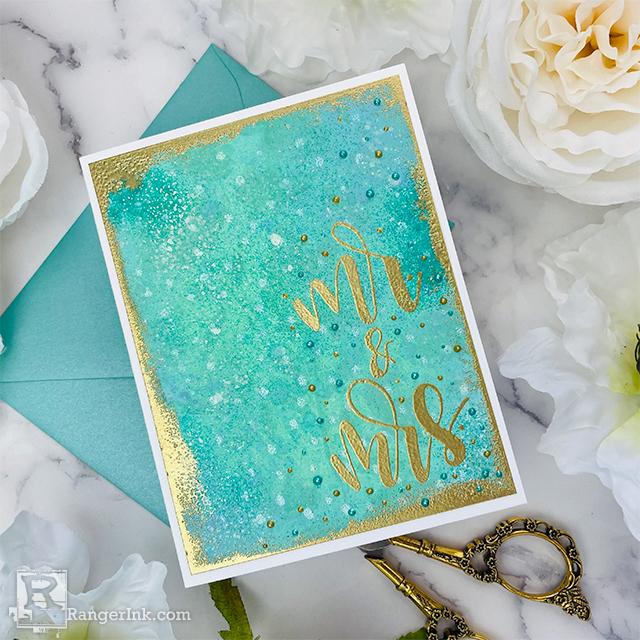
Follow along with Joy Baldwin as she makes this stunning Mr. & Mrs. Wedding card that has multidimensional layers using Letter It™ and Tim Holtz Distress® products.

Letter It™ Mr. & Mrs. Wedding Card by Joy Baldwin
- Materials
- Instructions
Letter It™ Clear Stamp Set: Wedding
Letter It™ Background Stencil: Dancing Dots
Letter It™ Embossing Pad Clear
Simon Hurley create. Background Stamp: Watercolor Blooms
Simon Hurley create. Stark White Cardstock
Tim Holtz Distress® Oxide Ink Pads: Salvaged Patina, Cracked Pistachio
Tim Holtz Distress® Oxide Spray: Salvaged Patina
Tim Holtz Distress® Embossing Glaze: Salvaged Patina
Tim Holtz Distress® Spray Stain: Picket Fence
Liquid Pearls™: Mermaid, Gold Pearl
Ranger Embossing Powder: White, Princess Gold
Ranger Mini Ink Blending Tool with Foam
Instructions
Hi, crafty friends! I have a beautiful wedding card for you today! I used a different color combination for the design and it turned out beautiful! I hope you enjoy, let’s get started.

Step 1: Place an A2 size piece of Stark White Cardstock onto the Make Art Stay-tion, place the Dancing Dots Stencil on the cardstock and ink it with the Clear Embossing Ink. Sprinkle on White Embossing Powder and heat it until it is melted.

Step 2: Stamp the Watercolor Blooms onto the stenciled background with Cracked Pistachio Oxide Ink.

Step 3: Using a Blending Tool and Foam, ink the center lightly with Cracked Pistachio and the edges with Salvaged Patina.

Step 4: Spray some Salvaged Patina Distress Oxide Spray onto the background, mainly around the edges and a little in the center.

Step 5: Spray a tiny bit of Picket Fence Distress Spray Stain onto the background.

Step 6: Trim the card panel down slightly on all sides. Use the Embossing Ink Pad and rub it onto the edges of the background panel, then sprinkle on Princess Gold Embossing Powder and heat until melted. Next, stamp the sentiment from the Wedding Stamp and gold heat emboss that as well.

Step 7: Adhere the panel to a white A2 size card base. Add Liquid Pearls around the sentiment to finish the card.


 Hi! My name is Joy Baldwin, AKA, Create it with Joy. I am a wife and a mother to 3 kids and 3 crazy animals. I homeschool my 2 youngest kids (maybe I'm crazy) and am a part-time Nail Tech. I absolutely LOVE the creative process of making cards and the tutorials that go along with them. Also, the community of wonderful crafters and the friendships that follow. Find me at