by Taylor Huizenga

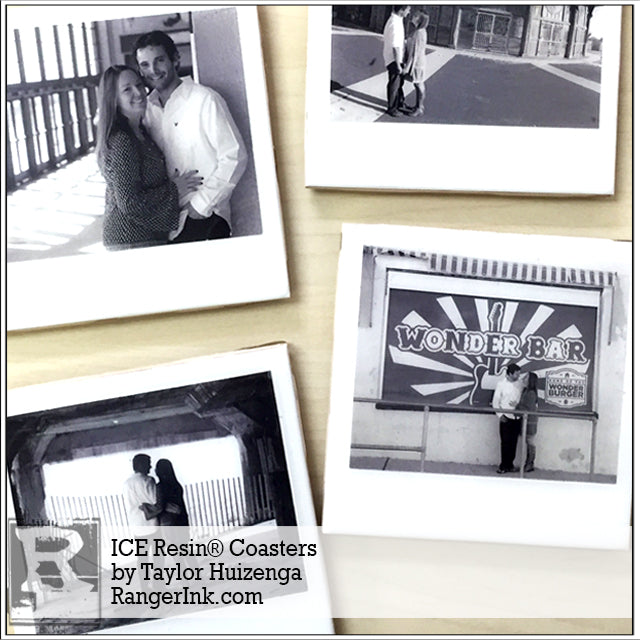
ICE Resin® Polaroid Coasters by Taylor Huizenga
- Materials
- Instructions
- ICE Resin®
- ICE Resin® Mixing Cups & Stir Sticks
- ICE Resin® Paper Sealer
- ICE Resin® Brushes
- Ranger Non-Stick Craft Sheet™
- Cardstock
- Vinyl Bumpers
- Glazed White Tiles
Instructions
 >
>
With the holiday season right around the corner, it’s time to start thinking of gift ideas for those special people in our lives. Finding the perfect gift can be difficult, so why not make a set of personalized coasters using your very own photographs this year!

Step 1: Begin by choosing the images you would like to use. For this project, I used 4 ¼” x 4 ¼” glazed white tiles, so I made the photos 3 5/8” w x 3” h. Once the images are sized, print on cardstock and cut out.

Step 2: Working on a craft sheet, coat the cut out images with ICE Resin® Paper Sealer. Be sure to evenly coat the front, back and sides of the paper. Let Paper Sealer dry completely before continuing on.

Step 3: Once your images have completely dried, grab your tiles and place them on your craft sheet. Before working on your tiles, wipe them down with a paper towel and rubbing alcohol to make sure the surfaces are clean. Paint a coat of Paper Sealer on the back of the images. Once painted, turnover and place on the tile. Repeat for each tile. Let dry.

Step 4: Mix ICE Resin® according to the instructions on the labels. Begin with adding 1 oz. of Part A Resin to your mixing cup, followed by 1 oz. of Part B Hardener. Slowly fold the two parts together until well mixed. Continue mixing thoroughly for 2 minutes until the resin becomes slightly opaque. Let rest for 5 minutes before using.

Step 5: Slowly pour a small amount of ICE Resin® into the center of your coaster. Be sure to not over pour, remember it is easier to add more if needed then it is to remove if you’ve added to much. Using your stir stick slowly push the resin out to the edges. ICE Resin® is self-doming which allows for it to be worked all the way to the edges and not overflow, as long as the resin is not over poured and there is too much.

Step 6: Once all coasters have been coated in ICE Resin® set aside. Let dry overnight.

Step 7: When your ICE Resin® coasters have fully hardened, attach vinyl bumpers to the four bottom corners of the tiles to help prevent the tiles from scratching any surfaces while using the coasters.


