by Jenny Marples

Events Diary by Jenny Marples
- Materials
- Instructions
- Letter It™ Stamp Sets: Occasions, Loves, Birthday, Celebration, Baby
- Letter It™ Stencils: Organic Stripes
- Letter It™ Stamping Ink: Set #3
- Letter It™ Embossing Powders: Brights
- Letter It™ Embossing Ink Pad
- Letter It™ Acrylic Stamp Block
- Ranger Texture Paste: Opaque Matte
- Ranger Heat it™ Craft Tool
- Dina Wakley Media Mediums and Gessoes: White Gesso
- Dina Wakley Media Acrylic Paints: Lime Green, White
- Tim Holtz Distress® Collage Mediums: Matte
- Tim Holtz Distress® Collage Brushes
- Tim Holtz Idea-ology Collage Paper: Plain
- Sizzix ScoreBoards XL Die - Book, Passport
- Sizzix Little Sizzles Mat Board
- Thin White Elastic
- Beads
Instructions

Step 1: Die cut two covers and a spine from Mat Board. Paint all the board pieces on both sides with a couple of coats of Dina Wakley Media White Gesso. Use the Heat it™ Craft Tool to dry the gesso between coats.

Step 2: Place the Letter It™ Organics Stripes Stencil on the outside of each cover piece in turn and spread Ranger Opaque Texture Paste through five of the stripes. Set aside each cover piece to air dry completely.

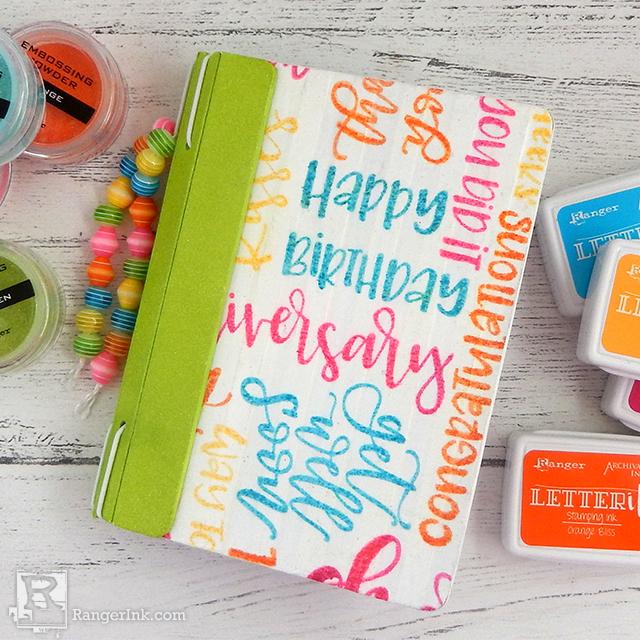
Step 3: On a piece of Tim Holtz Idea-ology Collage Paper wide enough to spread over both covers stamp a range of sentiments from the various Letter It™ Stamp Sets using the Letter It™ Stamping Ink from #Set 3.

Step 4: When the Ranger Opaque Texture Paste stencilled stripes on the covers have dried completely, paint both sides of each cover with Dina Wakley Media White Acrylic Paint. Set aside to air dry.

Step 5: Apply Dina Wakley Media Lime Acrylic Paint to both sides of the spine piece, ensuring you work the paint into the pre-scored creases on the outside and the holes at the top and bottom of the spine.

Step 6: Once the paint on the spine has dried completely apply Letter It™ Embossing Ink to the outside. Cover it in the Lime Letter It™ Embossing Powder and use the Ranger Heat it™ Craft Tool to heat set the powder.

Step 7: When the ink stamping on the Collage Paper is dry, brush Tim Holtz Distress® Collage Medium Matte over the stencilled sides of the covers. Apply the Collage Paper over it and trim the paper to fit.

Step 8: Use Tim Holtz Distress® Collage Medium Matte to stick the edges of the spine piece to the outside of the covers as shown. Clothes pegs will hold the spine and covers together in place until completely dry.
To finish the diary thread thin white elastic through the spine and tie the ends together inside. Cut pages from copier paper using the die and insert inside the diary using the elastic. Attach a string of coordinating coloured beads to the spine.


