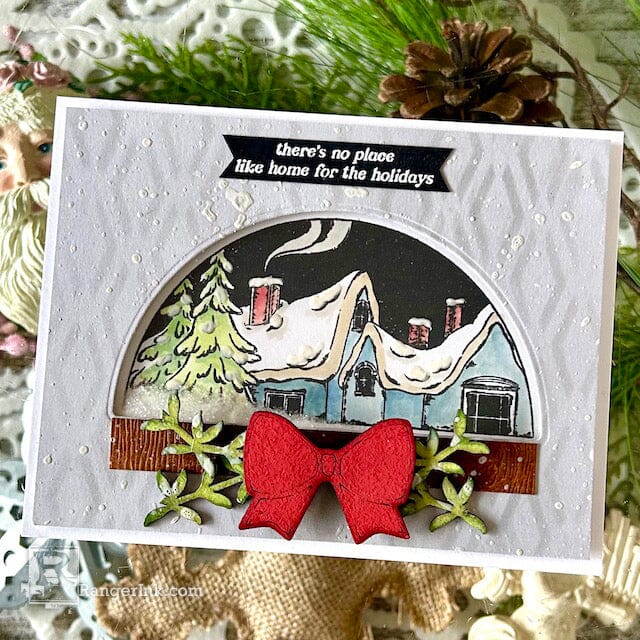
Join Kimberly Boliver in crafting winter magic with this snow dome shaker card tutorial! Explore the beauty of this enchanting snowy scene, brought to life with Ranger enamel accents.

Enamel Accents Snow Dome Shaker Card by Kimberly Boliver
- Materials
- Instructions
Instructions
Enamel Accents are the perfect addition to any snowy scene. Today I am going to show you how to use it to add snow to your image for that little extra pop on a cute snow dome shaker card.

Step 1: Using the Wendy Vecchi Make Art Perfect Stamp Positioner and Make Art Stay-tion, stamp the dome scene image from Simon Hurley create. Winter Wonderland with Black Soot Distress Ink on Wendy Vecchi Perfect Cardstock White Panel. You will need to use Black Soot Distress because later when you paint the image with Archival inks, it will not run.

Step 2: Cut a Wendy Vecchi Perfect Cardstock Grey Card in half to 4” x 5 ¼” and use the dome shape die from the matching Winter Wonderland Die set to die cut a window in the center of it.

Step 3: Cut a 4” x ½” piece of Tim Holtz Distress Woodgrain Cardstock and cut off 4 pieces of the wreath in Wendy Vecchi Make Art Wreath Chippies.

Step 4: Smoosh the wreath Chippie directly on Ranger Sea Grass Archival ink to ink it up. Next, Dab the wreath pieces in Ranger Olive Archival ink around the edges. Ink the bow Chippie in Ranger Vermillion Archival ink.

Step 5: Smoosh Ranger Coffee Archival ink on a Ranger Non-stick Craft Sheet then lightly spritz with 91% alcohol Ink to smoosh ink on the strip of woodgrain cardstock. Repeat until you get your desired darkness.

Step 6: Ink smoosh the following Ranger Archival inks on your craft sheet: Library Green, Vivid Chartreuse, Vermillion, Coffee, Shadow Grey, and Cobalt Blue. Dip your paint brush into 91% alcohol to make the ink more fluid and paint the snowy scene image using the Archival Inks.

Step 7: Use the Make Art Stay-tion to hold the Dazzling Diamond Stencil to the die cut gray card panel. Ink blend with Shadow Grey Archival ink.

Step 8: Adhere the woodgrain strip under the dome. Mix a small amount of water with Ranger White Enamel Accents and using a paintbrush splatter over the greenery and card panel. You can use the paintbrush to dab the watered-down enamel accents onto the leaf tips to add more of a snowy look. Let it dry.

Step 9: Using the white Enamel Accents directly from the bottle onto the image, add accents to the edges of the tree, the chimney, and parts of the roof. Set aside to dry completely.

Step 10: Once the enamel accents are dry, adhere a piece of clear Tim Holtz Alcohol Ink Dura-Lar to the back of the grey die cut window panel. Add Foam tape around the edge of the card panel. Then add a small amount of Distress Rock Candy Glitter to the snow scene panel taking care to keep it within the dome area so it does not leak out of the foam tape. Line up the grey dome window panel over the image and adhere the two panels together. Next, attach it to a Wendy Vecchi Perfect Cardstock White Card base.

Step 11: Using Ranger White Embossing Powder and Emboss It embossing ink, emboss the sentiment on a strip of Letter It™ Black Cardstock that you pretreated with the Ranger Anti-Static Pouch.

Step 12: Finally, trim flags at both ends of the sentiment. Adhere it above the dome. Then adhere the greenery and bow on the woodgrain strip below the dome.


Your Cart
- Choosing a selection results in a full page refresh.


