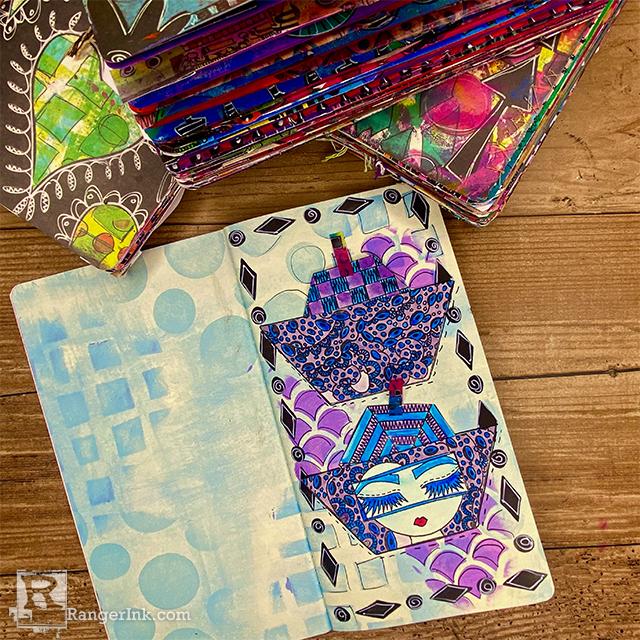
Follow along as Beth Purnell shows you how to make this colorful interactive mermaid pocket page in your Dyalog using Dylusions Paints, Stamps and Stencils.

Dylusions Dyalog Mermaid Pocket Page by Beth Purnell
- Materials
- Instructions
Dylusions Dyalog Backgrounds #2 Insert Book
Dylusions Flip Cap Paint: Black Marble, Laidback Lilac
Dylusions Dyalog Stencils: Stencil It Too, Frame It
Dylusions Creative Dyary Mini Glue Stick 3 Pk
Dylusions Paint Pens: Black Marble, White Linen
Dylusions Cling Mount Stamp Sets: A Heck of Hexies, A Head Start
Dylusions Ink Spray: Laidback Lilac, London Blue, Cherry Pie
Dylusions Mixed Media Cardstock or page from Dylusions Creative Large Journal
Dylusions Washi Tape Set #6
Dylusons Dyalog Clear Stamp Sets: Numerology, Whatever
Ranger Archival Ink Pad: Jet Black
Ranger Mini Ink Blending Tool with Foam
Other:
Scissors
Instructions
Hi, Everyone!! Today I have created a mermaid pocket page in the Dylusions Dyalog. I love pockets, tags, and hidden messages. I also adore the Dyalog sytem. I use my Dyalog as a monthly art journal/diary. I add something that captures the day on each page. On this page I recorded the date and the best part of the day on the back of tags and put them in pockets I created from stamps.
I hope you enjoy this project!!

Step 1: Pick a cool color page in the Dylusions Insert Book Background #2.

Step 2: Use Dylusions Dyalog stencil Stencil it To, Dylusions Laidback Lilac and Blending Tool to add mermaid scales to page in three areas.

Step 3: With the Frame It stencil, Dylusions Black Marble paint, and blending tool add the diamond and circle border around the entire border.

Step 4: Stamp the mermaid head from Dylusions stamp set A Head Start and two patterned hexagon stamps from Heck of Hexies stamp onto Dylusions Mixed media paper.
Color stamps with Dylusions Ink Spray in Laidback Lilac, London Blue and Cherry Pie. Cut stamps along borders.

Step 5: Cut mermaid head in half and add washi tape handle to smaller patterned hexagon images.

Step 6: Adhere mermaid head to page with Dylusions glue stick making sure to only glue a small portion along the bottom and sides. Leave the top open, this is where your tags will be placed.

Step 7: Decorate the back of the patterned hexagons. Use the Dylusions Dyalog stamps in Numerology and Whatever with Ranger Archival Ink to add the day and month to the back of one of the patterned hexagons. Add your own personal message about the day on the back of the second tag. My daughter and I were inking in our journals, so I added a photo and message to the back of my second tag. This is definitely a memory I will always treasure!!

Step 8: Doodle time!! Outline the mermaid head pockets, doodle around the mermaid scales and background patterns with Dylusions Paint Pen in Black Marble. Use the White Linen Paint Pen to add doodles to border.

Step 9: Put hexagon patten tags into mermaid pockets. Enjoy lasting memories.


