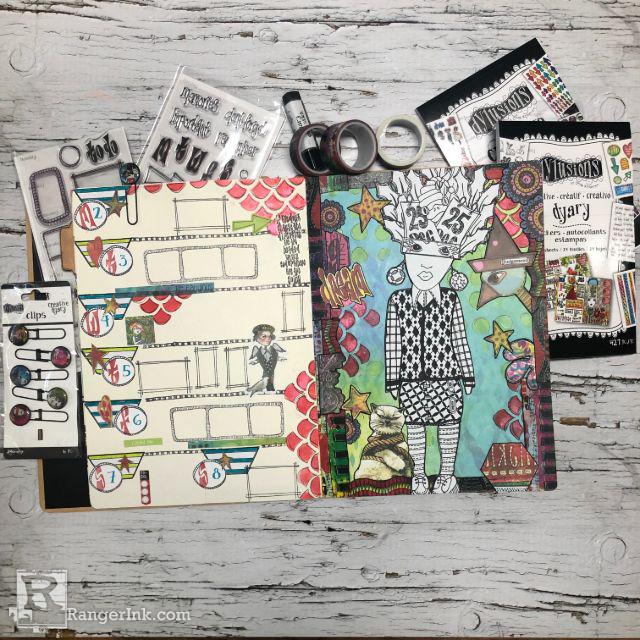
Denise Lush shows you how to create this fun Creative Dyary layout using a variety of Dylusions products to get a head start on your weekly planning ritual.

Dylusions Creative Dyary Dream Layout by Denise Lush
- Materials
- Instructions
Dylusions Creative Dyary
Dylusions Cling Mount Stamps:Hats off to Christmas, Tree Topper, Black Sheep, The Ties the Limit
Dylusions Stencil: Fishtails, small
Dylusions Collage Sheets: Set 1
Dylusions Collage Sheets: Christmas
Dylusions Shimmer Paint: Postbox Red
Dylusions Ink Spray: Calypso Teal, Fresh Lime
Ranger Archival Ink Pad: Jet Black, Vermillion
Dylusions Mixed Media Palette: Calypso Teal
Creative Dyary Tape Strips
Creative Dyary Stickers
Creative Dyary Stickers, Collection 2
Dylusions Creative Dyary Stamps Set
Dylusions Creative Dyary Stamps, Set 2
Creative Dyary Clips
Dylusions Creative Dyary Mini Glue Sticks
Dylusions Washi Tape #4
Other:
scissors
Black paint pen
Stabillo All pencil
Instructions
Whether you are a planner or a memory keeper, having the spread ready ahead of time makes things so much easier. Follow along to get ready for your week!

Step 1: In your Creative Dyary, find this spread or use whatever page is next. To start, use some Postbox Red Dylusions Shimmer Paint through the stencil Fishtails. Do so on both pages to tie them together.

Step 2: Stamp the images shown from the Dylsuions Stamps Sets Hats Off to Christmas, Tree Topper, Black Sheep and The Ties the Limit, and cut them out. Stamp and cut 7 of the half hexagons.

Step 3: Find these collage images from Dylusions Collage Sheets Set 1 and Christmas. You can use any random collage images from any of the sets. They don't need to make sense or tie into anything else. The small hearts and stars were chosen purposely for the planner side of the spread.

Step 4: Piece your stamped images together as shown.

Step 5: Using the collage images and Dylusions Washi Tape, create a border around the background page. Glue down the half hexagons as shown on the planner page.

Step 6: To create the days for the planner page, stamp the circle from Dylusions Creative Dyary Stamp Set in Jet Black Archival Ink. Stamp, inside the circles, the letters for the days of the week from Dylusions Creative Dyary Stamp Set 2 in Vermillion Archival Ink and the numbers from Dylusions Creative Dyary Stamp Set in Calypso Teal Archival Ink. Cut them out.

Step 7: Add some images from the Dylusions Creative Dyary Stickers and Dylusions Creative Dyary Stickers Set 2 to decorate your page. To seperate the days of the week stamp lines using Dylusions Creative Dyary Stamp Set 2. You may also use strips from the Creative Dyary Tape Sheet.
Stamp out some journaling spots with the Dylusions Creative Dyary Stamp Set and Dylusions Creative Dyary Stamp Set 2. You may also use any Dyalog stamps you have.
Add the stars and hearts to the half hexagons and also add some stars to the collage side so the two pages have another common element.

Step 8: If you wish, trace around your collage and stamped images with a black paint pen. For something a little less bold, use the stabillo all pencil (used here to trace around the Fishtails stencil).
A Dylusions Creative Dyary Clip is a great embellishment to keep your place in the Dyary for easy access.
Your spread is now complete and ready for the week! Happy planning!


 My name is Denise Lush and I live in Ontario, Canada. I love to create and want to try ALL the things!!! I love to work with bright colors but I also love grungy layers! As long as my hands are getting inky and painty, I'm a happy girl. I also love sharing what I love to do and inspire others to play and have fun. You can find process videos on my YouTube channel
