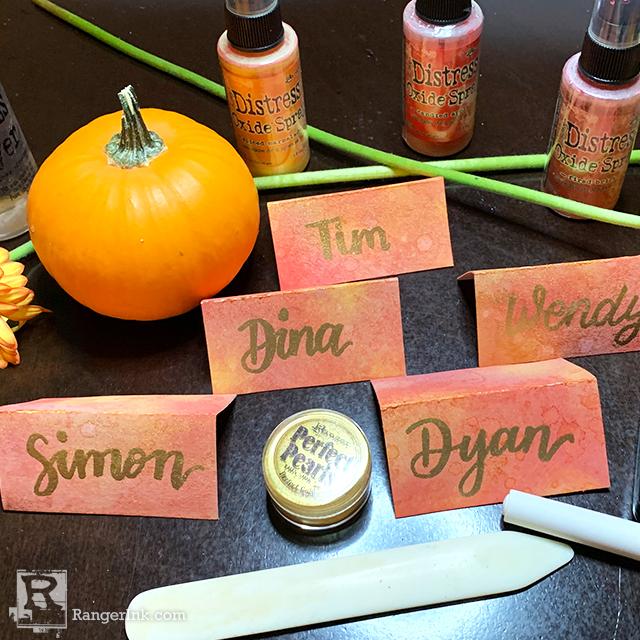
In this tutorial, combine inks and stamps to create layered backgrounds perfect for turning into Thanksgiving Place Cards. Use Letter It Medium Pens with Embossing Powder to easily write names of guests. These place cards will dress up any Thanksgiving tablescape!

DIY Thanksgiving Place Cards by Julie Faherty
- Materials
- Instructions
-
Letter It™ White Cardstock Panels
Tim Holtz Distress® Oxide® Sprays: Fired Brick, Spiced Marmalade, Mustard Seed, Candied Apple
Tim Holtz Distress® Sprayer
Simon Hurley create. Background Stamps: Flower Garden, Classic Flannel
Simon Hurley create. Dye Ink: Traffic Cone
Ranger Heat It Craft Tool
Ranger Bone Folder
Ranger Anti-Static Pouch
Letter It™ Medium Pen Set 1: Bullet Tip
Embossing Powder: Princess Gold
Perfect Pearls: Perfect Gold
Ranger Ink Non-Stick Craft Sheet
Instructions
Step 1:
Step 2:
Step 3: Spritz Simon Hurley create. Classic Flannel background stamp with water.
Step 4: Lay background over stamp and blot with paper towel. Let dry.
Step 5: Ink Simon Hurley create. Flower Garden background stamp with Simon Hurley create. Traffic Cone Dye Ink pad.
Step 6: Press background into background stamp to transfer image. Let dry.
Step 7: Cut and fold backgrounds into place cards.
Step 8: Dust card with a Ranger Anti-Static Pouch. Write names of guests using Letter It Medium Pen- brush tip.
Step 8: Sprinkle with Princess Gold Embossing Powder and tap off excess powder. Melt powder using a Heat It Craft Tool.
Step 9: Brush cards with Perfect Pearl Perfect Gold powder and mist with water using the Distress Sprayer.
Follow along as Julie Faherty shares how she creates these simple DIY Thanksgiving place cards.


