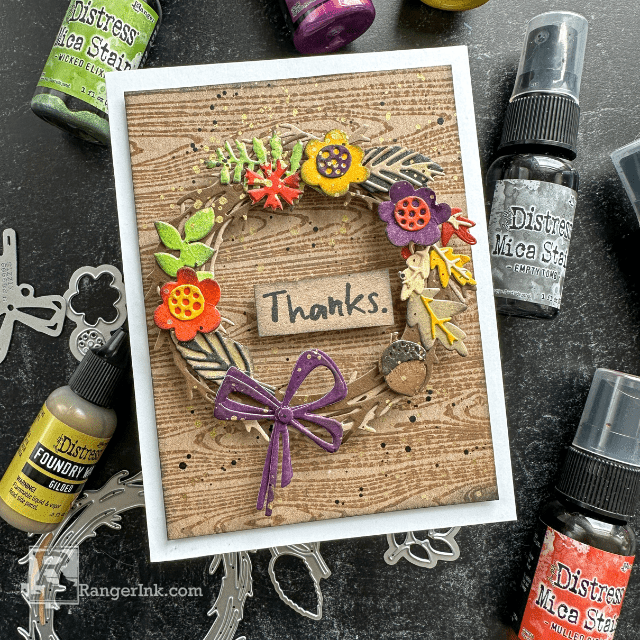
Embrace the upcoming season with this stunning fall card by Cheiron Brandon, created using Tim Holtz Distress Halloween Mica Stains! These seasonal stains add the perfect shimmer and color to your autumnal projects.

Distress Mica Stain Fall Card by Cheiron Brandon
- Materials
- Instructions
Tim Holtz Distress® Gilded Foundry Wax Kit #1
Tim Holtz Distress® Ink Pad Black Soot
Tim Holtz Distress® Flip Top Paint Black Soot
Tim Holtz Distress® Archival Ink™ - Black Soot
Ranger Artist Brushes
Tim Holtz Distress® Watercolor Cardstock
Tim Holtz Distress® Sprayer
Ranger Heat It™ Craft Tool
Tim Holtz Stampers Anonymous Cling Mount Stamp Abstract Florals
Tim Holtz Alterations by Sizzix Thinlits Die Set Vault Foliage Wreath
Other:
Tim Holtz Cling Mount Stamp Lumberjack
Splat Box
Hi there! It’s Cheiron Brandon and I am back with another fun tutorial using Tim Holtz Distress products. I know it’s still summer where I am but I always love to think about my fall projects in the summer. I am always excited for the Seasonal colors of Distress even though I use them all year long, especially the Distress Mica Stains. I have the entire fall palette ready to play with today and I’ll show you one of my favorite time saving techniques for working with the Mica Stains and Sizzix die cuts. I like to make little Mica Stain Papers to have on hand to create die cut projects whenever the need arises!

Step 1: Gather up your Mica Stains, Distress Watercolor Paper (I cut mine to 2 ½ x 4 ¼) and a Splat box. You can find this color chart on the Ranger Ink website (under organize your Ranger products).


Step 2: Inside of your Splat Box, spray your papers with a bit of water (this will help the stain flow on the paper), then spray the papers with Distress Mica Stain. I like to do a few of each color while I am doing this process. I used ALL of the colors, but you can narrow down your color palette if you like.

Step 3: Cut your leaves and floral pieces out from the Mica Stain Papers. For the wreath pieces I used regular card stock but you could make Mica Stain Papers from these too.

Step 4: Ink the edges of your cut pieces with Black Soot Distress Ink and a tiny blending tool to make them pop.

Step 5: Lay down the wreath and adhere your cut floral and leaf pieces arranging them as you go. I popped some up with foam tape for extra interest.

Step 6: Stamp the sentiment from the Abstract Florals stamp set onto a piece of Distress Kraft Heavystock using Black Soot Distress Archival Ink. Trim to size and ink the edge with Black Soot Distress Ink.

Step 7: Mix some Gilded Foundry Wax with Isopropyl Alcohol and use a paintbrush to splatter it on your card. Let dry or dry with heat tool. I covered my sentiment with a piece of scrap paper while doing this.

Step 8: Splatter some Black Soot Distress Paint onto your card. Let dry or dry with heat tool. Mount your panel onto a notecard.

I hope you try creating some of these Mica Stain Papers for yourself and using them on your cards! They are so great to have on hand for die cutting any time of year.
Your Cart
- Choosing a selection results in a full page refresh.


