Instructions
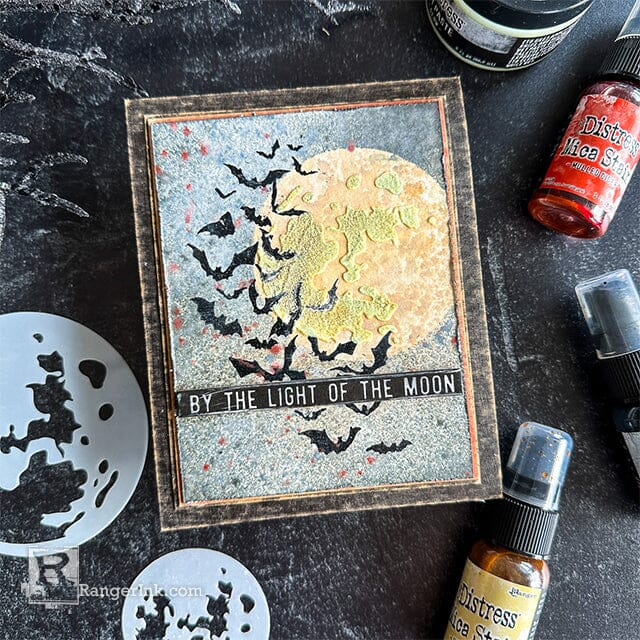
Hi there crafty friends! It’s Cheiron Brandon here and I am back with a new project to share with you using some of the brand new Distress Halloween Mica Stains and Glow Grit Paste. If you have not seen this paste in action, the glow is ureal! I can not wait to use it on all my Halloween cards. This card features some stenciling, embossing and layering to get a fabulous glow in the dark moon! Remember to shake your stains to mix the mica, I find it best to move them side to side like ringing a bell. I store them on their sides while working with them.

Step 1: Gather your supplies: you will need Distress Watercolor Cardstock, Distress Mica Stains (Mulled Cider, Phantom Mist and Unravelled), Distress Glow Grit Paste, Hickory Smoke Distress Archival Ink, Black Soot Distress Ink, Ranger Embossing Ink, Ultra Fine Black Embossing Powder, Tim Holtz Stampers Anonymous Stamps and Tim Holtz Stampers Anonymous Moon Masks.

Step 2: Before we begin creating, here is a peek at the Moon Masks if you have never used them. The set comes with 3 sizes of masks (the solid circles) and 3 coordinating stencils to add dimension or shading to your moon. We will achieve this with inking and Distress Glow Grit Paste.

Step 3: Inside of a Splat Box, spray a piece of Distress Watercolor Cardstock with Unravelled Distress Mica Stain. Let dry or dry with a heat tool.


Step 4: Add your mask to the panel (I backed mine with a piece of sticky grid) and then spray the Phantom Mist over the panel. Let dry or dry with a heat tool.

Step 5: Unscrew the Mulled Cider Distress Mica Stain and use the sprayer to splatter some over the panel. Remember to put the top back and screw it on tightly when you are finished! Let dry or dry with a heat tool.

Step 6: Using a foam blending tool, add shading to the moon using Hickory Smoke Distress Archival Ink. We are using Archival Ink here, so it won’t bleed later when we add the paste.

Step 7: Stamp and emboss the bats from the Unraveled stamp set in Black Super Fine Detail Embossing Powder.

Step 8: Distress edges of panel with a Distress Edger and ink with Black Soot Distress Ink.


Step 9: Align moon stencil onto card where you previously stenciled the Distress Archival Ink. Using a palette knife, apply Distress Glow Grit Paste through the stencil. I used several pieces of scrap paper to mask off my card. Let the paste dry and wash your stencil (I did use a craft pick when the paste was wet to very carefully scrape off the paste that was covering up the stamped bats).

Step 10: Cut some Kraft Stock Layers for your card and Distress them using a foam blending tool with a sanding disk. Adhere the panel to the layers.

Step 11: Adhere a sentiment from the Baseboards Halloween to complete your card.

Step 12: Thought you might like a little peek at the GLOW this paste gives. Here is a picture of the moon on the card that I took from inside the closet in my house…hope you love this new Distress Glow Grit Paste as much as I do!
I hope you had fun making this project. I can’t wait to give all my cards a “Glow Up” for Halloween!


