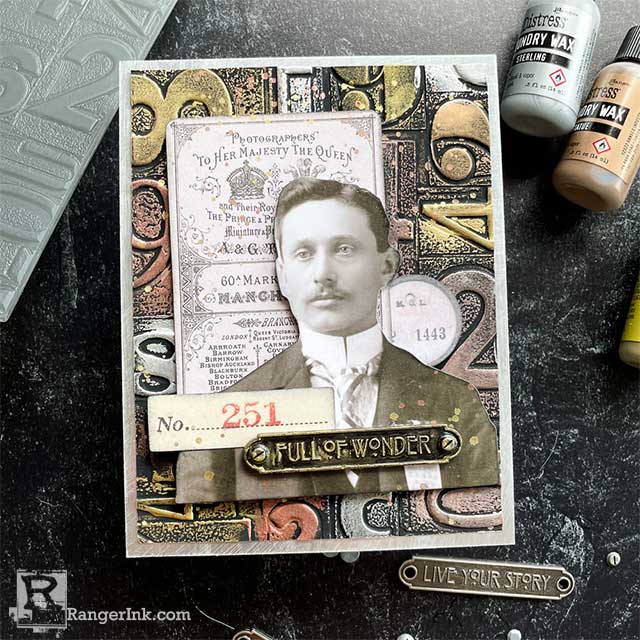
In this tutorial, Cheiron Brandon shows you multiple ways to use Tim Holtz Distress® Foundry Wax to make this lustrous and debonair card.

Distress Foundry Wax Full of Wonder Card by Cheiron Brandon
- Materials
- Instructions
Tim Holtz® Alcohol Ink Cardstock Black Matte
Ranger Artist Brushes
Tim Holtz Distress® Flip Top Paint Black Soot
Tim Holtz Distress® Collage Medium Matte
Tim Holtz® Idea-ology Word Plaques
Tim Holtz® Idea-ology Kraft Stock Metallic Classics
Tim Holtz® Idea-ology Paper Dolls Portraits
Other:
Tim Holtz® Alterations by Sizzix Numbered 3D Textured Fade
Tim Holtz® Idea-ology Hardware Heads
Hello there, crafty friends! It’s Cheiron Brandon back with another post using Tim Holtz products. This month, I am sharing some ideas for using Distress Foundry Wax on cards.
For today’s card, I wanted to show you some of the ways I like to use Foundry Wax, to highlight textures of paper and metal elements on my cards. A few tips when using this wax, always remember to shake it well to mix it, and keep it away from your embossing tool.

Step 1: To begin, let’s gather our supplies: Foundry Wax (in all the colors, of course), Black Alcohol Ink Cardstock, a Sizzix 3D Texture Fades (I used the new Numbered), and a Tim Holtz Idea-ology Word Plaque.

Step 2: Emboss your Black Alcohol Ink Cardstock using the texture fade. I misted my paper with water a few times before I put it in the folder to make it more pliable.

Step 3: Now it’s time to add the Foundry Wax to the panel. Be sure to shake your Foundry Wax well until you hear the mixing ball. Put one color at a time onto your glass mat. I put a little dot and added the wax to the panel with my finger (you can wear gloves or use a brush if you wish).

Step 4: Continue adding the wax to all the numbers on the panel using all four colors of wax. Once you are finished, heat the wax with your embossing gun.


Step 5: Paint your Word Plaque and two Hardware Heads with Black Soot Distress Paint and dry with a Heat Tool. Add some Foundry Wax to the raised areas, and heat emboss. Set aside to cool.

Step 6: Choose some Ephemera to use on your card. I used a Paper Doll Portrait as the focal point.

Step 7: Ink all the edges of your Ephemera using Black Soot Distress Ink and an Ink Blending Tool.

Step 8: Add Foundry Wax splatter by mixing a bit of the Foundry Wax with a few drops of isopropyl alcohol. Mix it together, splatter on your project, and then heat set. I also put a piece of scrap paper over most of the Portrait Paper Doll while I did this.

Step 9: Adhere the Word Plaque and Hardware Heads with Distress Collage Medium. Let dry.

Step 10: Adhere the completed panel to a piece of Idea-ology Metallic K that has been lightly sanded. Adhere to a white notecard.


