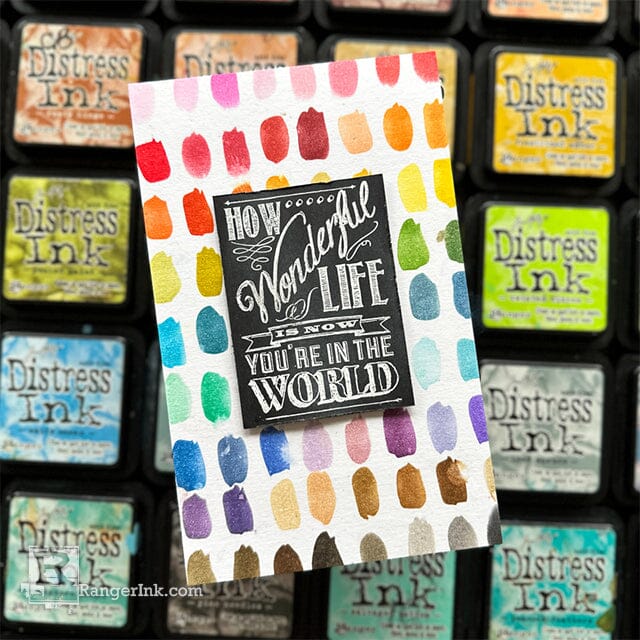
Cheers to 2024 marking 20 incredible years of Tim Holtz Distress®! Join the celebration with Cheiron Brandon as she brings the magic to life using all 73 colors of Distress Inks Pads and the new Tiny Blending Tool, in this vibrant and amazing card. Here's to two decades of creativity and color!

20 Years of Distress Celebration Card by Cheiron Brandon
- Materials
- Instructions
Tim Holtz Distress® Watercolor Cardstock
Tim Holtz Distress® Tiny Blending Tool 2pk
Tim Holtz Distress® Tiny Blending Foams
Tim Holtz Distress® Sprayer
Stampers Anonymous Layering Stencil Brush Mark
Emboss It™ Ink Pad Clear
Embossing Powder White
Ranger Heat It™ Craft Tool
Other:
Stampers Anonymous Tim Holtz Cling Mount Stamps: Random Quotes CMS182
Paper Distresser
Hello there friends! It’s Cheiron Brandon here and I am thrilled to be joining Ranger today to celebrate the 20th year of Tim Holtz Distress. This celebration has a very special meaning to me because 2004 was the first time I ever stepped into a stamp store and started taking card making classes and bought my very first Distress Inks, which I still own! I have a fun card (that requires a bit of patience) for you today using ALL the colors of Distress Ink including the newest color in the line, Scorched Timber. I am using the brand new Tiny Ink Blending Tool to make this process easier to blend through smaller spaces.

Step 1: Gather your supplies. To create the card base you will need ALL the colors of Distress Ink, Distress Watercolor Cardstock, the Brush Marks stencil, a Tiny Ink Blending Tool and a Distress Sprayer. I arranged my ink pads in color order and then put them in 9 stacks of 8 inks. I used a piece of Distress Watercolor Cardstock that was 5 ½ x 8 ½ and trimmed down at the end.

Step 2: Put a piece of blending foam onto your Tiny Ink Blending tool. I used a different piece of foam for each color family.

Step 3: Line up the Brush Marks stencil on the Distress Watercolor Cardstock. Using the Tiny Ink Blending Tool, begin adding the colors in rainbow order.

Step 4: When you get to the second row, use some tape to block off the row above and below on your stencil so there is no ink that runs over. Continue this each time you switch rows.

Step 5: Continue onto the next set of colors and don’t forget to move the tape down. I wiped my stencil off with a baby wipe before switching to the next batch of ink colors.

Step 6: Mist your completed panel lightly with a Distress Sprayer filled with water.

Step 7: Blot the panel off with a paper towel.

Step 8: Stamp and emboss the sentiment from the Random Quotes Stamp set with White Embossing Powder.

Step 9: Distress the edges of the paper using a Paper Distresser.

Step 10: Add the panel to a card base. Add the sentiment to your card using foam adhesive.
Thanks for joining me today to celebrate 20 years of Distress and the newest color of Distress, Scorched Timber. This card would be great in just a few colors too!
Your Cart
- Choosing a selection results in a full page refresh.


