by Jill Haglund

Arty Paper Doll Birthday Tags by Jill Haglund
- Materials
- Instructions
- Dina Wakley Media Stamps: Handwritten Quotes, Primitive Icons, Scribbly Insects, Collaged Hearts, All the Gals, Silhouetted Women, Scribbly Women, Handwritten Heart Quotes
- Dylusions Ink Sprays: Bubblegum Pink, Tangerine Orange, Lemon Zest, Vibrant Turquoise, Calypso Teal, London Blue, Funky Fuchsia, Crushed Grape
- Archival Ink Pads: Jet Black, Manganese
- Ranger Craft Tags
- Ranger Watercolor Paper
- Ranger Adhesive Foam Rolls
- Ranger Heat it™ Craft Tool
- Ranger Non-Stick Craft Sheet™
- Tim Holtz by Tonic: Scissors
- Tim Holtz Idea-ology: Crinkle Ribbon
- Twetty Jill Acrylic Blocks
- assorted kitchen utensils
Instructions
 I thoroughly enjoy thinking ‘out of the box’, with this in mind I have been entertained as of late to using kitchen utensils as stencils, along with a bright color pallet of Dyan Reaveley’s Ink Sprays to be creative. Here, I combine the Ink Sprays with Dina Wakley’s Media Stamps to create an edgy, yet whimsical birthday gift tag to tie onto a colorful bag or package for a family member or friend; especially an arty friend!
 PREPARE TAG: Use an ordinary kitchen ‘flipper’ as a ‘stencil’ and spray Bubble Gum Pink & Tangerine Dream Ink Spray colors through the utensil to make a pattern on a white 6.25” x 3.25” tag.
 Try a silicone baster sprayed with Tangerine Dream Ink Spray to add texture to the tag. Set aside, the tag base is complete.
 HOW-TO PREPARE THE PAPER(S) FOR STAMPING IMAGES AND WORDS:
Use a few sheets of watercolor paper as a substrate and acrylic blocks as the applicator. Spray inks, then scrape and spatter inky colors across the paper with the acrylic block. I recommend starting with light colors first to keep your papers bright.
 Add more of your favorite Dylusions Ink Spray colors and quickly scrape the inky color around the paper while it is wet. Use an acrylic block to add movement and energy to the sprayed colors. You’ll want to make sure to leave plenty of white space!
 Once the first layer is dry, try your kitchen utensils combined with Spray Inks to create stenciled textures on the papers; you must be sure to continue to leave some white areas on the paper to “pop” the lively colors. Once finished your ‘prepared background papers’ for stamping are complete and ready for stamping!
 TIME TO STAMP: On your ‘prepared background papers’, use Dina Wakley Media Cling Stamps: “Silhouetted Women” and “Scribbly Insects” for the main images.
Also stamp a few “Handwritten Quote” such as ‘Magic is something you make’ or single words from “Primitive Icons” such as ‘LOVE’ or ‘ART’ to add to the bottom of the tag.
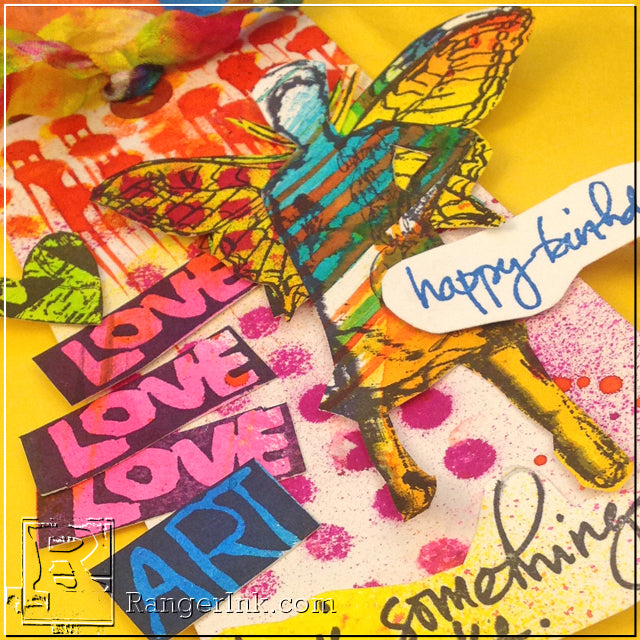
 CUTTING: Time to ‘ fussy cut’ or detail cut your favorite “Silhouetted Woman” image. To duplicate the tag above, cut out two butterflies to allow layering of the wings.
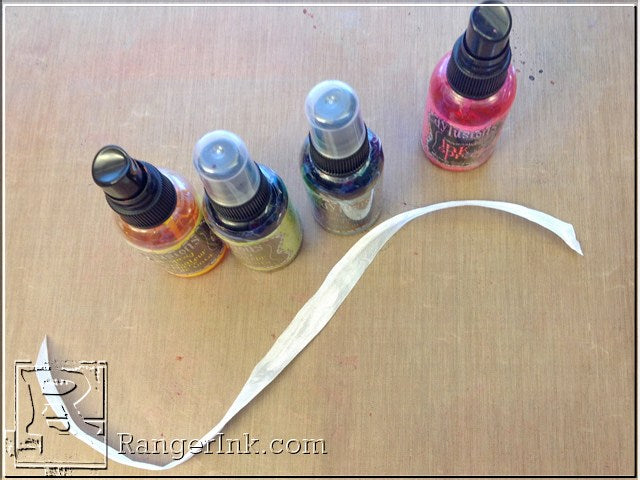
 CREATE RIBBON FOR YOUR TAG: Cut approx. 8-12”of white seam binding.
 Add color with Spray Inks. Air dry or dry with a Heat Tool.
 Cut off the frayed ends by sniping the ribbon at a slant.
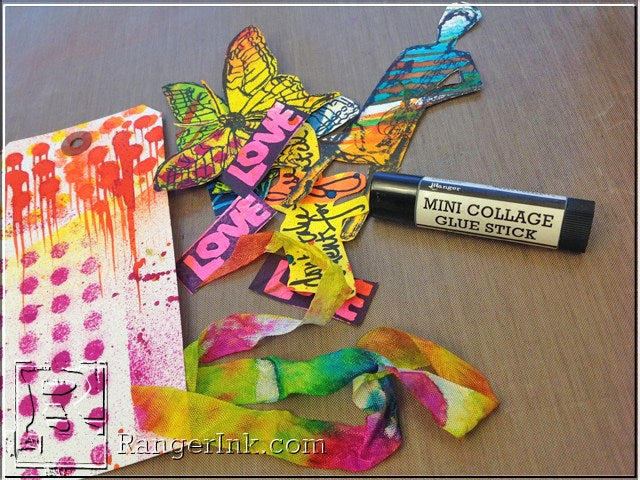
 GET READY TO ASSEMBLE THE TAG: Gather your tag, cut out ‘arty paper doll’ images, ribbon and quotes.
 Put your tag together as desired, trying different ideas for placement of favorite pieces you cut out. Notice the close-up of the layered wings. Creating your own ‘arty paper dolls’ with the pieces you make is so much fun!
The best part is there are no two ‘paper dolls tags’ exactly alike. Your tag is custom and your very own creation!
 Use a glue stick to adhere your ‘arty paper doll’ pieces and the quote to your tag.
 Add your ribbon through the tag hole.
 Use Dina Wakley’ Media: “Handwritten Heart Collage” to add a stamped ‘Happy Birthday’ greeting.
 To adhere stamped Birthday ‘greeting’ I recommend using foam tape to overlap image and add dimension. If you only need a Birthday card, this tag easily transforms into a fun and whimsical card! The bold colors appear more dramatic against black card stock and it fits perfectly on an A-7 size card. You can add a custom note inside with the Ranger White Opaque Pen.
 Want to learn more creative ways to use stencils? Join Jill in her online workshop Utensil Stencil Workshop: 12 Creative Lessons for the Brave at Art.


