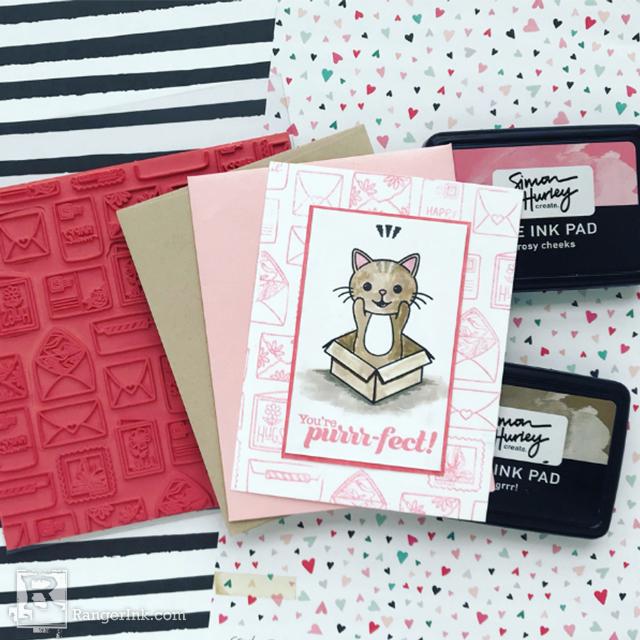
Let you're special someone know they're purr-fect with this adorable cat card for Valentine's Day. Jess Francisco shares how to use Simon Hurley create. Dye Ink, Cool Cat Clear Stamps, and Happy Mail Background Stamp to make this charming card.

You're Purrr-fect by Jess Francisco
- Materials
- Instructions
Instructions

Step 1: Cut a piece of Stark White cardstock to approximately 2.5” x 4” and mask off the bottom half. With your mask in place, stamp the standing cat image from Cool Cats in Jet Black Archival Ink. Stamp the image so that the legs are on the mask and the top of the cat is on your panel.

Step 2: On a piece of masking paper or full sticky-back post it note, stamp the same image of the standing cat. Use a pair of sharp scissors to cut out the image and then cut off the legs at the same place your stamped image is cut off. Place this mask on top of the stamped image on your card panel.

Step 3: With your mask in place, stamp the box image from Cool Cats so that the front flaps of the box meet the bottom lines of your cat’s sides. This will give the appearance that the cat is popping out of the box! Stamp the sentiment ‘You’re purr-fect!’ at the bottom of your panel in Rosy Cheeks Ink.

Step 4: Stamp the image with the three markings on your kitty’s forehead if you’d like. You can also use this above the cat’s head to make it look like ‘surprise!’ as the cat is jumping out of the box. On the larger acrylic block, press Rosy Cheeks on one side and Grrr! on the other side, then spritz with a little water from the Distress Sprayer. With the #2 paintbrush, paint the colors on to your stamped image. You can also use Woof! if you’d like a gray cat!

Step 5: Cut another piece of Stark White cardstock to 2.75” x 4.25”. Using the Rosy Cheeks ink pad, swipe the ink directly on to the cardstock around the edges to create a perfectly coordinated mat panel.

Step 6: Cut a piece of Stark White cardstock to 4.25” x 5.5”. Ink up the Happy Mail background stamp with Rosy Cheeks ink and place a piece of Stark White Cardstock on top. Hold it firmly in place and gently smooth the cardstock on to the stamp to transfer the ink evenly.

Step 7: Assemble the card – adhere the panel with your stamped images to the pink mat. Then adhere both pieces to your stamped background. Attach your card front to a white A2 sized card base and you’re done!


