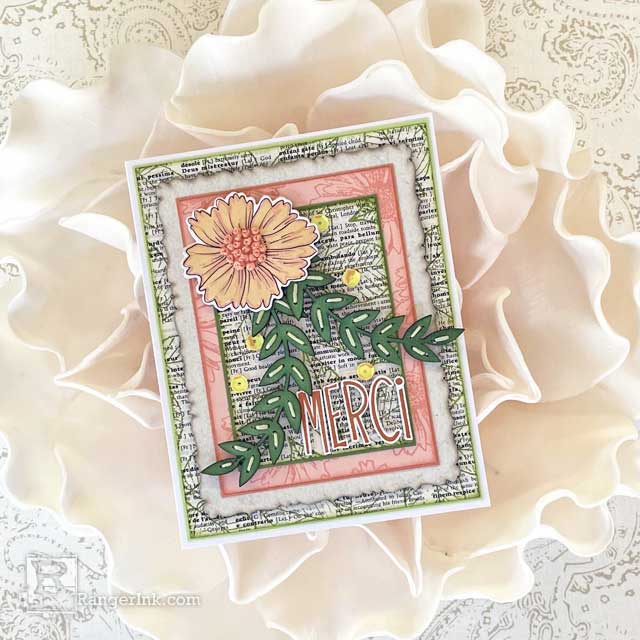
In this tutorial, Lauren Bergold shows you how to embroider on Wendy Vecchi Chippies to add texture and dimension to this lovely Thank You card.

Wendy Vecchi Stitched Chippies Card by Lauren Bergold
- Materials
- Instructions
Instructions
Wendy Vecchi's MAKE ART Chippies are sturdy, pre-primed chipboard embellishments which can be inked, stamped and painted to uniquely enhance your papercrafting projects. In this tutorial, Lauren Bergold shows you how to add even more dimension and texture to your projects by hand-stitching on your Chippies!
Hand-stitching adds an extra-special, personal touch to any card or layout, as well as being easy and relaxing to accomplish.

Step 1: Snip apart one of the half-circle shapes from the "Wreaths" set of Wendy Vecchi's MAKE ART Chippies. Use a Ranger Mini Domed Ink Blending Foam and English Ivy Archival Ink to tint both leafy pieces.

Step 2: Use a Tim Holtz by Tonic Retractable Craft Pick to pierce holes at each end of the vein lines on the chipboard leaves, taking care not to go too close to the edge. Add one embroidery floss stitch to each leaf. Tie off the floss at the back and remove any excess. Use a drop or two of Wendy Vecchi MAKE ART Perfect Card Adhesive to smooth and secure the ends of the floss.

Step 3: Trim a piece of dictionary paper to 2.5 x 3.5" and another piece to 4.25 x 5.5". Stamp the veined leaves from Wendy Vecchi's MAKE ART Country Flowers Stamp, Die and Stencil Set all over in Leaf Green Archival Ink, allowing some of the leaves to go off the edge of the panels. Lightly ink the edges in the same color, if desired, and adhere to coordinating cardstock mats.

Step 4: Stamp the solid flower from Wendy's Country Flowers Set in Sunflower Archival on white cardstock, overstamp the flower outline in Tea Rose, and diecut. Add additional outlines and details with a Letter It Black Fine Liner, if desired.

Step 5: (Optional!) Pierce 16-20 holes at the center of the flower, taking care to leave at least 1/16" between them. Working carefully, so as not to tear the cardstock, make one French Knot in each hole. When finished, tie off the floss at the back of the flower, trim the excess and use a drop or two of Perfect Card Adhesive to smooth and secure the ends of the floss.

Step 6: Trim a piece of Tea Rose cardstock to 3.25 x 4.5" and stamp the flower outline from the Country Flowers set randomly all over the panel in Tea Rose Archival Ink. Adhere finished panel to a mat of coordinating cardstock.

Step 7: Using Orange Blossom Archival Ink, Stamp "Merci" from Wendy Vecchi's MAKE ART Merci and More Stamp, Die and Stencil Set on a scrap of white cardstock then carefully cut out each letter, leaving a small outline of white.

Step 8: Assembly! Using Perfect Card Adhesive, affix the larger leafy panel to a white A6 card. Affix the smaller dictionary panel to the Tea Rose flower panel; then add this compound panel to the center of the ruffled frame from Wendy's Bases and Frames Chippies. Use Letter It Double Stick Tape to adhere the Chippie to the front of the card. With Perfect Card Adhesive, place the sentiment at the bottom right of the topmost text panel. Use your favorite strong, clear-drying adhesive to attach the stitched-leaf Chippies to the the card as pictured. With Ranger White Adhesive Foam Tape, add the stitched flower to the top left corner. Scatter a few coordinating sequins around the panel, if desired.

Step 9: Admire your handiwork, and address an envelope to send a little gratitude to someone special!


 My name is Lauren Bergold, I live in central New Jersey with my husband of 30+ years and A LOT of art supplies! My favorite medium is paper and I especially love making cards. I teach papercrafting classes, as well as collecting and compiling vintage and found papers. You can find me on my blog,