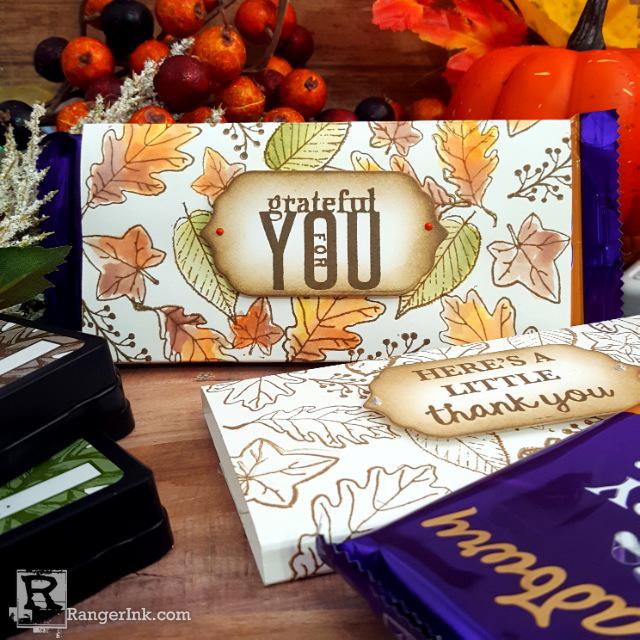
Follow along as Terri Burson shares a unique way to express your gratitude to someone by making these gorgeous fall-themed candy bar wrappers.

Wendy Vecchi Gratitude Candy Bar Wrappers by Terri Burson
- Materials
- Instructions
Wendy Vecchi Blendable Dye Ink Pads: Orange Blossom, Sunflower, Fern Green, Tiger Lily, Potting Soil
Wendy Vecchi Perfect Card Adhesive, 2oz
Wendy Vecchi MAKE ART Stay-tion Craft Sheet 9"x9"
Wendy Vecchi MAKE ART Liquid Pearls: Orange Blossom
Ranger Liquid Pearls: Platinum Pearl
Wendy Vecchi Archival Ink™ Pad: Potting Soil
Wendy Vecchi MAKE ART Stay-tion
Wendy Vecchi MAKE ART Perfect Stamp Positioner Set
Ranger Adhesive Foam Tape White, 2 yards
Tim Holtz Distress™ Waterbrush Detailer Tip
Ranger Heat It ™Craft Tool
Ranger Ink Mini Blending Tool
Ranger Mini Ink Blending Tool Dome Replacement Foams
Wendy Vecchi Perfect Cardstock White Panels 10pk
Other:
Trimmer
Manual Die Cut Machine
Lightweight Cardstock
Score Board and Scoring Tool
Instructions
The season of Thanksgiving and gratitude is fast approaching, as is World Kindness Day. I thought it would be fun to share some random acts of kindness by handing out some sweetness in the form of deliciously wrapped chocolate bars. These gratitude candy bar wrappers are super easy to create and are a thoughtful, shareable gift to teachers, friends, family, or maybe your favorite server! I’ll be showcasing 2 examples, one of which can be done in under 10 minutes and you can even get the kids involved!

Step 1: Trim a section of lightweight cardstock that measures 7.5 x 6 inches. This will cover a large, 6 x 3-inch candy bar. Measure a 3-inch center, then score ¼ inch sections lengthwise on both sides of your center, as shown in the graphic above.

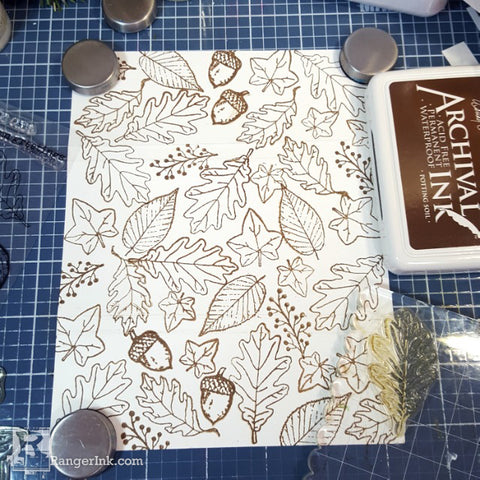
Step 2: To create the first sample, apply free handed stamping to your entire sheet using Wendy Vecchi Potting Soil Archival Ink using the MAKE ART Stay-tion, Perfect Stamp Block, and various leaf and foliage elements from the Autumn Greetings and Country Flowers stamp sets. At this point, you can create your label, fold, and adhere your wrapper and complete your project in under 10 minutes.

Step 3: For the second sample, follow the steps above but color in your leaves with a variety of Blendable Dye Inks (Orange Blossom, Sunflower, Fern Green, Tiger Lily, Potting Soil) and the Tim Holtz Waterbrush Detailer Tip. Simply press your ink pad onto the Wendy Vecchi MAKE ART Craft Sheet and express a droplet of water into the mix, then begin coloring. Get creative and color with multiple inks in the various leaves. Dry with the Ranger Heat It Craft Tool.

Step 4: For the labels, use the label die from the Merci & More Stamp Set and cut with your manual die cut machine using cardstock or the Wendy Vecchi Perfect White card panels. Blend around the edges using the Ranger Mini Ink Blending Tool and Domed Replacement Foams with the Potting Soil Archival Ink.

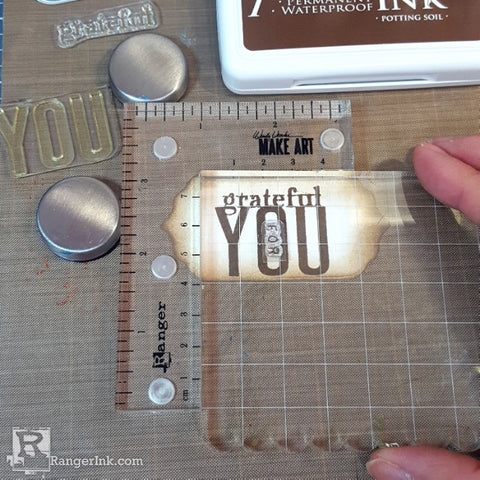
Step 5: Stamp the first sentiment by incorporating words from the Autumn Greetings Stamp Set and Let’s Shop set. Begin by centering the large word “YOU” near the bottom edge and stamp with Potting Soil Archival Ink, using the Perfect Stamp Positioner and block with the Stay-tion. Because this is such a small area to work with, you may wish to anchor your positioner with magnets to avoid slippage. Stamp the word “Gratitude” (from the Autumn Greetings set) directly above so that it appears to be attached to the “YOU.” Stamp the word “for,” also from the Autumn Greetings set, in the center of the “You” vertically.
The second sentiment from the Let’s Shop Stamp Set should be created in the same manner with the exception of masking part of the sentiment with tape.

Step 6: Fold the wrapper and seal the overlapped edge with Wendy Vecchi Perfect Card Adhesive. Press and hold for a minute. Clean up any seepage with a paper towel.

Step 7: Add some decorative Liquid Pearls to the label and apply to the center of the wrapper using Ranger Adhesive Foam Tape.

Step 8: Because the sleeves are removeable and reusable, let your recipient know. They may wish to pay it forward and share some kindness too!


 Hello, my name is Terri Burson. I’m a native New Yorker, transplanted in the deep South. My husband and I are parents to a 19 year old son and numerous fur babies. I’m an avid card maker but love dabbling in many forms of art and mediums. You can find me on most social media platforms