By Wendy Vecchi

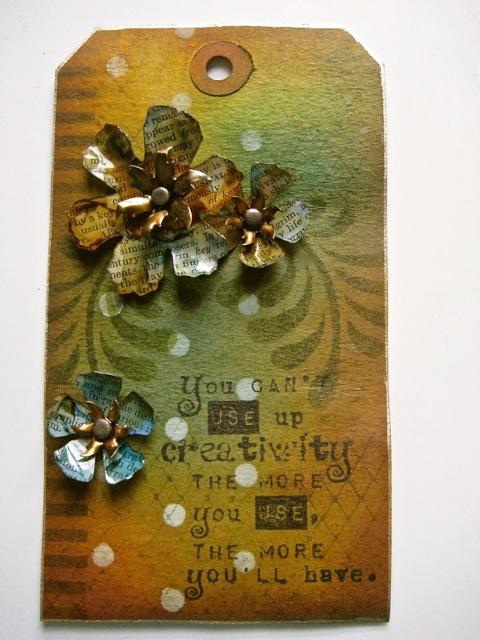
Wendy Vecchi Archival Creativity Tag
- Materials
- Instructions
- Archival Ink™ Designer Series: Wendy Vecchi: Watering Can, Fern Green, Cornflower Blue
- Archival Ink™ #0 Pads: Jet Black
- Tim Holtz® Distress Stains™: Tarnished Brass
- Tim Holtz® Distress Ink Pads: Mustard Seed, Wild Honey, Broken China, Faded Jeans, Gathered Twigs
- Tim Holtz® Adirondack® Alcohol Inks: Caramel and Stonewash
- Ranger Ink Blending Tool & Foam
- Ranger Non-Stick Craft Sheet™
- Ranger Heat it™ Craft Tool
- Ranger Brayers
- Tim Holtz Idea-ology: Long Fasteners, Festive Foliage 1 large & 2 small flowers
- Tim Holtz Alterations by Sizzix: Tattered Florals die, Movers and Shapers Mini Tattered Florals, Vagabond or other embossing machine
- Stampers Anonymous Wendy Vecchi studio 490: Vintage Mesh background stamp (WVBG006), Sentiment stamp (LCS107), Stencils Dots & Stripes Borders, 3 Flourishes, Clearly For Art (clear)
- vintage dictionary page
- pliers or hemostat
- push pin
- paper trimmer
Instructions
1. Cut a #8 kraft tag to 5 1/2 inches tall.
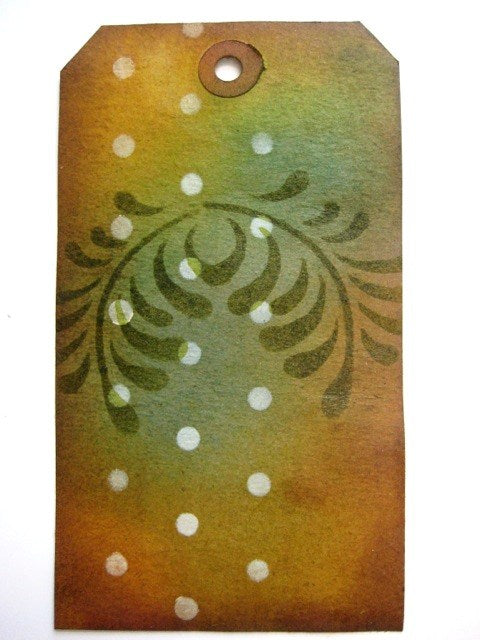
2. Use the Blending Tool with the Distress Inks, to create a background. Add Gathered Twigs to heavily shade the left side & the bottom of the tag.
3. Shake the Antique Linen Distress Paint & apply a small amount onto the craft sheet. Pick up the paint with the Blending Tool and stencil the polka dot border as shown. Clean the stencil before the paint dries.
4. Tap the Blending Tool onto the Fern Green Archival pad & stencil the 2 medium flourishes.
5. Tap the Blending Tool onto the Watering Can pad and stencil the stripes to create a border on the left side of the tag. Use Jet Black to stamp the sentiment on the bottom right. Use Cornflower Blue on the Vintage Mesh background to stamp several random areas over the background. Shake the Distress Stain & with a fairly dry dabber top, edge the tag & dry.
6. Apply a thin layer of Glue N’ Seal to one side of Clearly For Art, then add a vintage dictionary page over the Glue N’ Seal. Brayer and dry.
7. Die cut one Movers & Shapers Flower & 2 of the smallest flowers from the Tattered Florals die. Drip alcohol ink onto the Clearly For Art (plastic) side of the flowers, tilt the flowers to cover. It will only take 2 or 3 drops of the alcohol inks. Heat the flowers to soften the Clearly For Art, and shape the flowers, while warm. Drip alcohol inks over the metal foliage flowers and use pliers or a hemostat to bend the flower petals.
8. Use a push pin to create holes in the flowers. Assemble the flowers by putting the Long Fastener thru the metal flower, then thru the Clearly For Art flower. Use a push pin to create holes in the tag for the fasteners & add the flowers.
9. Here’s a closer look at the dimensional alcohol inked (adorable) flowers.
Things to note
1. Rubbing alcohol will remove the Archival Ink from the stencil.
2. Distress Paint is removable from stencils (with water) while it’s wet. When dry, Distress Paints are permanent.
3. Use other colors for stenciling and background stamping, then use Jet Black Archival Ink for the main image or sentiment. It pops!
4. Clearly For Art can be heated, reheated & reshaped many times.
5. If you’re not happy with the Alcohol Ink colors you chose, Alcohol Blending Solution will remove the color from the Clearly For Art.
6. When using Distress Stains to edge a tag, make sure the dabber top is fairly dry, not saturated.


