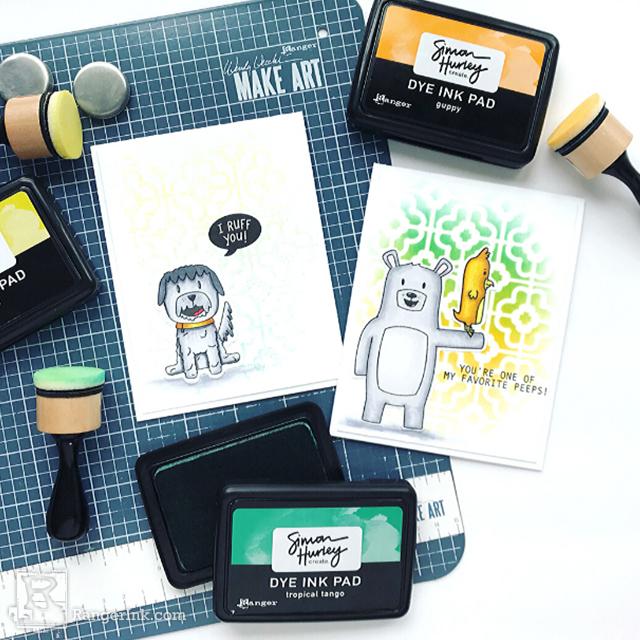
In this tutorial, Jess Francisco shares how to create two cards for the price of one using Simon Hurley create. products. Use the positive and negative of a stencil to achieve two card backgrounds without using any additional ink!

Two Quick & Easy Cards by Jess Francisco
- Materials
- Instructions
- Simon Hurley create. Stamp Set:
-
Simon Hurley create. Stencil: The Loo
Simon Hurley create. Dye Ink Pads: Tropical Tango, Sike!, Guppy
Simon Hurley create. Dude Die Cuts
Simon Hurley create. Stark White Cardstock
Ranger Mini Ink Blending Tool and Foam
Ranger Multi Medium: Matte
Ranger Fine Tip Applicator
Ranger Non-Stick Craft Sheet
Ranger Heat It Craft Tool
Ranger Archival Ink: Jet Black
Tim Holtz Distress® Sprayer
Wendy Vecchi MAKE Art 7" STAY-tion™
Favorite Coloring Medium
Instructions

Step 1: To get started, grab a piece of Simon Hurley create. Stark White Cardsock and dye ink pads in Tropical Tango, Sike!, and Guppy. To make ink blending easier, you can use the Wendy Vecchi MAKE ART STAY-tion to hold ‘The Loo’ Stencil in place. Use the Mini Ink Blending Tools and Foam Replacement pads to blend on color, overlapping each color with the one before. This will give you a smooth blended look as you change from one color to the next. Pretty!

Step 2: Next, set the ink blended panel to the side and grab the Distress Sprayer. Spritz the stencil a few times from several inches away and then lay a separate piece of Stark White Cardstock on top. Smooth the cardstock gently to ensure good coverage of the ink, and then carefully remove the cardstock from the stencil. This will give you a lighter and almost watercolored look in the pattern of the stencil. Now you have two backgrounds for the price of one and didn’t waste any ink.
\
Step 3: Grab one of the dog images from the package of Dude Die Cuts. This will be the focus of one of your cards. For the other card, use the bear image from Bestest Friends and the cute bird from Bird Buddies. You can stamp these in black ink with an acrylic block or stamp positioned. Don’t even worry about masking, you can just stamp the bear first and then line up the bird right on top and it will look like the bird is standing on the bear’s arm. Cool! Use your favorite coloring medium to color the images.

Step 4: Once your coloring is done, cut out the bear and bird and it’s time to add the sentiments to each of your backgrounds. Use ‘I ruff you’ on the lighter background and ‘you’re one of my favorite peeps’ on the ink-blended background. Black ink works best here so that the sentiments show up nicely on the backgrounds.

Step 5: Use the Ranger Multi Medium Matte to adhere the stamped images to the card front. Finally, attach each of the card panels to an A2-sized card base and you’re done! You’ve got two fun cards in no time.

Your Cart
- Choosing a selection results in a full page refresh.


