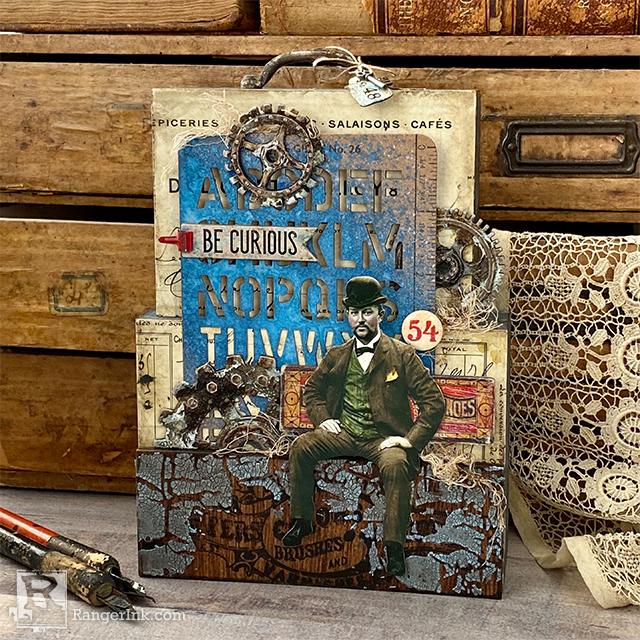
Paula Cheney shows you how to create this stunning DIY Vignette display that showcases the newest color in the Tim Holtz Distress palette, Prize Ribbon.

Paula Cheney shows you how to create this stunning DIY Vignette display that showcases the newest color in the Tim Holtz Distress palette, Prize Ribbon.
Instructions

Step 1: To begin, you will need a package of idea-ology Vignette Boxes, Distress Watercolor Cardstock, Prize Ribbon in both Distress Spray Stain and Distress Oxide Spray + your favorite brown Spray Stain, mine is Walnut Stain.

Step 2: Cut a half sheet of Distress Watercolor Cardstock. Spray Prize Ribbon Distress Ink and Oxide + Walnut Stain onto a Craft Sheet. Spritz with water and and repeatedly press the cardstock into the ink, drying with a Heat Tool in between. Once you are satisfied, slowly push down on the nozzle of Prize Ribbon Oxide to add a splatter of bight blue across the inked cardstock. Set aside to dry.

Step 3: This project uses the two largest boxes of the Vignette Box pack. The two smaller boxes can be set aside for another project. Use a paper trimmer to cut idea-ology Backdrop paper for the flat side of the two boxes (this will become the front of the project). Cut the inked watercolor cardstock to fit three sides of each box (no paper is needed on the bottom).

Step 4: Use Collage Medium to add papers to the two Vignette Boxes. Please note: if you add a layer of Collage Medium over the cardstock inked with Prize Ribbon Oxide, it will loose its “chalky” appearance. I added Collage Medium over the idea-ology Backdrops paper on the top (and just slightly over the cut edges) but I left the sides CM free to keep that great finish.

Step 5: By adding the Collage Medium over the top paper, I was able to use my Walnut Stain Distress Crayon over the slick surface. I just scribble it on, rub with my fingers, then pounce a wet wipe at random over the crayon edge to give it a mottled finish.

Step 6: Use Collage Medium to glue the two Vignette Boxes together. As you can see, I glued the top box to the left, slightly off center. What you can't see is that the top box is narrower than the bottom, so there will be a gap at the front edge. We will use this gap to our advantage when adding the gears. NOTE: I took the picture of the boxes lying flat, but in reality I glued the boxes together in a standing position to let gravity do its job. Set aside to dry.

Step 7: Lay an idea-ology Stencil Card on a paper towel. Shake up Prize Ribbon Oxide Spray and spray a diagonal pattern over the card. It will take a few sprays to get the opacity in the center of the card. Let air dry or use a Heat Tool.

Step 8: Adhere the Stencil Card to the boxes. You will need Collage Medium for the bottom portion and foam squares for the top since there is a gap.

Step 9: I used three sets of double stack 3D foam squares across the top to keep it stable. You are going to be adding a metal embellishment to the top so it needs the hidden support.

Step 10: Add a dollop of Crackle Texture Paste to a Craft Sheet or disposable deli sheet. Squeeze a drop or two of Prize Ribbon Distress Paint on top of the paste.

Step 11: Using a palette knife, stir the paste and paint together to get a solid color.

Step 12: Lay a stencil (Decayed THS129) over one of the idea-ology Vignette Advert Panels. Use a palette knife to spread the Crackle Paste over the stencil surface. Remove stencil and wash right away (or place in a water bath till you can wash it). Set wood panel aside to dry completely.

Step 13: Once the Crackle Texture Paste is dry and cracked, spray it with Walnut Stain Distress Spray Stain.

Step 14: Let the spray soak in, then blot away excess and dry with a Heat Tool.

Step 15: Add Vignette Advert Panel to the front of the box with Collage Medium. Let dry before standing up.

Step 16: Use your finger to add Translucent Distress Grit Paste to three Industrial Gears. Let dry.

Step 17: Rub Picket Fence Distress Paint randomly over the surface.

Step 18: Use a Blending Tool with felt to add Mushroom Alcohol Ink to the gears.

Step 19: Add Teakwood Alcohol Ink to finish the grungy look. Be sure to sand away some of the finish to expose metal highlights.

Step 20: Color Paper Doll with Distress Crayons. Color the Paper Doll with the Crayon, then rub the crayon until you can see the image details return to view. Easily remove any excess crayon (off hands, face, shirt, etc) with a damp cotton swab. Use the Detail Water Brush to add small details, like the pocket square, cheek color, texture in vest, etc.

Step 21: Foam squares were used to add the Paper Doll so he appears to be sitting on the wall. Use Collage Medium to add the Industrial Gears. See how the one on the right slips right in under the gap under the Stencil Card? I love that kind of secret space.

Step 22: Choose a Baseboard piece from the idea-ology Junk Drawer pack. I had a foam square behind the man so I just cut the long piece and added it to the substrate with foam square on either side. No one is the wiser! I also added the Mini Flair 54 with Collage Medium. Let dry before standing the piece up.

Step 23: Lightly spray Prize Ribbon Distress Spray Stain onto Glass Mat or Craft Sheet. Press any added paper embellishments, like the Quote Chips into the dots of ink. Dry with a Heat Tool.

Step 24: To add the Quote Chip, I first painted a Tiny Clip with Candied Apple Distress Paint. While it was drying, I cut a bit off the left side of the Quote Chip and cut a V on the right end. Once the Tiny Clip was dry, I used it to clip the Quote Chip to the Stencil Card.

Step 25: For the handle, I used the exact same technique as the gears: Translucent Grit Paste, Picket Fence Distress Paint, Alcohol Ink, and sanding. I added Hardware Heads to each end of the handle so it appears to be screwed into the box top. To finish it off, I tied the little tag and a tiny Adornments Key to the handle. Now that makes me happy!
 I have been a “maker” all my life. Sewing, stamping, paper arts, I love it all. Creating and teaching is a passion for me, whether it is in the classroom or on my blog, One Lucky Day.. I have worked in the scrapbooking/mixed media field since 2005 and for the last 7 years have been the Creative Coordinator for Tim Holtz Brands, a dream job if there ever was one. On a personal note, I live on the Central Coast of California with my husband, Jay. I love to travel to new places to look for old junk and am willing to pack a bag at a moment’s notice. On an ordinary day you can find me working away in my craft room with the windows wide open and music playing in the background. Follow Paula on instagram @luckyday.
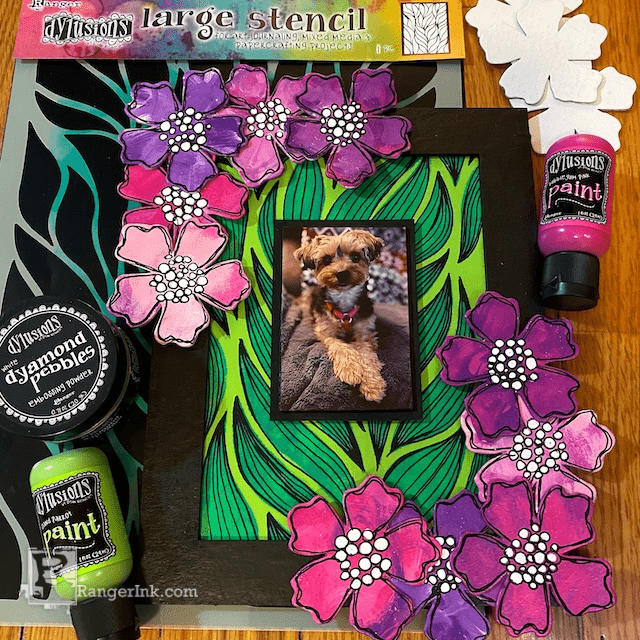
Brighten up your space with this beautiful Dylusions flowers and fronds picture frame by Jess Peters! Created with...
Read More