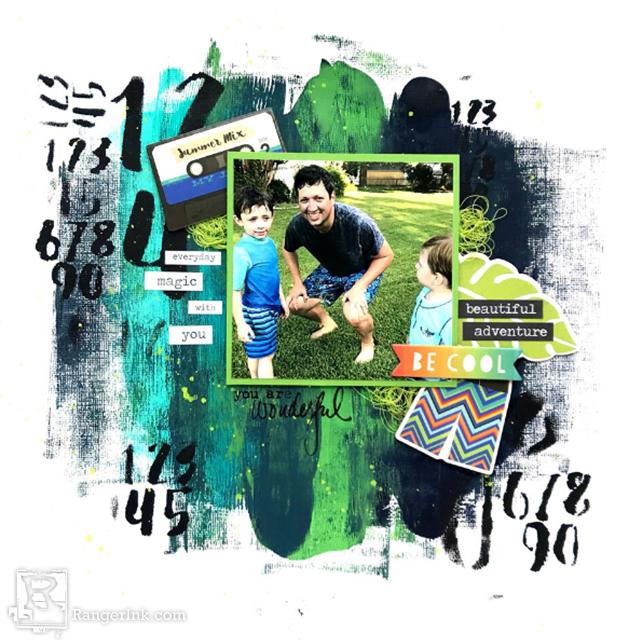
In this tutorial, follow along as Jess Francisco uses the blue and green spectrum of Dina Wakley MEdia Acrylic paints to create an abstract scrapbook page that is perfect for capturing those summer memories you've been making this summer.

Summer Mixed Media Scrapbook Layout By Jess Francisco
- Materials
- Instructions
Instructions

Step 1: Gather your supplies. To start things off, you’ll need a 12x12 piece of white cardstock (but you can change this up and use whichever size you’d prefer). Select a few Dina Wakley acrylic paints in colors that coordinate with the photo you’d like to use. You’ll also need a small brayer to apply the paint.

Step 2: Apply squiqqles of paint directly to the cardstock (you can treat the surface with clear or white gesso first if your cardstock is thin). Using the brayer, roll the paint out in streaks. If you don’t want the colors to get muddy the further into the mixing you get, clean the brayer in between each color. You can use the Heat It Tool to dry your paint or set it aside and let it air dry.

Step 3: Next, it’s time for some stenciling! Lay the Jumbled Numbers stencil on top of your painted background. Squirt a small amount of Dina Wakley’s Black Acrylic Paint on your Craft Sheet. Using the foam replacement pads and Mini Ink Blending Tool gently pounce the black paint through the openings in the stencil. Move the stencil around carefully and apply ink to additional spots on your layout. Once you’re happy with the results, let your background dry.

Step 4: Once your paint has dried, it’s time to add some splatters! Remove the lid from the Dina Wakley Gloss Spray (Lime) and hold the lid and tube portion over your project. Gently tap the lid and little splatters will fall off and land on your project. Continue this over the cardstock until you’re happy with the results.

Step 5: After your splatters have dried, use the Just What to Say rubber stamp set to add the sentiment ‘you’re wonderful.’ You can place this anywhere that works with your photo!

Step 6: Finish off your layout by adding ephemera, stickers, or threads you may have in your stash. You can experiment by adding foam tape to the back of your photos or elements to give your layout dimension, or keep it flat so it will fit nicely in an album. Your layout is done and ready for an album or frame!


