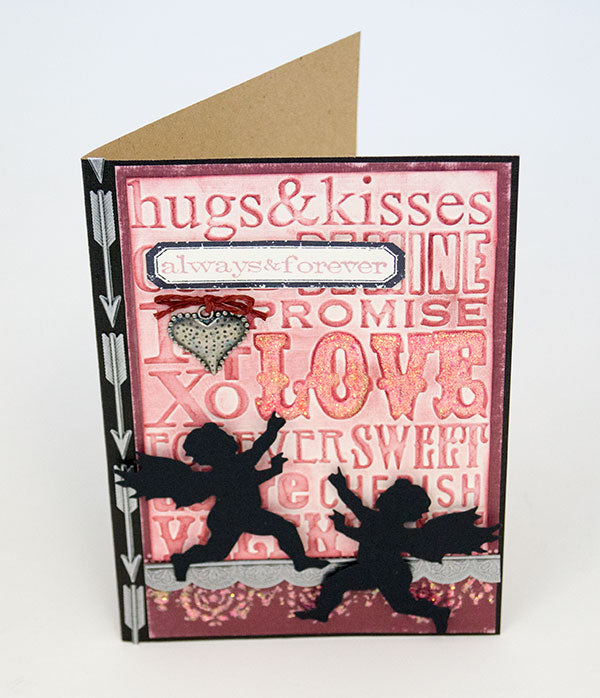
Use the New Neon Flamingo Stickles to make this Valentine for your Sweetheart.

Stickles Always & Forever Valentine’s Card by Annette Green
- Materials
- Instructions
- Stickles™ Glitter Glue: Neon Flamingo Stickles
- Tim Holtz® Distress Ink Pads: Victorian Velvet, Aged Mahogany
- Ranger Ink Blending Tool & Foam
- Archival Ink™ #0 Pads: Jet Black
- Card stock: black & mahogany (Core-dinations Kraft Core)
- Tim Holtz Alterations by Sizzix-Valentine Background & Borders set/Sizzix Texture Fade and Love Struck Mini Mover & Shaper
- Tim Holtz Idea-ology Industrious Stickers, Adornments (heart charm)
- Red waxed twine
Instructions
1. Cut and fold a card base from black card stock to measure 5 x 7 inches. Cut a piece of Mahogany card stock 4.5 x 6.75 inches and emboss the bottom portion using the border Texture Fade in the Valentine set. Lightly sand raised area and around all four edges. Adhere this card stock piece to card front, leaving space on left edge for arrow stickers.
2. Cut a piece of cream colored card stock 4.25 x 5.5 inches and emboss it using the large word collage Texture Fade in the Valentine set. With a blending tool swirl Victorian Velvet Distress Ink on the entire surface. Follow up with Aged Mahogany Distress Ink on the raised areas only and the outer edges of the paper. Adhere to card.
3. Adhere four arrow stickers along left edge of card (you’ll cut one of them apart) and cut a scalloped border sticker to 4.5 inches and adhere across the card.
4. Stamp a frame in Black Archival Ink from the Simple Sayings set. Stamp “always & forever” with Victorian Velvet inside the frame. Trim frame out and adhere to card.
5. Tie a piece of red waxed twine into heart charm and make a bow. Adhere to card using Glossy Accents.
6. Use Neon Flamingo Stickles to fill in the embossed word “LOVE” and then accent the embossed border with dots of the same Stickles. Let dry completely.
7. Cut two cherubs from black card stock using the Movers & Shapers die. (Be sure to flip the textured side of the paper for one before cutting since each of your cherubs will be facing each other.) Adhere cherubs to card using pop-ups foam.
Your Cart
- Choosing a selection results in a full page refresh.


