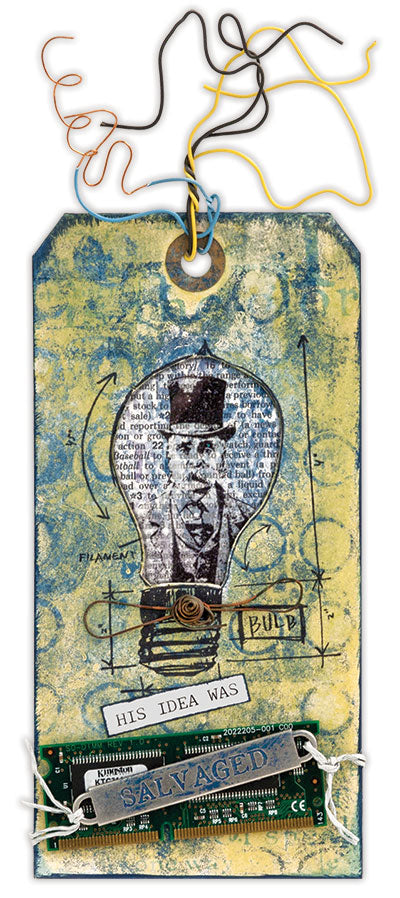
Check out this Bright Idea and learn how to use Ranger Acrylic Paint Dabbers to make an interesting background for your next project.

Ranger Acrylic Dabber Bright Idea Tag By Michelle McCosh
- Materials
- Instructions
- Archival Ink™ #0 Pads: Jet Black
- Ranger Brayers
- Ranger Non-Stick Craft Sheet™
- Ranger Heat it™ Craft Tool
- Dina Wakley Media Brushes
- Tim Holtz idea-ology - paper string
- Tim Holtz Collection by Stampers Anonymous Stamp Sets - CMS 149 Industrial Blueprint, CMS 159 Paris Memoir
- Gelli Plate
- Craft Knife
- Cutting Mat
- Book Paper
- old computer part (memory stick)
- old wires
- found metal piece
Instructions
1. Paint tag using Acrylic Lemonade Dabber. Dry with heat tool. Use the brayer to apply the following paint colors onto the Gelli Plate: Cloudy Blue, Sailboat Blue and Denim.
2. Place Dylusions Stencil Chequered Dots onto Gelli Plate.
3. Place scrap paper onto stencil, rub to remove some of the paint from the gelli plate.
4. It will leave a stenciled paint impression behind.
5. Remove stencil and place tag onto gelli plate.
6. Rub and transfer the pattern to the tag.
7. Rub book paper onto the remaining left over paint on gelli plate. Dry both with heat it tool.
8. Stamp light bulb using Jet Black Archival Ink onto painted tag.
9. Cut interior of light bulb out using a craft knife.
10. Stamp Man onto book paper using Jet Black Archival Ink.
11. Use the Denim Dabber to apply paint to the edges of tag. Glue clearly for art to the back of the tag covering the hole and then glue the stamped man behind that.
12. Rub denim dabber onto the Word Band to highlight the sentiment. Glue on old computer part to front of tag and then tie on the painted word band using Tim Holtz Paper String.
13. Glue on discarded metal piece to bottom of stamped light bulb. Add wires to top of tag. Glue on typed sentiment to complete the tag.


