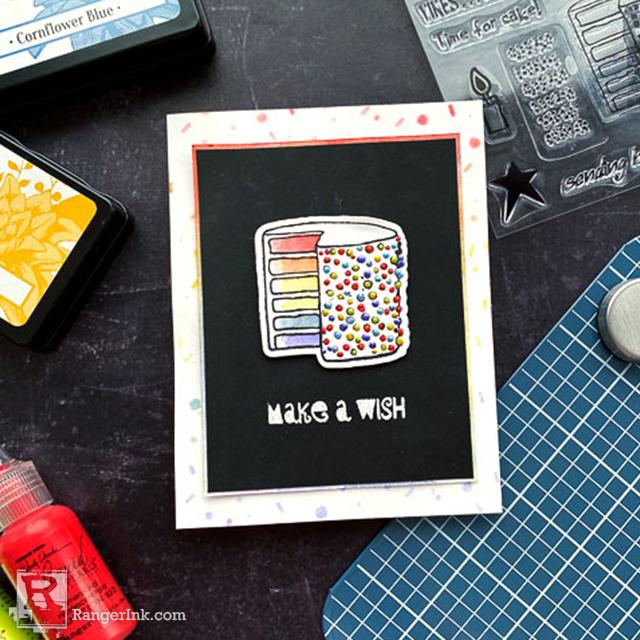
Cheiron Brandon shares simple, fun techniques to easily create this rainbow colored birthday card using Wendy Vecchi MAKE Art products.

Rainbow Cake Birthday Card by Cheiron Brandon
- Materials
- Instructions
- Wendy Vecchi MAKE ART Perfect Cardstock: White Panels
- Wendy Vecchi MAKE ART Stamp, Die, Stencil Set: Birthday Bash
- Wendy Vecchi MAKE ART Blendable Dye Inks: Red Carnation, Orange Blossom, Sunflower, Prickly Pear, Cornflower Blue, Violet
- Wendy Vecchi Liquid Pearls: Red Carnation, Orange Blossom, Sunflower, Prickly Pear, Cornflower Blue, Violet
- Wendy Vecchi MAKE ART 7" Stay-tion™
- Wendy Vecchi MAKE ART Perfect Stylus Set
- Ranger Detail Blending Tools
- Ranger Archival Ink: Jet Black
- Ranger Emboss It Ink Pad: Grey
- Ranger Embossing Powder: Super Fine White
- Tim Holtz Distress® Waterbrush: Detailer Tip
- Tim Holtz Distress® Sprayer
- Tim Holtz Distress® Watercolor Cardstock
- Letter It™ Cardstock Panels: Black
Instructions
Hi there crafty friends, it’s Cheiron Brandon here with a fun rainbow birthday card using Wendy Vecchi Stamps, Stencils, Inks and Liquid Pearls.

Step 1: For this project I used the Wendy Vecchi MAKE ART Birthday Bash Stamp, Die, Stencil Set. This combo makes it easy to make so many different cards because the stamp, matching die cuts and a coordinating stencil are included. I also used MAKE ART Dye Inks and Liquid Pearls in Red Carnation, Orange Blossom, Sunflower, Prickly Pear, Cornflower Blue and Violet.

Step 2: First take a 4.25" x 5.5" White Perfect Cardstock Panel and place the stencil over it on the 7" MAKE ART Stay-tion and secure it with the magnets. Be sure to secure both the stencil and cardstock.

Step 3: Use the Ranger Detail Blending Tools to apply inks through the stencil in rainbow order to fill the panel.

Step 4: Stamp and die cut the cake onto a piece of white cardstock in Jet Black Archival Ink. To color in the rainbow layers of the cake, press the MAKE ART Dye Inks directly onto a Tim Holtz Glass Mat and use a waterbrush to pick up the ink and paint in the layers.

Step 5: To color in the “sprinkles” on the outside of the cake, use the MAKE ART Stylus Set to apply dots of Liquid Pearls.

Step 6: Add a drop of each color of Liquid Pearls and dip the tip of the stylus into the Liquid Pearls and onto the dots on the stamped image, cleaning the stylus between each color and when finished with a baby wipe.

Step 7: Stamp and emboss the sentiment onto a black cardstock panel using Emboss It Embossing Ink and Super Fine White Embossing Powder.

Step 8: To create some contrast between the black panel and the stenciled panel, create a rainbow mat. Cut a piece of watercolor cardstock, press the dye inks onto the glass mat in rainbow order and spray water using a Tim Holtz Distress Sprayer. Swipe your cardstock through it and adhere all the pieces together, using Adhesive Foam to add the cake.

Your Cart
- Choosing a selection results in a full page refresh.


