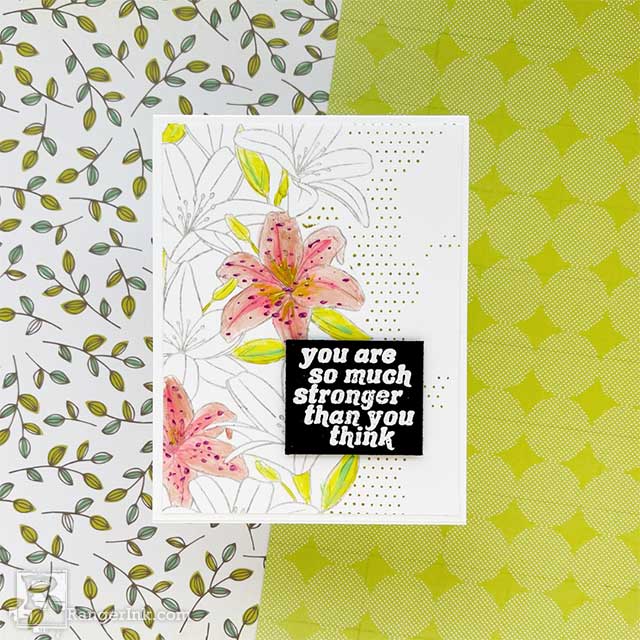
Jess Francisco shows you how to paint with Liquid Pearls to give this elegant affirmation card a subtle shimmer using Simon Hurley create. products.

Painting with Liquid Pearls™ Affirmation Card by Jess Francisco
- Materials
- Instructions
Instructions

Step 1: Ink up the left side of the Lovely Lilies background stamp with Woof! ink. Lay a piece of white cardstock measuring 4” x 5.25” on top of the inked stamp and apply firm, even pressure to transfer the ink. Carefully remove the cardstock.

Step 2: Place the middle (dotted) section of the Lovely Lilies Background Stamp on an acrylic block and apply Viper ink. Line up the middle section of the stamp with the left section already stamped on the cardstock and stamp.

Step 3: Apply a small amount of Liquid Pearls in each color to the Craft Sheet. Using a very small paintbrush, paint inside the stamped lines. After the first layer has dried for a few minutes, you can add another layer of Liquid Pearls on top in another color. If you'd like a more diluted color, you can mix a small amount of water with the Liquid Pearls on the Craft Sheet before painting.

Step 4: After the first layer has dried for a few minutes, you can add another layer of Liquid Pearls on top in another color. If you'd like a more diluted color, you can mix a small amount of water with the Liquid Pearls on the Craft Sheet before painting.

Step 5: Treat a piece of black cardstock with the Anti-Static Pouch and stamp the sentiment in embossing ink. Pour White Embossing Powder over the stamped image and tap off the excess. Use the Heat Tool to melt the powder. Use a pair of sharp scissors or paper trimmer to trim around the sentiment.

Step 6: Mount the card panel on a white card base measuring 4.25” 5.5”. Apply foam tape to the back of the sentiment strip. Remove the backing strips from the foam tape and attach the sentiment to the card panel.

Your card is finished and ready to send!
Your Cart
- Choosing a selection results in a full page refresh.


