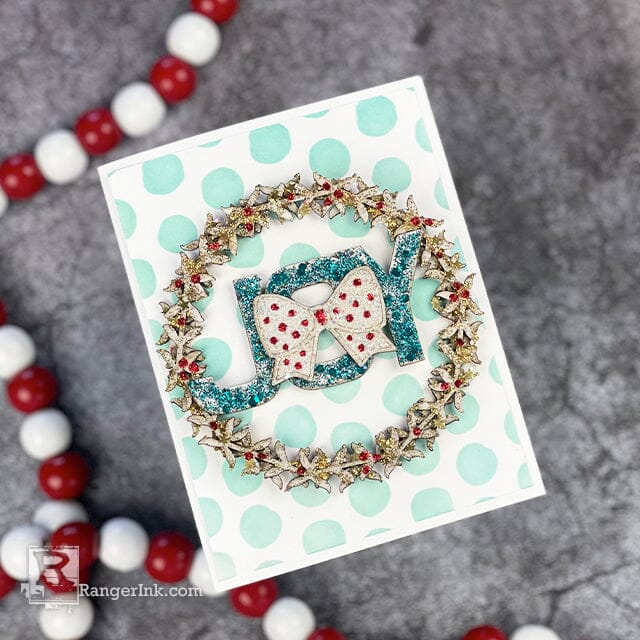
Stickles™ add so much JOY to any project. In this tutorial, Joy Baldwin makes this playful Christmas card using Stickles™ Glitter Gels and Glitter Glue.

Stickles Joyful Christmas Card by Joy Baldwin
- Materials
- Instructions
Stickles™ Glitter Gels Solar Flare
Stickles™ Glitter Gels Moon Dust
Stickles™ Glitter Gels Galaxy
Stickles™ Glitter Glue Christmas Red
Ranger Mini Ink Blending Tool
Ranger Multi Medium Bottle Matte
Tim Holtz Distress® Oxide® Ink Pad Salvaged Patina
Wendy Vecchi MAKE ART Chippies Wreaths
Wendy Vecchi MAKE ART Chippies Statements
Simon Hurley create. Stark White Cardstock
Other:
Simon Hurley create. Bubble Wrap Stencil
Instructions
Hi crafters, it’s Joy here and I have a playful Christmas card for you today. I used Stickles™ Glitter Gels and Glitter Glue to paint Wendy Vecchi Chippies. It’s a lot of fun, so let’s get started!

Step 1: Painting Chippies with Stickles™ Glitter Gel is so fun. I used my fingers to paint because it made it easier to cover the Chippies. You could also use a palette knife or paint brush. The colors of the Stickles™ Glitter Gels are Solar Flare, Moon Dust and Galaxy. I put those aside to dry.

Step 2: To stencil the background, I used Salvaged Patina Distress® Oxide® Ink with the Bubble Wrap Stencil and a foam blender tool.

Step 3: For a fuller wreath, I glued the two wreaths together slightly offset from each other.

Step 4: The bow is adhered to the “JOY” and the “JOY” is adhered to the wreath using Multi Medium Matte glue.

Step 5: To add details and a pop of color, I used Christmas Red Stickles™ Glitter Glue. I created berries around the wreath and added polka dots to the bow.

Step 6: The finished card is adhered to a white A2 size card base.
Your Cart
- Choosing a selection results in a full page refresh.


 Hi! My name is Joy Baldwin, AKA, Create it with Joy. I am a wife and a mother to 3 kids and 3 crazy animals. I homeschool my 2 youngest kids (maybe I'm crazy) and am a part-time Nail Tech. I absolutely LOVE the creative process of making cards and the tutorials that go along with them. Also, the community of wonderful crafters and the friendships that follow. Find me at
