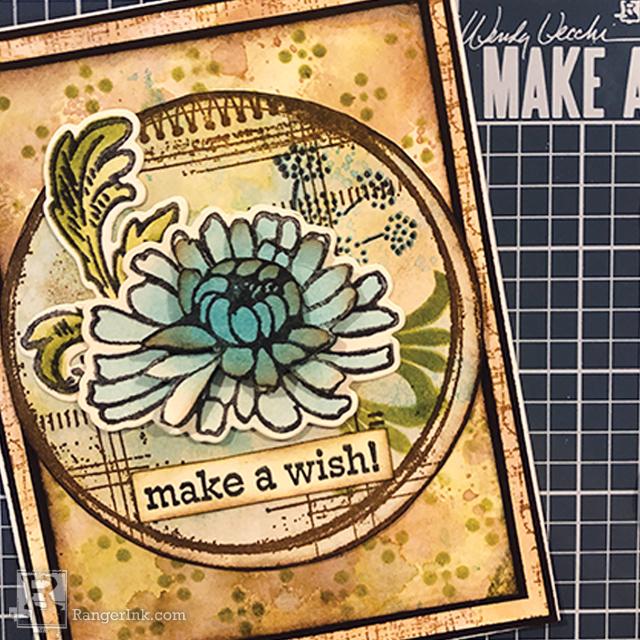
In this tutorial, Cassie Lynch shares simple techniques using Wendy Vecchi MAKE ART products to create a vintage inspired birthday card.

Make A Wish Card by Cassie Lynch
- Materials
- Instructions
- Wendy Vecchi MAKE ART Stamp, Die, & Stencil Set: Thank You, Merci & More
- Wendy Vecchi MAKE ART Perfect Cardstock: White Panels
- Wendy Vecchi MAKE ART Stay-tion
- Wendy Vecchi Blendable Dye Inks: Prickly Pear, Fern Green, Forget-Me-Not, Acorn
- Wendy Vecchi MAKE ART Perfect Stamp Positioner Set
Wendy Vecchi MAKE ART Perfect Stamp Block - Wendy Vecchi Archival Ink: Potting Soil
- Ranger Archival Ink: Jet Black, Coffee
- Ranger Mini Ink Blending Tool and Foam
- Ranger Detail Blending Tools
-
Ranger Heat It Craft Tool
Ranger Mister Bottle
Ranger Non- Stick Craft Sheet
Wendy Vecchi Studio 490 by Stampers Anonymous: Collage Circle Background, All Scratched Up Background
Instructions

Step 1: Cut a piece of Wendy Vecchi MAKE ART White Perfect Cardstock to 4 x 5 ¼ inches. Apply ink from MAKE ART Blendable Dye Ink Pads: Sunflower, Acorn, and Potting Soil to a Non-Stick Craft Sheet, mist with water and swoosh the cardstock through the ink.

Step 2: Stamp the Wendy Vecchi Studio 490 All Scratched Up Background Stamp onto the inked surface with Coffee Archival Ink.

Step 3: Cut a second piece of Perfect White Cardstock to 3 ½ x 4 ¾ inches. Use the same technique described in Step 1, but this time use ink colors Fern Green and Acorn. Do this a few times, drying the ink between layers using a Ranger Heat it Craft Tool.

Step 4: Use the stencil that comes in the Wendy Vecchi Merci & More Stamp, Die, and Stencil Set and and apply Fern Green Blendable Ink with a Mini Ink Blending Tool and Foam to add some interest to the background of your smaller surface.

Step 5: Stamp Wendy Vecchi Studio 490 Circle Collage Background Stamp on another piece of Perfect White Cardstock using Potting Soil Archival ink. Add color to the circle using Forget-Me-Knot Blendable Dye Ink and water that has been swooshed on your craft sheet. Again, do this until you are happy with the look. It may take a few times, remembering to dry the ink between layers.

Step 6: Die cut three of the same flower from the Wendy Vecchi Make Art Thank You Stamp, Die and Stencil Set. Color them with Forget-Me-Knot Blendable Dye Ink and a Blending Tool. Be sure to use the coordinating flower stencil so the edges stay ink free. Then fussy cut layers of the flowers so that you can add dimension and layers to the flower when it is assembled.

Step 7: Follow the same procedure described in Step 6 to make the leaf from the Thank You Stamp, Die, Stencil Set. Ink the leaf with Prickly Pear Blendable Dye Ink. Add shading using the Ranger Detail Blending Tool.
Step 8: This is where you begin figuring out your layout. Once that is known it’s easy adding additional stamps to add interest. To make placement super easy use the Wendy Vecchi MAKE ART Perfect Stamp Positioner and Acrylic Block. The small flower and flourish stamp used in the sample card is from the Thank You Stamp, Die, Stencil Set.

Step 9: Stamp a sentiment and add it to the collage circle. Assemble your card.
Your Cart
- Choosing a selection results in a full page refresh.


