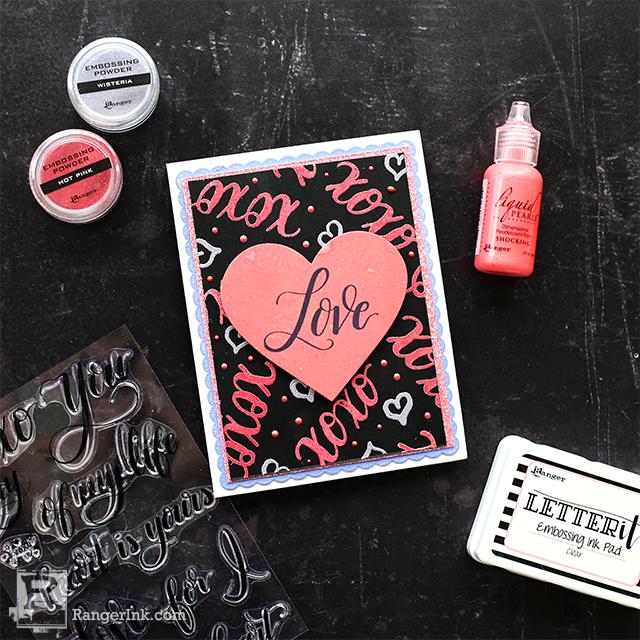
Hi crafty friends. It’s Cheiron here and today I have a fun and easy Letter it Valentine Card for you using bright colors of embossing powder and Liquid Pearls along with the Sweetheart Letter It Stamps to create a special handmade card for Valentine’s Day or any other time you’d like to send some love.

Letter It™ Embossed Valentines by Cheiron Brandon
- Materials
- Instructions
- Letter It™ Surfaces: Black Cardstock
- Letter It™ Embossing Powders: Graceful, Brights
- Letter It™ Embossing Ink Pad
- Letter It™ Stamp Sets: Sweetheart
- Liquid Pearls™: Shocking
- Ranger Anti-Static Pouch
- Tim Holtz Distress® Mixed Media Heavystock
- Tim Holtz Distress® Sprayer
- Wendy Vecchi Perfect Cardstock: White Cards
- Tim Holtz Distress® Oxide® Ink Pads: Shaded Lilac, Worn Lipstick
- Ranger Heat it™ Craft Tool
- Ranger Adhesive Foam Rolls: Black Foam
- Scallop Die
- Heart Die
- Glitter Paper
Instructions

Step 1: Prep your panel with an anti-static pouch. Stamp the “xoxo” from the Sweetheart stamp set in a random pattern around the panel, then emboss it with Hot Pink Embossing powder.

Step 2: Fill in the blank areas on the panel with the little heart stamp from the Sweetheart stamp set and emboss the hearts with Wisteria Embossing Powder.

Step 3: Cut a background scalloped rectangle panel from Distress Mixed Media Heavystock. Apply Shaded Lilac Distress Oxide direct to paper (you only have to do the edges as you will cover the center.) Spritz with water to oxidize the ink and then dry with a heat tool. Be sure to clean the ink off of your work area.

Step 4: With another small panel of Distress Media Heavystock, apply the Worn Lipstick Distress Oxide direct to paper (this time covering the entire piece), spritz with water and dry with a Heat Tool. When dry, stamp the word love using Jet Black Archival Ink and then die cut it out using a heart die. Clean the ink off of your work area.

Step 5: Adhere your embossed layer to a glitter cardstock mat. Then adhere that layer to the scalloped layer you created. Use black adhesive foam to attach the heart to the front of the card.

Step 6: Once all the layers have been adhered and you have added the heart, add Shocking Liquid Pearls in the remaining blank areas of the embossed panel to finish your colorful background and let dry.

Your Cart
- Choosing a selection results in a full page refresh.


