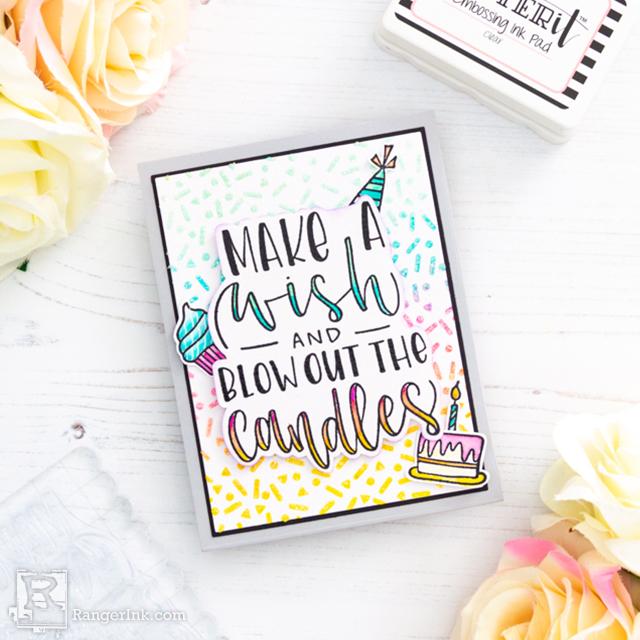
In this tutorial, Laura Volpes shows you how to create a rainbow with Mini Distress® Ink Pads and then layer Stickles™ Glitter Gels over top for extra sparkle and dimension using Letter It stamps and stencils.

Letter It™ Rainbow Birthday Card by Laura Volpes
- Materials
- Instructions
Letter It™ Background Stencil: Party Time
Letter It™ Embossing Pad Clear
Ranger Embossing Powder Super Fine White, Clear
Tim Holtz Distress® Watercolor Cardstock 8.5" x 11", 10pc
Wendy Vecchi Perfect Cardstock Grey Panels 10pk
Wendy Vecchi MAKE ART Stay-tion 7"
Wendy Vecchi MAKE ART Perfect Stamp Block
Instructions

Step 1: Working on the Wendy Vecchi MAKE ART Stay-tion cut Tim Holtz Watercolor Cardstock to 3.75"x5". Blend Distress Inks in Cracked Pistachio, Peacock Feathers, Picked Raspberry and Mustard Seed through the Party Time stencil to create a rainbow pattern.

Step 2: Without removing the stencil, apply Glitter Gel in the color Moonstone on the panel. Set aside to dry.

Step 3: Stamp the sentiment from the Let's Party Stamp set on Tim Holtz Watercolor Cardstock. Use Black Archival Ink and heat emboss with Fine Clear Embossing Powder. (Optional: stamp a second time with the Letter It™ Embossing Pad before heat embossing).

Step 4: Paint the white gaps in the sentiment with the same Distress Ink colors used on the background. Cut out the sentiment and shade the edges with Distress Ink in Shaded Lilac.

Step 5: Repeat steps 3 and 4 to create small images to decorate your card.

Step 6: Layer the background over some black and gray cardstock, respectively cut to 3.875" x 5.125" and 4.25"x5.5".

Step 7: Glue the sentiment and the images to the card front. Raise the sentiment panel over some foam tape for added dimension.


