Hello! I’m Samantha, known as Scarlyton in the art community, and I’m thrilled to share the process of one of my art journal spreads in Dina Wakley’s Media Journal. I enjoy creating layers with paint and collage elements, so I wanted to show you my technique. Work along with me to create your very own art journal spread!

I Am Enough Art Journal Spread by Samantha “Scarlyton” Carlton
- Materials
- Instructions
- Dina Wakley Media Journal
- Dina Wakley Media Stamps : Woodcuts
- Dina Wakley Media Stencils & Masks : Mini Favorites, Fractured Circles, Cellular, Plastic Canvas
- Dina Wakley Media Scribble Sticks : Blackberry, Lemon
- Dina Wakley Media Heavy Body Acrylic Paints : Lime, Ocean, Cheddar, Magenta, Turquoise, Black, Blushing
- Dina Wakley Media Brushes
- Ranger Mini Blending Tool with Foam
- Tim Holtz® Distress Sprayer
- Tim Holtz® Distress Collage Mediums
- Archival Ink™ #0 Pads : Jet Black, Coffee
- Fude Ball Pen
- Ranger Collage Glue Stick
- Handpainted Pattern Paper
- Tissue Paper
- Hot Glue
- Packaging Paper
- Ruffled Muslin
- Pencil
- Baby Wipes
Instructions

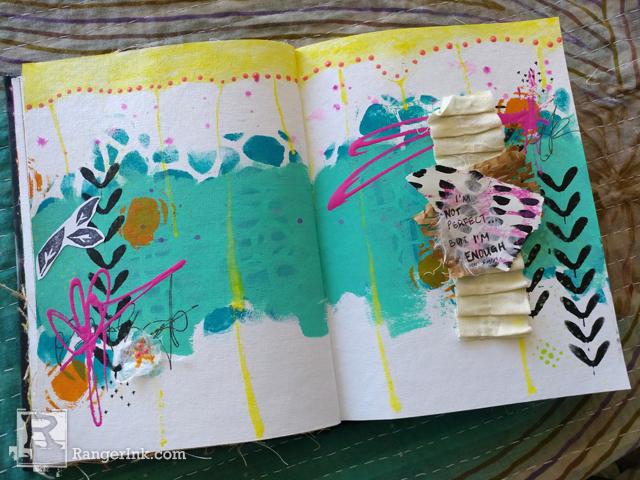
Step 1: To create a layered effect, I started by lightly writing a secret message (this is a journal, after all!) in pencil and added the Cellular stencil across two pages with Ocean paint and the Ink Blending Tool on top of my writing. After the paint dried, I applied a thin layer of Turquoise with a brush. Before the Turquoise dried, I put the Tracks stencil on top and removed some of the paint with a wet baby wipe.

Step 2: Into water I dipped the Lemon Scribble Stick to scribble lengthways across the top of the page. Keep in mind, the more water used, the more translucent the pigment; I used limited water to ensure opacity. After covering the top of the pages in Lemon, I propped up the journal and carefully used the sprayer to create.

Step 3: Using the Mini Favorites (Spinners) stencil, black paint, and ink blending tool, I added the stencil on opposite ends of the pages. After they dried, I created scribbles using the Fudeball pen. Because I can’t get enough layers or stencils, I added Lime paint using the Plastic Canvas stencil with a paintbrush.

Step 4: Using the 1oz. Blushing paint, I used the fine tip to add dots across the Lemon on my pages. While that dried, I added sprinkles of pigment using the Blackberry Scribble Stick. Dip the stick into water and use your finger to tap the stick over the area you want to cover. Next I used the Fractured Circles and Cheddar paint to add a pop of color on the spread.

Step 5: Magenta is one of my favorite colors so I scribbled it on using the applicator tipped bottle. I wanted the bright color to sit on top of my heavy black for a vibrant effect. For detail, tiny crosses were added using the Fudeball pen. The Woodcuts leaves were stamped onto white cardstock using Archival Ink and pasted onto the page. I also glued white tissue paper with smudged Cheddar and dotted Blushing to the spread.

Step 6: To create a mini collage, I stacked the following elements: ruffled muslin, packing paper, hand-painted pattern paper (featuring the Mini Favorites – Halves stencil and Magenta paint), and tissue paper. On the tissue paper I wrote a quote from one of my favorite psychologists, Carl Rogers. I glued the elements together using the Ranger collage stick and affixed the entire ensemble using hot glue.

Thanks for joining me and I hope you create something beautiful! Don’t be afraid to add your own twist to showcase your talent and personality.


