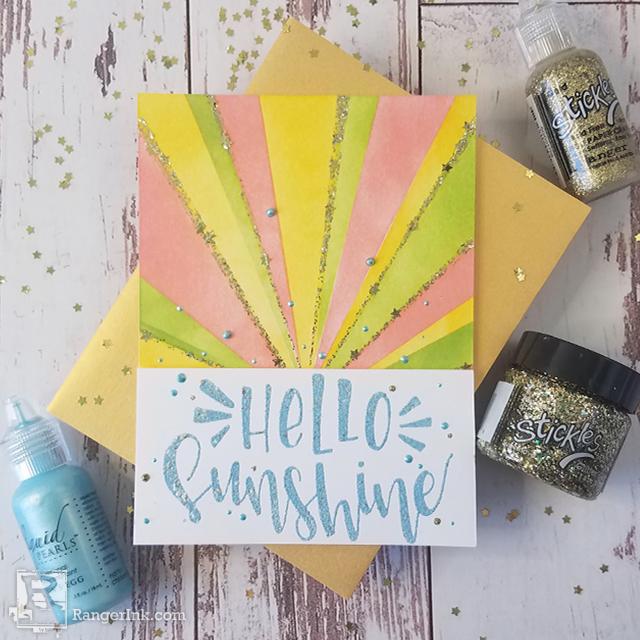
In this creative card tutorial, Joy Baldwin shares how she creates a sunburst using Archival Ink and Stickles Glitter Gels.

Hello Sunshine by Joy Baldwin
- Materials
- Instructions
- Stickles Glitter Gel: Super Nova
- Stickles Glitter Glue: Gold
- Liquid Pearls: Robin's Egg
- Ranger Speckle Embossing Powder: Blueberry
- Ranger Emboss It™ Ink Pad: Grey
Ranger Mini Ink Blending Tool and Foam
Ranger Heat It Craft Tool - Archival Ink Pads: Sun Dazed, Sea Grass, Coastal Coral
-
Wendy Vecchi MAKE ART Perfect Cardstock Panels: White
Wendy Vecchi MAKE ART STAY-tion 7"
Wendy Vecchi MAKE ART Perfect Stamp Block - Letter It™ Stamp Sets: Hello Sunshine
- Letter It™ Adhesive Foam Tape: White
- Low Tack Tape
Instructions

Step 1: Use the MAKE ART STAY-tion to hold a Wendy Vecchi Perfect Cardstock Card Panel in place. Use low-tack tape and start in the lower center of the card panel and tape off sections of different widths, going from the center to the top so it resembles sun rays. Use an Ink Blending Tool with Foam to apply ink into each section, alternating with Sun Dazed, Sea Grass and Coastal Coral.

Step 2: This is how it is starting to look, keep taping and inking until the whole top of the card is inked.

Step 3: Tape small sections where two colors meet and add Stickles Glitter Gel. You can add the Stickles Glitter Gel randomly or add it to every line.

Step 4: This is how looks when added randomly and not to every line.

Step 5: Working on another piece of White Cardstock, stamp the sentiment “Hello Sunshine” with Grey Tinted Embossing Ink. Pour a small amount of Blueberry Speckle Embossing Powder over top of the stamped image, remove the excess and return to the jar. Use the Heat It Tool to melt Embossing Powder. Trim down sentiment piece to fit the bottom of the inked panel. Add some White Foam Tape behind the sentiment and adhere that to the bottom of the card.

Step 6: To Finish the card, adhere it to a Wendy Vecchi Perfect Card. Then add some embellishments with Gold Stickles and Robin's Egg Liquid Pearls.
 Hi my name is Joy Baldwin, AKA, Create it with Joy. I am a wife and a mother to 3 kids and 3 crazy animals. I homeschool my 2 youngest kids (maybe I'm crazy) and am a part-time Nail Tech. I absolutely LOVE the creative process of making cards and the tutorials that go along with them. Also, the community of wonderful crafters and the friendships that follow. Find me at www.createitwithjoy.com.


