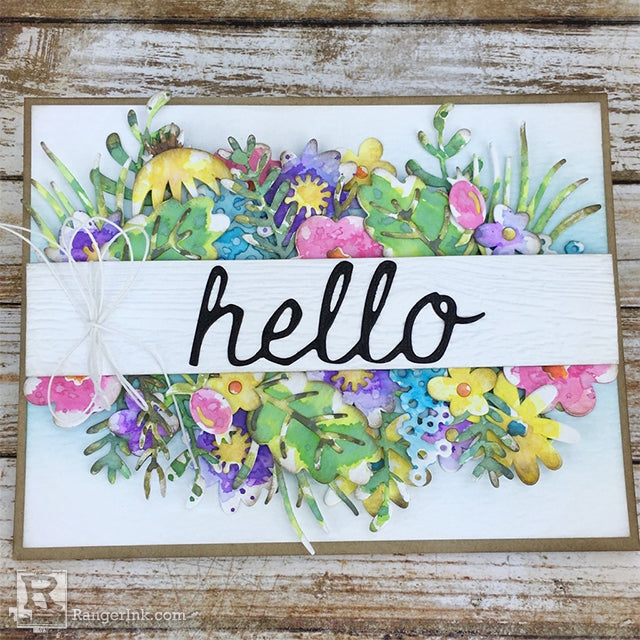
Hello Spring Distress Oxide Card by Bobbi Smith
- Materials
- Instructions
- Tim Holtz Distress® Oxides®: Twisted Citron, Mowed Lawn, Peeled Paint, Forest Moss, Evergreen Bough, Broken China, Mermaid Lagoon, Worn Lipstick, Picked Raspberry, Shaded Lilac, Wilted Violet, Walnut Stain, Carved Pumpkin, Ripe Persimmon, Mustard Seed, Fossilized Amber
- Tim Holtz Distress® Ink: Pumice Stone, Walnut Stain
- Tim Holtz Distress® Collage Medium: Matte
- Tim Holtz Distress® Watercolor Cardstock
- Tim Holtz Detail Waterbrush
- Tim Holtz Distress® Blending Brush
- Tim Holtz Distress® Sprayer
- Letter It™ Adhesive Black Foam
- Ranger Ink Blending Tool with Foam
- Ranger Non-Stick Craft Sheet
- Ranger Heat It Craft Tool
- Ranger Kraft Cardstock
- Tim Holtz® Classic Kraft: Black
- Tim Holtz® Eclectic Elements Craft Thread
- Tim Holtz® Alterations by Sizzix: Funky Floral Thinlits Set 662700, Cut Words #2 Thinlits Set 662685, Lumber 3D Texture Faded Embossing Folder 662718
Instructions
Hi everyone, Bobbi here. I’m so happy to be with you today! I thought I would share a fun dimensional “Hello” Springtime Funky Floral card tutorial with you, featuring Distress Oxide Inks.

Step 1: Die cut several flowers and leaves from the Funky Floral Thinlits.

Step 2: Gather several different colors of Distress Oxide Inks. The colors I used are Twisted Citron, Mowed Lawn, Peeled Paint, Forest Moss, Evergreen Bough, Broken China, Mermaid Lagoon, Worn Lipstick, Picked Raspberry, Shaded Lilac, Wilted Violet, Walnut Stain, Carved Pumpkin, Ripe Persimmon, Mustard Seed and Fossilized Amber. Apply Distress Oxide Inks directly to Non-Stick Craft Sheet.

Step 3: Pick up ink with Waterbrush and color Funky Florals Leaves. Dry with Heat Tool between layers and colors.

Step 4: Run a sheet of Distress Watercolor Cardstock thru a die cut machine using the Lumber 3D Texture Fades Embossing Folder. Spritz a little water on each side of watercolor cardstock before embossing and run thru 3 times to really get that great texture. Dry cardstock with Heat Tool. Cut 1 plank down to 1 inch for a sentiment border.

Step 5: Ink edges of flowers and leaves with Walnut Stain Distress Ink and a Blending Tool with Foam for shading.

Step 6: Assemble flowers and leaves using Distress Collage Medium Matte. Let dry.

Step 7: Apply Broken China Distress Oxide to a sheet of Distress Watercolor Cardstock using a Distress Blending Brush, swirling color concentrating color towards center.

Step 8: Place the lumber plank down center of panel as a guide (do not glue down yet). Start adhering flowers and leaves using a combination of Distress Collage Medium Matte and small pieces of Ranger Letter It Black Adhesive Foam.

Step 9: Tie a bow to corrugated lumber plank border using Eclectic Elements Craft Thread. Then attach to floral card panel with adhesive foam.

Step 10: Die Cut the inside portion “hello” from black classic kraft cardstock using the Cut Words #2 Thinlits Set. Then attach to right side of corrugated border, using Distress Collage Medium Matte.

Step 11: Then attach to lumber plank border, using Distress Collage Medium Matte. Assemble an A2 kraft card base and attach card front to base. This is such a fun whimsical spring card to make, I hope you give it a try!
Your Cart
- Choosing a selection results in a full page refresh.


